Это цитата сообщения SVETlana729 Оригинальное сообщение
Без заголовка
Today I am guest blogging over at Stash Manicure and sharing a part of my Happy Quilting Quilt-A-Long. That is how to make a Disappearing 16 patch block :) So pop on over and check it out or follow along below. Either will work!!

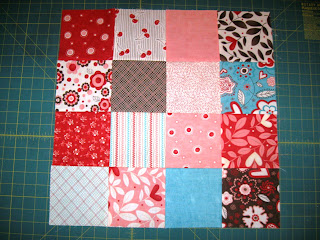
Start by making some 16 patch blocks. (If you have never made a 16 patch block there are excellent instructions onhow to make them here. ) You can make your blocks any size as long as they are all the same. In the example we are using 5" blocks but I have also made it in 3 and 4 before and they all look great. You will be able to get 2 Disappearing 9 patch blocks out of each 16 patch block.
Grab your first 16 patch block that you made in the last step. Lay it out on your mat. Don't worry to much about lining it up, it doesn't matter. Now, if you have a yard stick it will probally be easier to use. Unfortunately, I don't own one. Crazy, I know. If you don't have a yard stick use your long ruler and another ruler lined up together. Lay your ruler diagonally across your entire block. You want to try and make sure that your ruler is intersecting each of the corners. Make sure to really smooth your corners out, they will want to creep in on you :) Once you are all lined up, go ahead and cut along the diagonal.
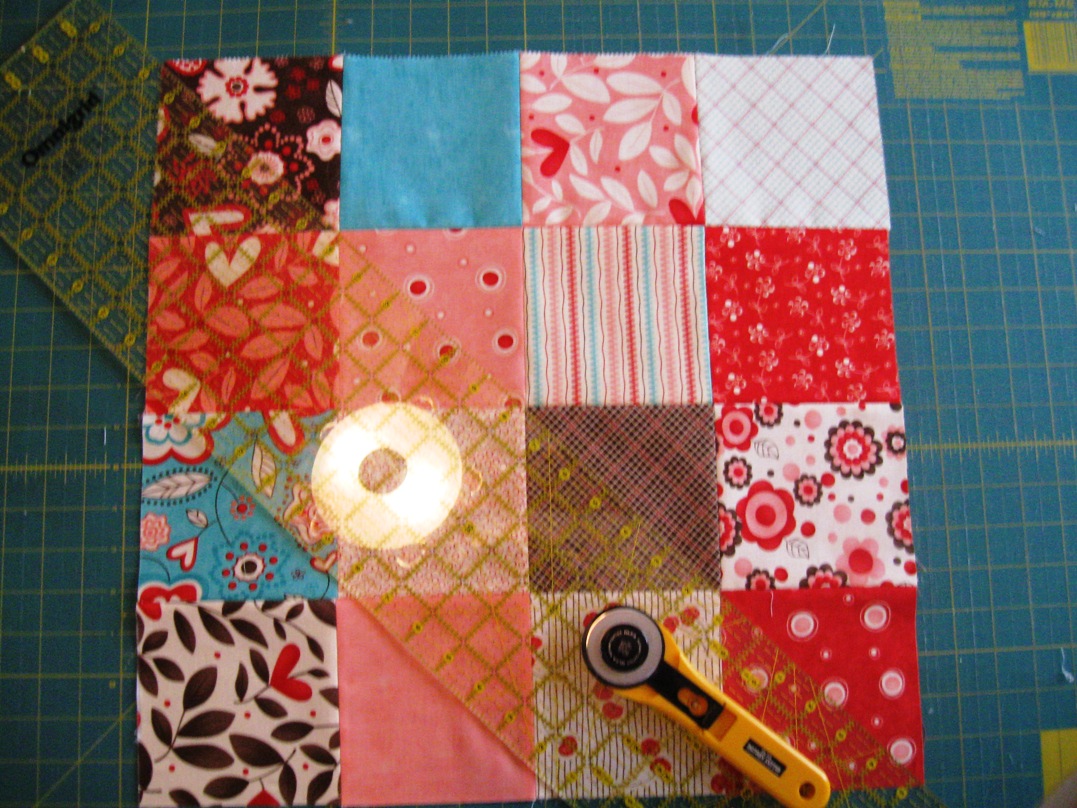
Now don't move your fabric. Go ahead and pick up your rulers or yardstick and align them along the opposite diagonal. Once again, make sure to intersect all of your points and to smooth out your corners. Honestly, a lot of times your points will be all lined up and then you will find the edge doesn't line up. Most often it just needs to be smoothed out. Once you are all lined up go ahead and slice along the diagonal.

Now you can go ahead and pull your 4 parts apart. You will end up with 1 - 2 of these little scrap pieces hanging out either under your square or poking out. Go ahead and cut them off. This will help to reduce bulk making them easier to piece in future steps.
So out of each 16 Patch Block you will end up with 4 wonderful, adorable, easy to make, triangles :)

Continue this process until all of your 16 patch blocks have been cut. You will have a fun little pile of triangles.

Now, back to more random piecing fun!!! Go ahead and grab 2 triangles and line them up as follows. Once again, you are trying to keep it random so don't stress to much about what lines up where. Just try to avoid having the exact same blocks across from each other :)

Lay your top triangle onto your bottom triangle with right sides together. Once again we are going to pin just like you did your 16 patch blocks. Pin your seams first, making sure they match up. Then pin your edges. If you have any bubbles smooth them out with your finger and then put in a vertical pin :) Continue to pin your blocks until you have done the required amount of sets. (Once again, remember, if you are required to have an odd number of blocks you will have 2 leftover triangles)

Now it is on to sewing. Once again, sew a 1/4" seam along your pinned edge. Make sure to remove pins as you go and to double check your seams that they are laying flat by running your finger underneath the seam right before you sew across it. Continue to chain stitch all of your Disappearing 16 Patch Blocks.

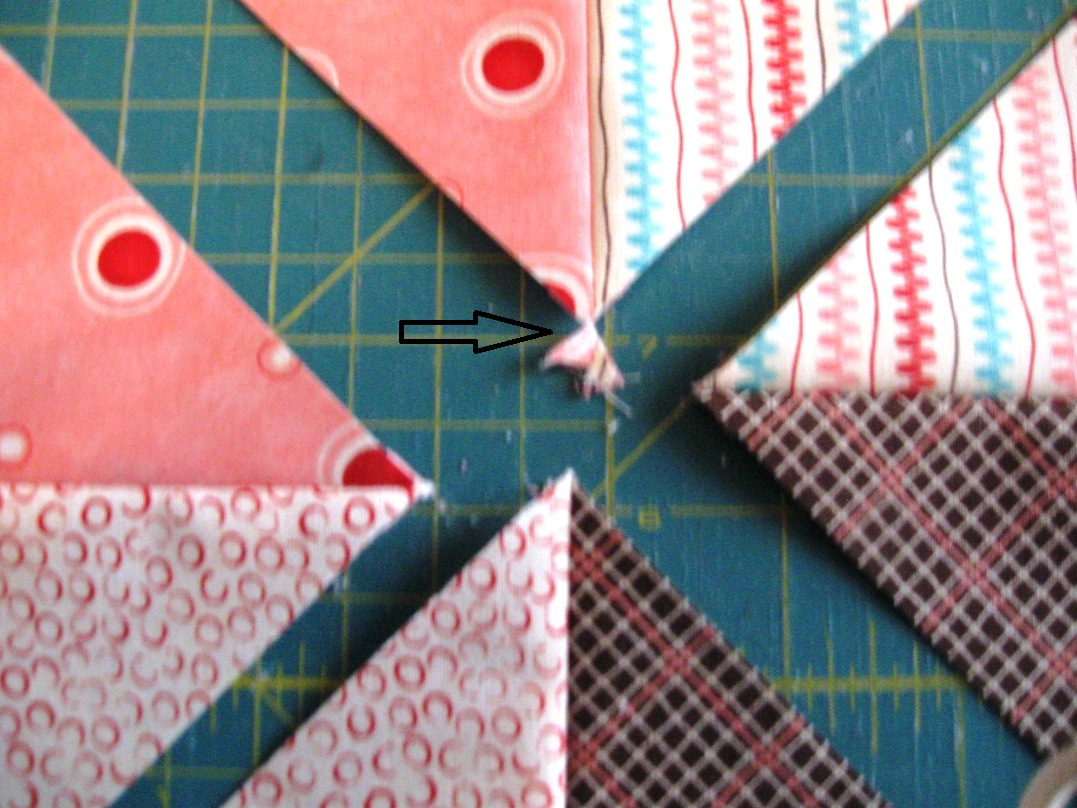
Go ahead and clip your threads between your sets. Now, just like before, we are going to press the new center seam open. Yes, you will have some little overhangs at the edges, we will deal with them shortly :)

Now, this step is not necessary but only takes a second and I like to do it to reduce bulk. Along the corners of the inner squares there will be a small triangle that is "hanging out". (The little red plaid one) I like to clip these out in all four of the corners. Once again, not necessary, it just reduces bulk.

Lastly, turn over your block over. You will have 4 little triangles sticking out from the center seam. Go ahead and clip them even with the block. Repeat for all 4 edges.

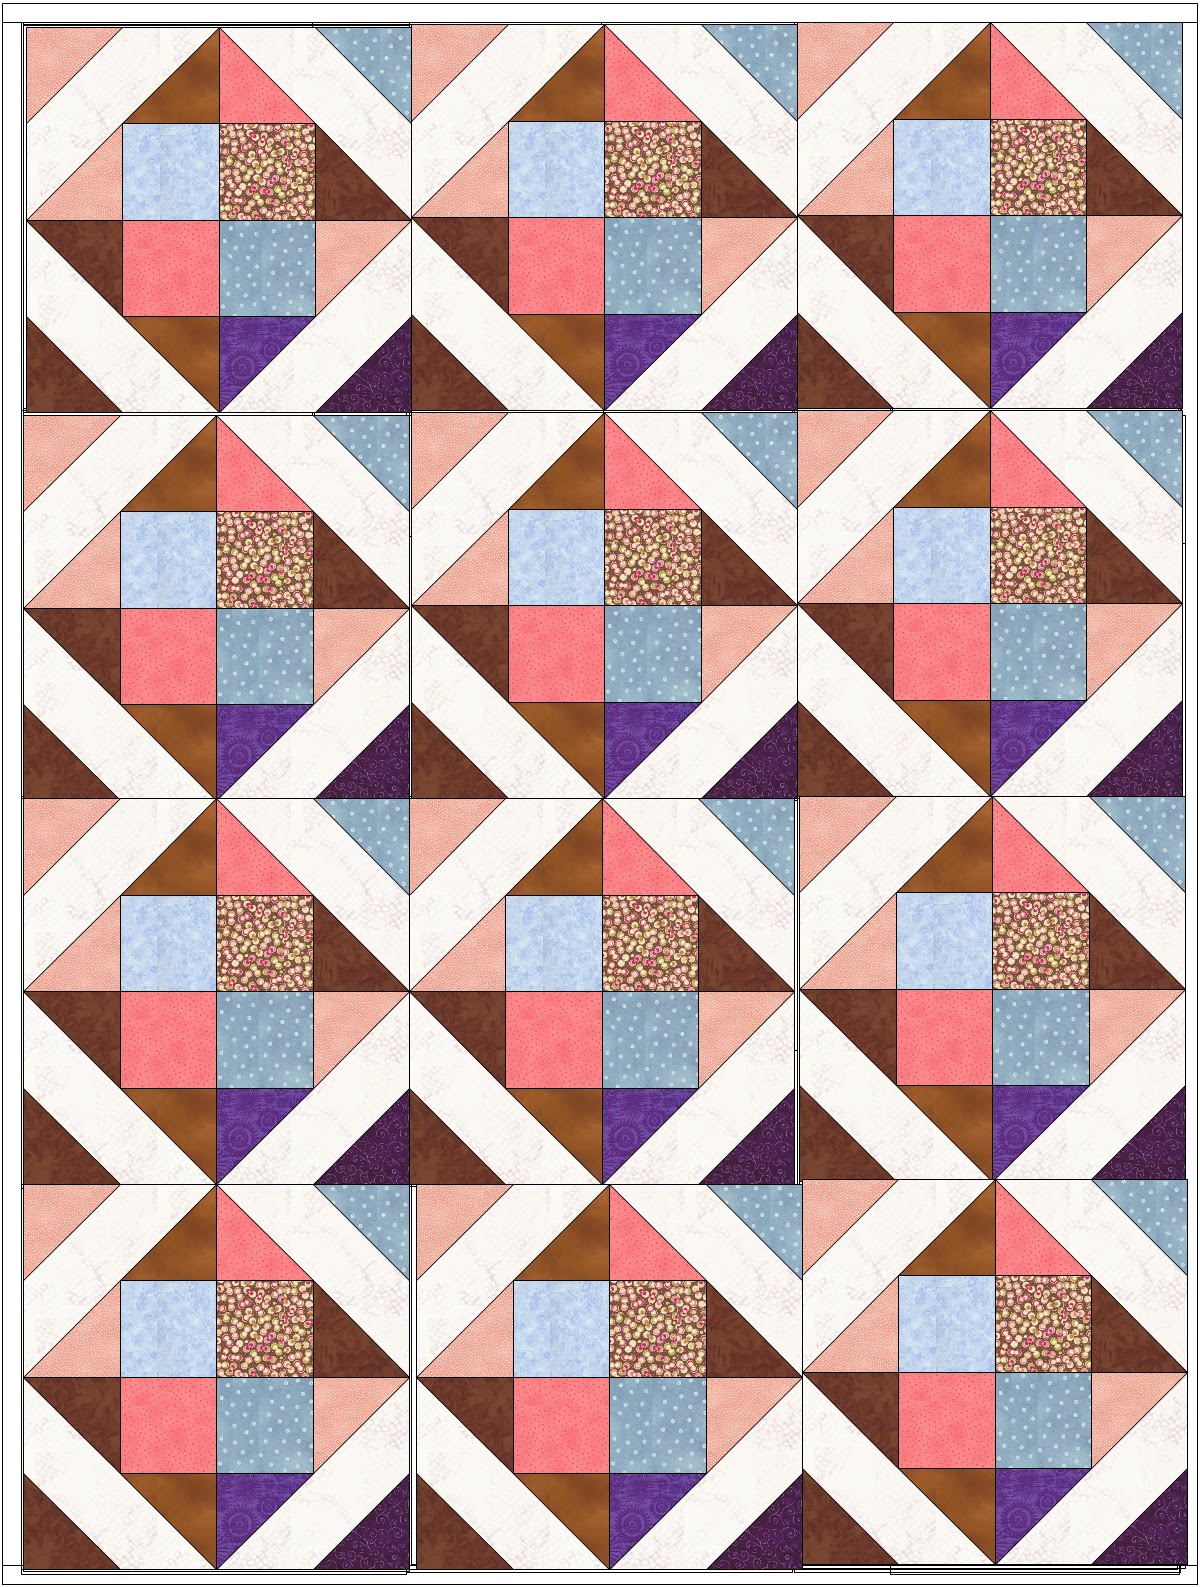
And there you have it. A stack of adorable Disappearing 16 Patch Block. So now what can you do with these cute little guys, the possibilities are endless!!

***Note - When you go to sew these blocks together, you will be cropping off the points of the 4 inner squares, that is the way the design works, sadly, I didn't know how to put that in the images below, but you can see it in the actual quilt below. I really liked the cropped look to give it a blended look with the additional sashing :)