Это цитата сообщения Rukodelkino Оригинальное сообщение
Журнал: Ручная работа №3 2005

Это цитата сообщения Svetlana-k Оригинальное сообщение
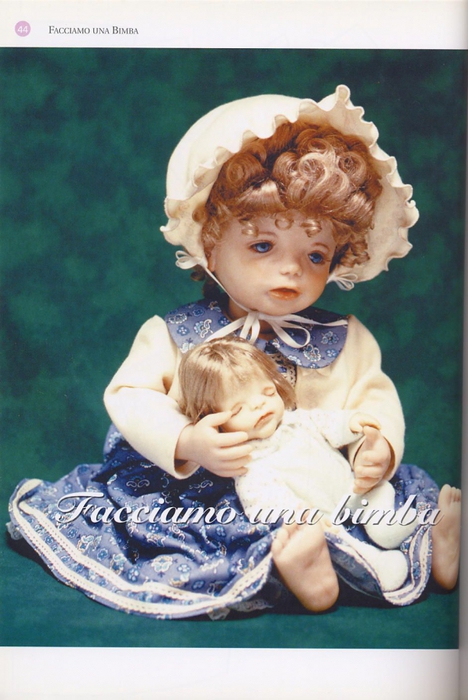
ЛЕОН КАЗИМИР БРЮ И ЕГО ЗНАМЕНИТЫЕ КУКЛЫ.

Куклы BRU считаются вершиной совершенства в истории кукольного искусства.
Они - почти несбыточная мечта для многих коллекционеров: слишком редки и слишком дороги...
Это цитата сообщения аграфена_31 Оригинальное сообщение
Кукла из цернита - часть 2.
часть 1 часть 3
Это цитата сообщения Байкалочка_10 Оригинальное сообщение
Очень подробный МК по кукольной ножке!
Стащила отсюда http://members.home.nl/asrai/cursus-en.htm
|
The foot in this tutorial is from heel to big toe about 1.8 inch long. Always use the head as a comparison for the size of the feet. The length of the feet is equal to the size of the head. |
 [250x163] [250x163] |
[250x163] |
|
In this tutorial I will only make the right foot. Try to work simultaneously on both feet because it is hard to make an equal looking foot afterwards. You start off by making a 2.5 inch long cylinder shaped roll of clay, about 0.8 inch thick (pict. 1). Bend the roll of clay in an angle like in pict. 2. The top will become a part leg and the other part the foot. |
|
|
[250x163] |
[250x163] |
| Flatten the clay by pressing it together between thumb and point finger towards the 'toes'. Be careful not to make it too flat. (pict. 3 + 4). | |
|
[250x163] |
[250x163] |
|
Now it is time to form the heel. Push/smear some clay from under the foot backwards (towards the heel) and push/smear some clay from the lower leg down (towards the heel) (pict. 5). This way you'll get more clay on the heel and a better shape at the sole of the foot. Press the clay with your thumb on the inside of the foot to make it more hollow (pict. 6). |
|
|
[250x163] |
[250x163] |
|
Before you can make incisions for the toes, the front of the foot needs to be reshaped a bit. Cut off a piece of clay slantwise starting at the 'big toe' (pict. 7). After this smooth the edge with your fingers (pict. 8). |
|
|
[250x163] |
[250x163] |
|
Look at the foot to see if it's not too thick, if it is you can make it thinner by smearing the clay from the instep to the leg. You can also smear clay upwards just above the heel towards the leg, this way the foot will become slimmer (pict. 9). Sculpt as smooth as possible, use a damp finger to rub the clay for a smooth finish. Now you can make incisions for the toes with the help of a sharp tool. Don't forget the big toe needs to be bigger than the other toes (pict. 10). |
|
|
[250x163] |
[250x163] |
Это цитата сообщения Ivanciza Оригинальное сообщение
оформление лица текстильной куклы (ох уж эти японцы)
Dreidimensionales Aussehen zu Ursachen hohlen Augen und Lippen Verschärfung einem Faden.
Eine lange Nadel, Faden, verwenden Sie die Nummer 8
Wenn Sie an dieser Schnur ziehen, einige Ausdruck. Ppokunari, dass mehr Erwachsene Position auf den Augen, hängende Augen sind wohl zu fühlen.
Ausrichten der Rand der Lippe ist, wo die oberen und unteren Enden der Watte.
 [170x250]
Это цитата сообщения аграфена_31 Оригинальное сообщение
Лепка рук из самозастывающего пластика

http://minenko-vika.jimdo.com/мастер-класс/лепка-рук-из-самозастывающего-пластика/
Это цитата сообщения Tenderrainy Оригинальное сообщение
Шляпки для кукол. Как их сделать.
Альбом на Пикасе, смотреть, нажимая на стрелочку вверху картинки.
ЖАТЬ СЮДА
[показать] [показать]
Это цитата сообщения Minchenko_Tatiana Оригинальное сообщение
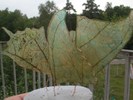
Как сделать крылья для фей из скелетизированных листьев
Это цитата сообщения Режевлянка Оригинальное сообщение
МК по изготовлению устойчивых ножек у кукол
ИСТОЧНИК Блог автора Каркас куклы уже с готовыми ножками Читать далее >>>
Это цитата сообщения Tenderrainy Оригинальное сообщение
Крепление головы куклы через винт. МК от Елены Маховой.
Хочу расказать о креплении головы куклы через винт, в принципе подобным способом можно крепить любые части куклы, ну и конечно этот способ широко применяется в мишках-тедди.
И так у нас имеется набитая тушка и не набитая голова куклы. Так же нам понадобится собственно винт, гайка, две шайбы и тканевый лейкопластырь.
[показать] Это цитата сообщения Tenderrainy Оригинальное сообщение
Обалденная книжка с множеством выкроек кукольной одежды.
Книжку можно ПОСМОТРЕТЬ ЗДЕСЬ , нажимая на стрелочки сверху картинки.
[показать] [показать]
Это цитата сообщения Февральская_лазурь Оригинальное сообщение
МК "Каркасные ручки для текстильной куклы" от Веры Морозовой и Жестяной лавки Огородной слободы
http://ogorodniza.livejournal.com/125712.html
Это цитата сообщения Февральская_лазурь Оригинальное сообщение
Куклы Susie McMahon в технике грунтованного текстиля.
Источник: http://www.prokukol.ru/communication/forum/forum58/topic418/
Она занималась изготовлением кукол, столько сколько помнит себя- в детстве она мастерила из всего, что попадалось ей в руки. Её поделки-в основном были миниатюрные и похоже на людей. Она продолжала мастерить кукол, при этом с удовольствием посещала художественную школу.
Повзрослев Susie увлеклась скульптурой и изготовляла кукол в перерывах между преподаванием искусства в школе. Недавно Susie оставила работу школьного учителя и безраздельно посвятила себя изготовлению кукол, живописи,скульптуре.
Куклы Susie McMahon сделаны в технике грунтованного текстиля! Голова,лепится из паперклея используется для нее основании из фольги. Потом накладывается ткань, тело у кукол полностью текстильное и очень подвижное. Роспись накладывается на несколько слоев грунтовки.
Это цитата сообщения Режевлянка Оригинальное сообщение
Выразительные руки
Часто руки куклы имеют неуклюжий и неестественный вид. Вот как эту проблему решает автор,Сьюзен McMahon.Она использует дополнительный палец.
 [400x266]
СМОТРИМ В БЛОГЕ АВТОРА
Это цитата сообщения Режевлянка Оригинальное сообщение
Текстиль с эффектом фарфора.
 [508x700]Читать далее >>>
Это цитата сообщения милена70 Оригинальное сообщение
ВИНТАЖНЫЙ ОРГАНАЙЗЕР ДЛЯ РУКОДЕЛИЯ... стильная штучка... выкройка, пошаговые фото...
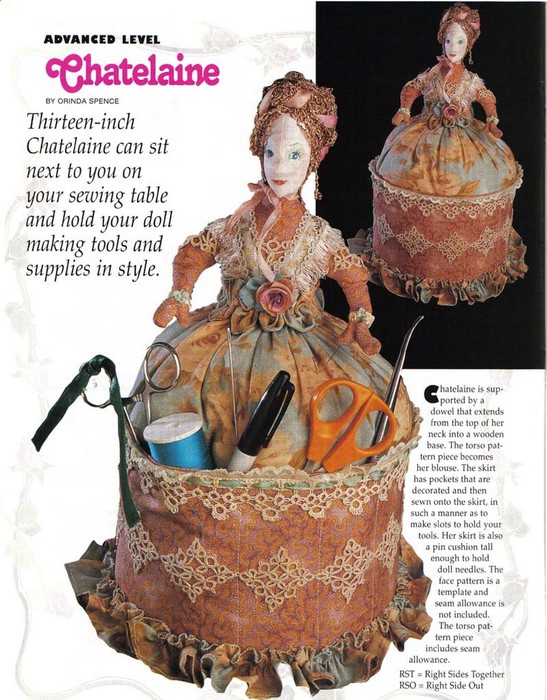
КАРТИНКИ УВЕЛИЧИВАЮТСЯ ПО КЛИКУ

Это цитата сообщения ДиночкаР Оригинальное сообщение
Невероятная японская книга по кройке и шитью для кукол
Невероятная японская книга по кройке и шитью для кукол
Невероятная японская книга по кройке и шитью для кукол
Идеи пригодяться и для людей :)

Это цитата сообщения pawy Оригинальное сообщение
Крылья для кукол
Вот такие крылья можно сделать благодаря мастер-классу "Кукольные крылья".

Это цитата сообщения bragi Оригинальное сообщение
Крыло Patterns
Крыло Patterns
Для загрузки нажмите на рисунок PDF Шаблон Крылья кнопку ниже.
Инструкции
Это цитата сообщения Байкалочка_10 Оригинальное сообщение
Очень подробный МК по кукольной ручке!!
Опять с заграничного сайта! Ну очень подробно!!!!!!!! Стащила отсюда! Классный сайт по куклам! http://members.home.nl/asrai/cursus-en.htm
|
The hand I made for this lesson is from the palm of the hand to the finger tips about 1.80 inch. It is a bit bigger than I usually make, smaller gave some photographic problems 'cause I don't have a macro lens. |
|
[250x163] |
[250x163] |
|
The size of the hands depend on the size of the head. The length of a hand is equal to the length from chin to halfway the forehead. A face is usually about 2 hands wide. This can always vary a bit depending on the kind of doll. You start off by making 2 cylinder shaped rolls of fimo, in this lesson they are about 2.6 inch long and 0.60 inch thick (pict. 1). Sculpt one end in a kind of spoon shape by pressing the clay with your thumb. Sculpt the hand thinner to the "finger tips' by pushing it more flat (pict. 2). |
|
|
[250x163] |
[250x163] |
|
For this lesson I'll continue with the making of the right hand. Try to work simultaneously on both hands because it is hard to make an equal looking hand afterwards. To make a wrist, roll the clay between thumb and point finger like pict. 3 You now have a roughly shaped hand with a part arm. Make the arm thinner if necessary. Smooth the hand nice and round. The hollow part is the inside/hand palm of the hand (pict. 4). |
|
|
[250x163] |
[250x163] |
|
At pict. 5 you see the back of the hand. You will now make 3 incisions with a knife for separating the fingers. The thumb will be added later. Because this will be a right hand, the incision for the little finger is cut a little further than the other incisions, take your own hand as example. Bend the 2 outer fingers gently side wards so you have more space (pict. 6). Hold the fingers between your point finger and thumb. While warming the clay by the warmth of your hands, very gently roll the fingers slightly back and forth, so the inside of the fingers will also become round. You can use a sculpting tool for the areas that are difficult to reach. |
|
|
[250x163] |
[250x163] |
|
When the two outer fingers are smoothed, you start with the middle two. Bend them slightly apart and again roll them gently back and forth to round off the edges on the inside of the fingers (pict. 7). Do this very slowly, it is important that while you are doing this, the clay will be warmed by your fingers so they don't rip at the beginning. Use a sculpting tool to smooth the areas that are hard to reach (pict. 8). |
|
|
| |