Это цитата сообщения lelek Оригинальное сообщение
Без заголовка
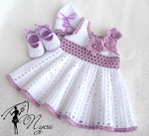
Сарафанчики на малышку
Сарафанчики на малышку
Это цитата сообщения Иримед Оригинальное сообщение
Пятиугольники крючком. Мастер-класс
Вязать такие пятиугольники мы будем от центра.
Делаем начальное кольцо из петли.
1 ряд: вяжем 3 в.п.п.,
Продолжение мастер-класса здесь:
http://uroki-vyazaniya.ru/pyatiugolniki-kryuchkom-sxema-vyazaniya-master-klass.html
Это цитата сообщения Oksana_Hilles Оригинальное сообщение
Жилет для мальчика
 [показать]
 [показать]
 [показать]
Это цитата сообщения Rinka-leo Оригинальное сообщение
Наряд для девочки от ПУСИ (˙·•๑✰ Пуси ✰๑•·˙)
 [600x546]
 [600x492]
 [600x430]Источник:


Это цитата сообщения Иримед Оригинальное сообщение
Для самых маленьких модниц: жакетик-болеро крючком
http://pinkrosecrochet.blogspot.com/2010/10/casaquinho-de-croche-para-bebe.html
Это цитата сообщения Иримед Оригинальное сообщение
Сетчатый пуловер спицами от Drops. Все размеры!
http://www.garnstudio.com/lang/us/pattern.php?id=270&lang=us

Перевод на русский язык здесь: http://www.liveinternet.ru/users/lyiolik/post200800719/
Sizes: S - M - L - XL - XXL
Finished measurements:
Bust: 78-88-98-108-118 cm [30.75" - 34 5/8" - 38 5/8" - 42.5" - 46.5"]
On account of the pattern the garment is very stretchy. The pullover will be approx. 5 cm [2"] wider (10 cm [4"] larger around) than shown on the diagram when worn.
Materials: DROPS ICE,
55% cotton, 45% acrylic, 50 g./45 m./49 yards
400-450-500-550-600 gr nr 03, light blue.
DROPS 10 mm [US 15] needles, or size needed to obtain correct gauge.
Gauge: 8 sts x 13 rows in pattern = 10 x 10 cm.
Pattern-body:
Row 1 (right side): * K 2 tog, yo *, repeat from * - * until 1 st before center st, K 3, * yo, slip 1 st as if to knit, K1, psso *, repeat from * - * to end of row.
Row 2 (wrong side): K 1, P to last st, K 1.
Row 3: K 1, * K 2 tog, yo *, repeat from * - * until 1 st before center st, K 1, * yo, slip 1 st as if to knit, K 1, psso *, repeat from * - * until last st, K 1.
Row 4: K 1, P to last st, K 1.
V-neck: See chart for Pattern 1. Shape the V-neck according to the chart for Pattern 1 – the sts outside each side of chart are knit the same as before.
Note: Shaping begins on the 6th row of the chart, with the center st bound off. The pattern is seen from the right side. All decs are made on right side rows. Knit each side separately. On the second side, start by picking up 1 st in the bound-off center st and K tog with the 1st st on second side. This is to reinforce the bottom of the V-neck.
Pattern-sleeve: See chart for Pattern 2.
= K from right side, P from wrong side
= P from right side, K from wrong side
= K 2 tog, yo
= yo, slip 1 as if to K, K 1, psso.
= K 2 tog
= Slip 1 st as if to knit, K 1, psso.
Front: Cast on 31-35-39-43-47 sts and K 1 row (wrong side row). Put a marker in the center st. Then knit Pattern-body – see instructions above. When the piece measures 35-36-37-38-39 cm dec 1 st at each side and on the next row cast on 1 new st at each side – this marks the beginning of the armhole. When the piece measures approx. 36-38-40-42-44 cm – adjust to end after a row 4 of the pattern – shape V-neck according to Pattern 1 – see instructions above.
After Pattern 1 is complete 8-10-12-14-16 sts remain on each shoulder, bind off. The piece measures approx. 54-56-58-60-62 cm.
Back: Cast on and knit the same as the front (without neck shaping) until the piece measures 52-54-56-58-60 cm – adjust to end after a row 1 of the pattern. On the next row (wrong side row) K the center 19 sts (P the remaining sts and K the edge sts as before). Then bind off the center 15 sts for the neck (bind off a little tight so the neckline will not stretch out). On the next row bind off the remaining 8-10-12-14-16 sts on each shoulder. The piece measures approx. 54-56-58-60-62 cm.
Assembly: Sew shoulder seams.
Sleeve: Pick up 30-32-34-36-38 sts in outermost sts along armhole (from the dec/inc on front to the dec/inc on back). Knit Pattern 2 keeping 1 edge st at each side in garter st (1st row of the pattern = the wrong side). When the piece measures 2 cm dec 1 st at each side every 7-6.5-5.5-5-4 cm a total of 6-6-7-7-8 times = 18-20-20-22-22 sts. So that the pattern matches up after the decs, knit the sts
Это цитата сообщения Иримед Оригинальное сообщение
Мак крючком. 2 варианта. Мастер-класс и описание
Вариант 1.
Автор: ![]() kseniyanik
kseniyanik
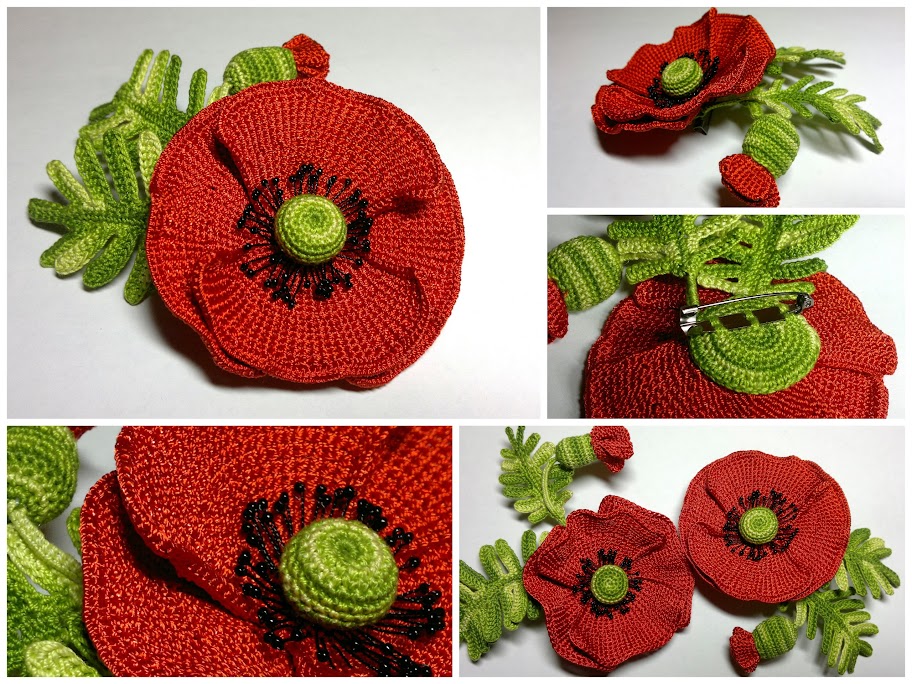
Материалы и инструменты
Красная пряжа для лепестков (в данном случае YarnArt Tulip, 100% микрофибра, 250 м на 50 гр) и зеленая пряжа для листьев (YarnArt Violet секционного крашения, 100% хлопок, 282 м на 50 гр). Крючки подходящего размера: в данном случае 0,9 для лепестков и 0,7 для листьев. Проволока красная, зеленая и черная; черный бисер, ножницы, игла с широким ушком (гобеленовая); немного наполнителя для набивки коробочки и бутона (в данном случае использовался наполнитель для игрушек; можно обойтись синтепоном); булавка для броши на платформе с тремя отверстиями.
Подробнейший мастер-класс здесь: http://kseniyanik.livejournal.com/29603.html
Вариант 2.
Автор: LimaGi
http://club.osinka.ru/topic-104072?&start=270
Текст автора: "по листику сверху вышиты полоски петельками крючком!
А в лепестке цветка последние ряды в одну нить нарисованы до центра - дальше симметрично.
Пришивала листья, захватывая кончики, а цветок за середину, закрепляя переходы между лепестками."
Это цитата сообщения gelexxx Оригинальное сообщение
Дуплет №78 Лето в городе-5
[показать]Это цитата сообщения Иримед Оригинальное сообщение
К лету: вяжем ажурный топ из мотивов. Подробное описание
[показать]Это топ, который связала Котя Узорчик по мотивам
этой туники.
Текст автора Котя Узорчик:
"Размер 34-36 (европ.)
Вам потребуется: 100 % хлопок (500 м/100 г), крючок № 2
Для такого топа мне понадобилось:
2 неполных мотивов
4 половинки мотива
12 полных мотивов
Плотность вязания: ширина мотива (от стороны к стороне) = ок. 16,5 см
Полный мотив:
вяжется по кругу. Начало и конец ряда соединяем соед.п. В начале ряда ст.с/н заменяем на 3 в.п.
Продолжение подробнейшего описания со всеми схемами здесь: http://uzor4ik.ru/index.php?num=360
Это цитата сообщения Иримед Оригинальное сообщение
Летние платья спицами. Подборка
[показать] [показать] [показать]
[показать] [показать] [показать]
[показать] [показать] [показать]
[показать] [показать] [показать]
Все описания здесь: http://spicami.ru/archives/18885
Это цитата сообщения В_Е_В Оригинальное сообщение
Двоечка сиреневого цвета
[показать]Это цитата сообщения Сима_Пекер Оригинальное сообщение
Ажурный пуловер спицами
[показать] http://domihobby.ru/632-azhurnyy-pulover.html [показать] [показать] Ажурный пуловер для весны выполнен спицами красивейшим узором с шишечками и гармонично подобранной пряжей нежно-розового цвета. Аура женственности, легкости и весеннего аромата в одной модели.
Размеры: 38/40 (46/48)
Вам потребуется: 350 (450) г розово-белой меланжевой пряжи Egypto Cotton Color (100% хлопка, 180 м/50 г): прямые спицы № 2,5 и № 3; круговые спицы № 2,5.
Рекомендуем: EGEO. Ярна. Индия (100% хлопок двойной мерсеризации).
Платочная вязка, спицы № 2.5: лиц. и изн. р. - лиц. п. Круговые р.: попеременно по 1 круговому р. лиц. и изн.
Лиц. гладь, спицы N9 3: лиц. р. - лиц. п., изн. р. - изн. п.
Ажурный узор с «шишечками», спицы № 3: число петель кратно 18 + 5 + 2 кром. Вязать по схеме, на которой приведены только лиц. р., в изн. р. все петли и накиды вязать изн. Начинать с 1 кром. и петель перед раппортом А или В. повторять раппорт А в 1-м - 8-м р. схемы, раппорт В в 9-м - 16-м р. схемы, заканчивать петлями после раппорта А или В и 1 кром. Повторять с 1-го по 16-й р.
Внимание! В 9-м - 16-м р. схемы раппорт смещается на 1 п. вправо.
Плотность вязания: 21 п. и 33 р. = 10 х 10 см.
Описание вязания кофты:
Спинка: набрать 97 (115) п. и связать для планки 2 см платочной вязкой и 2 р. лиц. гладью. Затем вязать ажурным узором с «шишечками». Через 36 см = 120 р. от планки закрыть для пройм с обеих сторон 3 п. и в каждом 2-м р. 2 х 2 и 3 х 1 п. = 77 (95) п. Через 56 см = 186 p. (61 см = 202 р.) от планки закрыть для выреза горловины средние 31 (35) п. и обе стороны закончить раздельно. Для закругления закрыть с внутреннего края в каждом 2-м р. 1 х 3 и 1 х 2 п. Через 58 см = 192 р. (63 см = 208 р.) от планки закрыть оставшиеся 18 (25) п. плеча с каждой стороны.
Перед: вязать так же, но для более глубокого выреза горловины закрыть через 45 см = 148 р. (50 см = 164 р.) от планки средние 17 (21) п. и в каждом 2-м р. 1 х 3. 2 х 2 и 5 х 1 п.
Рукава: набрать 51 (69) п. и связать для планки 2 см платочной вязкой и 2 р. лиц. гладью. Затем вязать ажурным узором с «шишечками», при этом вязать после и до кром. 4 п. лиц. глади. Одновременно от планки прибавить для скосов рукава с обеих сторон попеременно в каждом 8-м и 10-м р. 14 х 1 п. лиц. глади = 79 (97) п. Через 41 см = 136 р. от планки закрыть для оката рукава с обеих сторон 3 п. и в каждом 2-м р. 2 х 2,10х1,2х2и2хЗп. (5x2, 4x1, 5x2 и 2 х 3 п.). Через 51,5 см = 170 р. от планки закрыть оставшиеся 25 (31) п.
Сборка: выполнить плечевые швы. По вырезу горловины набрать на круговые спицы 108 (116) п., связать 2 см платочной вязкой и все петли закрыть лиц. Втачать рукава, выполнить боковые швы и швы рукавов.
Это цитата сообщения Rukodelkino Оригинальное сообщение
Вязаные мелочи
Скачать подборку http://depositfiles.com/files/yl7meaa1h


Это цитата сообщения NatalieM_osinka Оригинальное сообщение
Комплект для доченьки Маленькая Леди
Связано практически одновременно с комлектом розовая нежность. К этому комплекту есть схемы , правда я как всегда не вяжу по описаниям , всегда со своими изменениями.

Это цитата сообщения ХОДУСЯТКИ Оригинальное сообщение
Сарафан из мотивов. Вязание.
1.
 [237x566]