Это цитата сообщения Lena-zelena Оригинальное сообщение
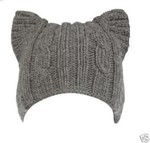
Подборка моделей из старых журналов
Взято отсюда: http://photo.qip.ru/users/enzian-edelweiss1/?pass_on=1&page=1
Схем нет,но почти все модели можно спокойно связать по фотографии.
 [показать]
 [показать]
 [показать]
 [показать]
 [показать]
 [показать]
 [показать]
 [показать]
 [показать]
 [показать]
 [показать]
 [показать]
 [показать]
 [показать]
 [показать]
 [показать]
 [показать]
 [показать]
 [показать]
 [показать]
 [показать]
 [показать]
 [показать]

Это цитата сообщения Таша92 Оригинальное сообщение
Авторская гибкая кукла Зои Пинигиной
Автор МК: Зоя Пинигина
Для начала предложу Вам повдохновляться работами автора, а после - МК
Приятного просмотра!


Это цитата сообщения Таша92 Оригинальное сообщение
Помпончик для домашнего декора!
Автор МК: my_mini_world
Это цитата сообщения Таша92 Оригинальное сообщение
Бисерные валентинки
Автор МК: Бригантина
Скоро День Влюблённых. Пора готовить сюрпризы-валентинки! Предлагаю сделать вот такие бисерно-пайеточные вальки!
ЭТОТ МК СМОЖЕТ ОСИЛИТЬ ЛЮБОЙ! Для этого нужны материалы и немного усидчивости. Вид плетения - монастырское (крестик).
Это цитата сообщения James_york Оригинальное сообщение
Мастер класс изготовление игольниц
http://www.craftstylish.com/item/945/how-to-make-pretty-pincushions
Are you ready for “oohs” and “ahs” all around? At just 1-1/2 inches tall, these minute pincushions will be the darlings of any party and the apple of any craftster’s eye. They fit neatly into a sewing box and are extremely handy perched on a sewing machine (just add a Velcro dot).
And did I mention that these cushions use recycled materials? The base is a soda-bottle cap wrapped with craft felt. As you can see in the photo, the sky’s the limit in terms of design. Besides simple shapes reminiscent of cupcakes or candy, you can fashion a mini poinsettia, a crown, or even a beehive or cactus—cute, cuter, cutest!
What you'll need:
Plastic cap from a liter-size soda bottle
Chalk
Sharp scissors
Craft felt
Large-eye embroidery needle
Multicolored skeins of embroidery floss
Poly fiberfill
Step 1: Prepare the base
Lay the bottle cap on a small square of felt. Trace the shape with chalk. Then cut along the chalk line with sharp scissors.
 [430x287] [430x287] |
Trace a bottle cap on felt. Cut along chalk line with scissors to create the base of the pincushion. |
Step 2: Sew outer sleeve to the base
Cut a felt strip a bit wider than your cap’s height and long enough to wrap around the cap with some overlap. Wrap it around the cap. Then slipstitch along the overlap. Pop in the base circle, and slipstitch around it as shown. Don’t cut the floss!
| [430x287] |
Wrap outer sleeve around cap. Slipstitch along the overlap. |
| [430x287] |
Slipstitch around the base circle. Leave a tail of floss to complete the bottom of the pincushion. |
Step 3: Create the top
Cut a 3-inch square, and then round the corners. Baste around the circle’s outer edge. Pull the floss ends to gather. Stuff the pouch with polyfiberfill (until the ball is hard), and knot the floss ends. Press the ball into the base.
| [430x287] |
Cut a 3-inch square. Round the corners with scissors to create a circle. |
| [430x287] |
Baste around circle's outer edge. Pull the floss to gather. |
| [430x287] |
Это цитата сообщения ОльчикОля Оригинальное сообщение
Декорирование комода декоративными гвоздями.

Это цитата сообщения Марриэтта Оригинальное сообщение
Шьем детские мячики "японский воздушный шар".
Предлагаю вам сшить вот такие веселенькие детские мячики. Называются они - "Японские воздушные шары". Во "вложении" - выкройка в натуральную величину.


Это цитата сообщения Таша92 Оригинальное сообщение
Валентинка "Бархатное сердце" Velvet heart
Автор МК: Миралисса
Это цитата сообщения Tanzja Оригинальное сообщение
Мастер-класс "Котомания" (магниты на холодильник).
МАСТЕР-КЛАСС >>>>>>
Это цитата сообщения Таша92 Оригинальное сообщение
Очень простые, но красивые розочки из бумаги "на скорую руку"
МК от Т.Просняковой
Пользуюсь случаем: Сегодня кто-то оставил неподписанное сердечко! Спасибо огромное! Очень Вас ищу! Хочу ответить взаимностью!
Это цитата сообщения Иримед Оригинальное сообщение
Слов нет!!! Жакет крючком в необычной технике + МК


Это цитата сообщения Иримед Оригинальное сообщение
Необычный цветок крючком. Схема + миниМК
http://www.stranamam.ru/post/2433530/
Серия сообщений "цветы крючком":
Часть 1 - Как связать такую розочку
Часть 2 - ВАШ ПОДАРОК БУДЕТ ОСОБЕННЫМ
...
Часть 25 - Маленькие бабочки крючком. Коллекция от Podarok
Часть 26 - Салфетка в форме листа крючком
Часть 27 - Необычный цветок крючком. Схема + миниМК
Это цитата сообщения Таша92 Оригинальное сообщение
Мастер-класс по созданию кулона в виде ловца снов
Автор МК: Вероника
Это цитата сообщения Таша92 Оригинальное сообщение
Потрясающие украшения в технике анкарс


Это цитата сообщения Марриэтта Оригинальное сообщение
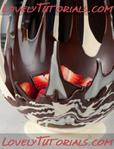
ДЕЛАЕМ ШОКОЛАДНУЮ ВАЗУ. Ням-ням)))
И опять воздушный шарик.... Мы уже и нитками его обматывали, чтобы сделать елочные игрушки, и айсингом облепляли.... Вот пожалуйста - еще одна идея. Шоколадная ваза с использованием воздушного шарика. Очень красиво и должно быть очень вкусно.

Это цитата сообщения Таша92 Оригинальное сообщение
Оригинальный тканевый браслет!
Честно сказать, не знаю, кто автор. Если кто-то его знает, пожалуйста, напишите - я поставлю ссылку на него. Не хочу нарушать авторство.