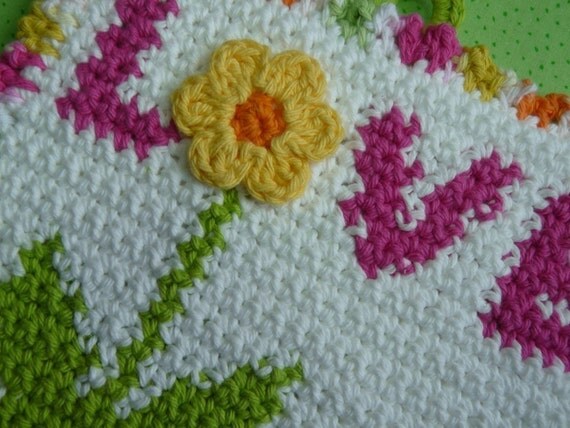
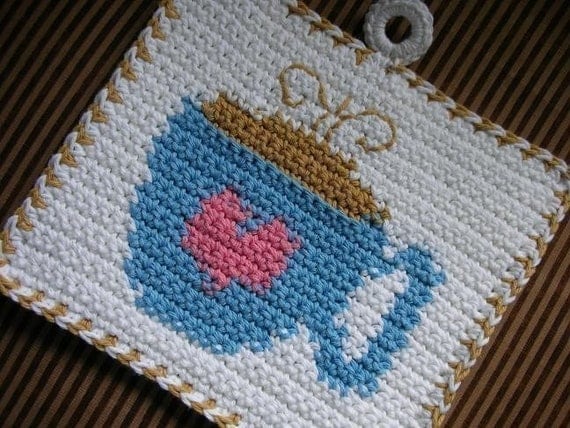
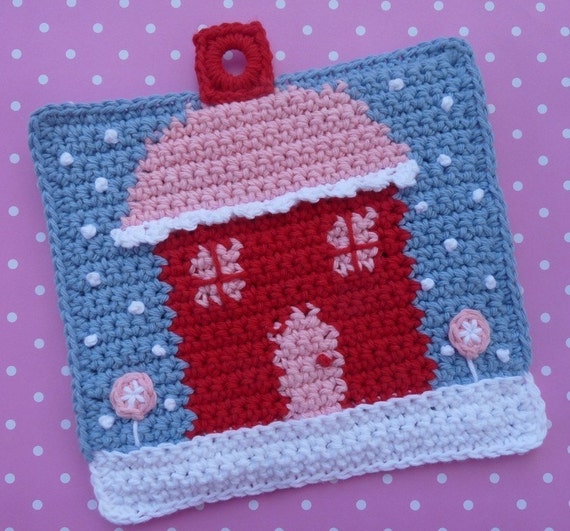
Прихватки
19-03-2016 10:10
комментарии: 0
понравилось!
вверх^
к полной версии
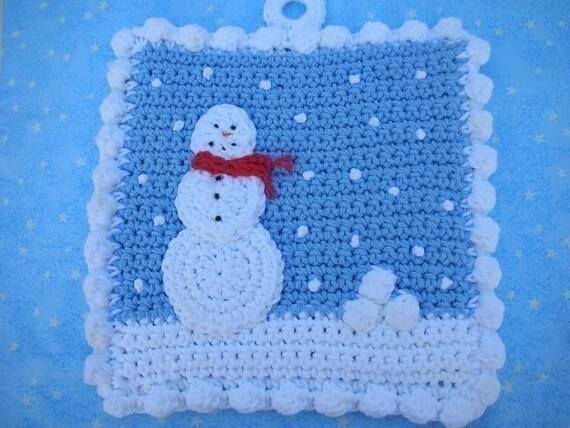


Снеговики
19-03-2016 10:00
 [показать]
[показать]
instructions: work in continuous spiral, start with magic ring
1. 6sc into magic ring (6)
2. 2sc in each st around (12)
3. *sc, 2sc* repeat around (18)
4. *sc, 2sc, sc* repeat around (24)
5. *2sc, sc, sc, sc* repeat around (30)
6.-10. sc in each st (30)
11. *dec, sc, sc, sc* repeat around (24)
12. *dec, sc, sc* repeat around (18)
13. sc in each st (18)
14. *sc, 2sc, sc* repeat around (24)
15. *2sc, sc, sc, sc* repeat around (30)
16.-18. sc in each st (30)
19. *dec, sc, sc, sc* repeat around (24)
20. *dec, sc, sc* repeat around (18)
21. *dec, sc* repeat around (12)
22. dec around (6)
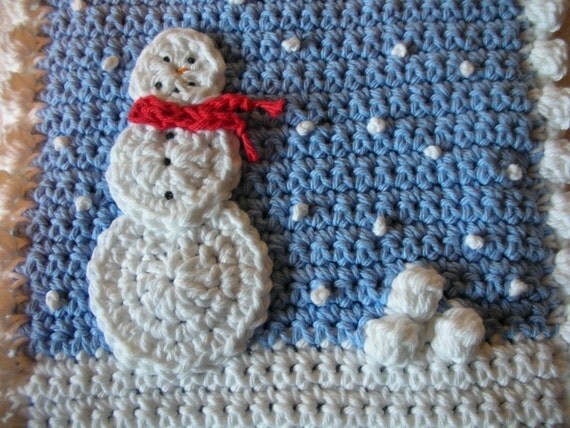
fasten off, using a needle, weave a tail through the front loops of the last 6 sts, pull tightly and close the opening
nose: chain 3, ss in 2nd st from hook and sc in the last chain
scarf: chain 85, fasten off
blush cheeks with soft pastel
Make other family members, following stitch count below (1st round – 6sts, 2nd round – 12sts, 3rd round – 18sts…)
baby: 6-12-18-24-24-24-24-24-18-12-12-24-24-24-21-18-12-6
mummy: 6-12-18-24-30-36-36-36-36-36-36-36-36-30-24-18-18-36-36-36-36-36-33-30-24-18-12-6
daddy: 6-12-18-24-30-36-36-36-36-36-36-36-36-33-30-24-18-18-36-36-36-36-36-36-33-30-24-18-12-6
I hope, you will enjoy making your own Snowman Family
Оригинал: http://doubletrebletrinkets.co.uk/2014/12/14/christmas-ornament-snowman/
комментарии: 0
понравилось!
вверх^
к полной версии
[показать] [показать] instructions: work in continuous spiral, start with magic ring
1. 6sc into magic ring (6)
2. 2sc in each st around (12)
3. *sc, 2sc* repeat around (18)
4. *sc, 2sc, sc* repeat around (24)
5. *2sc, sc, sc, sc* repeat around (30)
6.-10. sc in each st (30)
11. *dec, sc, sc, sc* repeat around (24)
12. *dec, sc, sc* repeat around (18)
13. sc in each st (18)
14. *sc, 2sc, sc* repeat around (24)
15. *2sc, sc, sc, sc* repeat around (30)
16.-18. sc in each st (30)
19. *dec, sc, sc, sc* repeat around (24)
20. *dec, sc, sc* repeat around (18)
21. *dec, sc* repeat around (12)
22. dec around (6)
fasten off, using a needle, weave a tail through the front loops of the last 6 sts, pull tightly and close the opening
nose: chain 3, ss in 2nd st from hook and sc in the last chain
scarf: chain 85, fasten off
blush cheeks with soft pastel
Make other family members, following stitch count below (1st round – 6sts, 2nd round – 12sts, 3rd round – 18sts…)
baby: 6-12-18-24-24-24-24-24-18-12-12-24-24-24-21-18-12-6
mummy: 6-12-18-24-30-36-36-36-36-36-36-36-36-30-24-18-18-36-36-36-36-36-33-30-24-18-12-6
daddy: 6-12-18-24-30-36-36-36-36-36-36-36-36-33-30-24-18-18-36-36-36-36-36-36-33-30-24-18-12-6
I hope, you will enjoy making your own Snowman Family
Оригинал: http://doubletrebletrinkets.co.uk/2014/12/14/christmas-ornament-snowman/
Санта
19-03-2016 09:50
комментарии: 0
понравилось!
вверх^
к полной версии
Пчелки
19-03-2016 09:48
[показать]
Please, meet my crocheted buzzing bees. I hope, this loving family will make you buzzzzzzz with happiness :)
Enjoy this video
small bee: 6-12-18-24-24-24-24-24-24-24-24-18-12-6 (1st round 6sc, 2nd round 12sc….)
medium bee: 6-12-18-24-27-27-27-27-27-27-27-27-27-24-18-12-6
big bee: 6-12-18-24-30-30-30-30-30-30-30-30-30-30-24-18-12-6
Black lines are embroidered after
Using DMC Petra size 8 and 0.75mm hook
Оригинал: http://doubletrebletrinkets.co.uk/2015/07/17/buzzing-bees/
комментарии: 0
понравилось!
вверх^
к полной версии
[показать] Please, meet my crocheted buzzing bees. I hope, this loving family will make you buzzzzzzz with happiness :)
Enjoy this video
small bee: 6-12-18-24-24-24-24-24-24-24-24-18-12-6 (1st round 6sc, 2nd round 12sc….)
medium bee: 6-12-18-24-27-27-27-27-27-27-27-27-27-24-18-12-6
big bee: 6-12-18-24-30-30-30-30-30-30-30-30-30-30-24-18-12-6
Black lines are embroidered after
Using DMC Petra size 8 and 0.75mm hook
Оригинал: http://doubletrebletrinkets.co.uk/2015/07/17/buzzing-bees/
Совы
19-03-2016 09:25
[показать]
[показать]
[показать]
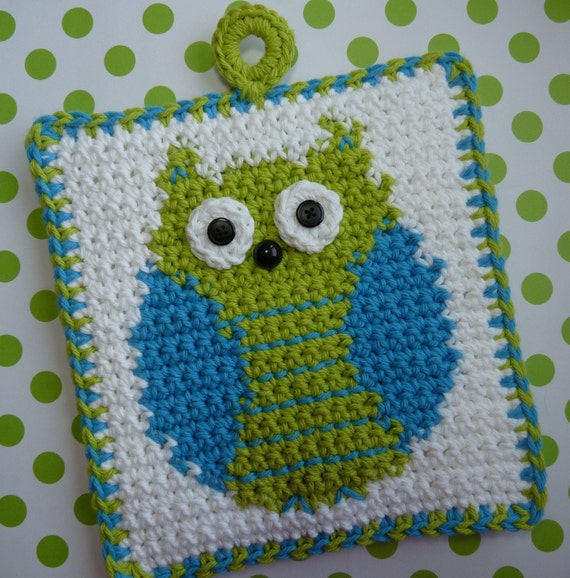
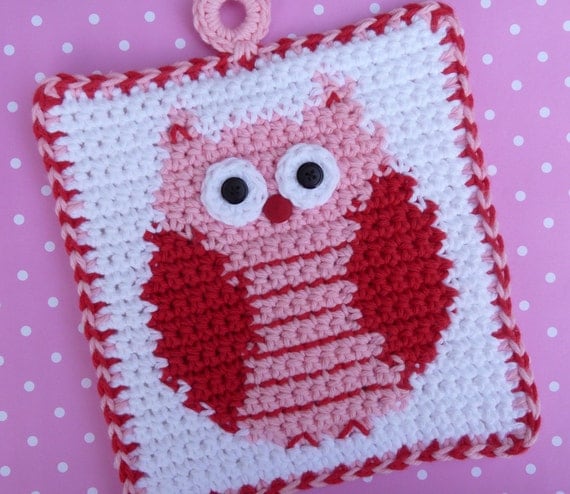
My owl family cushion cover is finally finished!!
I used my favorite ‘invisible’ 0.75mm hook and DMC Petra size 8 for this project.
This is c2c (corner to corner) method using hdc’s. More information about this method you can find here: on repeatcrafterme blog :)
Оригинал: http://doubletrebletrinkets.co.uk/2015/12/17/owl-cushion-cover/
комментарии: 0
понравилось!
вверх^
к полной версии
[показать] [показать] [показать] My owl family cushion cover is finally finished!!
I used my favorite ‘invisible’ 0.75mm hook and DMC Petra size 8 for this project.
This is c2c (corner to corner) method using hdc’s. More information about this method you can find here: on repeatcrafterme blog :)
Оригинал: http://doubletrebletrinkets.co.uk/2015/12/17/owl-cushion-cover/
Angels
19-03-2016 09:24
[показать]
[показать]
[показать]
ANGEL
DMC Petra size 8 and 0.75mm hook (ecru, pink, white) approx. size 7cm
Abbreviations:
ch=chain, ss=slip stitch, sc=single crochet, 2sc=inc=increase (2sc in the same st), dec=decrease
Head/body: with ecru, make a magic ring, work in rounds, close off each round with ss
1. 6sc into magic ring, join with ss (6)
2. ch1, 2sc in each st around, join with ss (12)
3. ch1, *sc, inc* repeat around, join with ss (18)
4. ch1, *sc, inc, sc* repeat around, join with ss (24)
5. ch1, *inc, sc, sc, sc* repeat around, join with ss (30)
6. ch1, *sc, sc, sc, inc, sc* repeat around, join with ss (36)
7. ch1, sc in each st around, joi with ss (36)
IMG_5242 (1)8. ch1, *inc, sc, sc, sc, sc, sc* repeat around, join with ss (42)
9. ch1, sc in each st around, join with ss (42)
10.-15. repeat round 9.
16. ch1, *dec, sc in each of next 5sts* repeat around, join with ss (36)
17. ch1, *sc, sc , sc, dec, sc* repeat around, join with ss (30)
18. ch1, *dec, sc, sc, sc* repeat around, join with ss (24)
Start stuffing
19. ch1, *sc, sc, dec* repeat around, join with ss (18)
20. ch1, *dec, sc* repeat around, join with ss (12)
Change colour (pink)
21. ch1, sc in each st around, join with ss (12)
22. ch1, *sc, inc* repeat around, join with ss (18)
23. ch1, *sc, inc, sc* repeat around, join with ss (24)
24.-26. ch1, sc in each st around, join with ss (24)
Stuff the head firmly
27. ch1, *sc in each of next 7sts, inc* repeat around, join wth ss (27)
28.-30. ch1, sc in each st around, join with ss (27)
31. ch1, *sc in each of next 8sts, inc* repeat around, join wth ss (30)
32.-34. ch1, sc in each st around, join with ss (30)
35. ch1, *sc in each of next 9sts, inc* repeat around, join wth ss (33)
36.-38. ch1, sc in each st around, join with ss (33)
39. ch1, *sc in each of next 10sts, inc* repeat around, join wth ss (36)
40.-44. ch1, sc in each st around, join with ss (36)
Fasten off, leaving a long tail for sewing
Arm (make 2): sleeves and hands are crocheted separately
Sleeve (make 2): with pink, make a magic ring ( leave a long tail for sewing in the beginning), work in rounds, close off each round with ss
1. 6sc into magic ring, join with ss (6)
2.-4. ch1, sc in each st around, join with ss (6)
5. ch1, *sc, sc, inc* repeat around, join with ss (8)
6. ch1, sc in each st around, join with ss (8)
7. ch1, *sc, sc, sc, inc* repeat around, join with ss (10)
8. ch1, sc in each st around, join with ss (10)
9. ch1, *sc, sc, sc, sc, inc* repeat around, join with ss (12)
10. ch1, sc in each st around, join with ss (12)
11. ch1, *sc, sc, sc, inc* repeat around, join with ss (15)
Fasten off, leaving a tail for sewing
Hand (make 2): with ecru, make a magic ring, work in rounds, close off each round with a ss
1. 6sc into magic rind, join with ss (6)
2.-7. ch1, sc in each st around, join with ss (6)
Fasten off
Оригинал: http://doubletrebletrinkets.co.uk/2016/01/25/angels-boys-and-girls/
комментарии: 0
понравилось!
вверх^
к полной версии
[показать] [показать] [показать] ANGEL
DMC Petra size 8 and 0.75mm hook (ecru, pink, white) approx. size 7cm
Abbreviations:
ch=chain, ss=slip stitch, sc=single crochet, 2sc=inc=increase (2sc in the same st), dec=decrease
Head/body: with ecru, make a magic ring, work in rounds, close off each round with ss
1. 6sc into magic ring, join with ss (6)
2. ch1, 2sc in each st around, join with ss (12)
3. ch1, *sc, inc* repeat around, join with ss (18)
4. ch1, *sc, inc, sc* repeat around, join with ss (24)
5. ch1, *inc, sc, sc, sc* repeat around, join with ss (30)
6. ch1, *sc, sc, sc, inc, sc* repeat around, join with ss (36)
7. ch1, sc in each st around, joi with ss (36)
IMG_5242 (1)8. ch1, *inc, sc, sc, sc, sc, sc* repeat around, join with ss (42)
9. ch1, sc in each st around, join with ss (42)
10.-15. repeat round 9.
16. ch1, *dec, sc in each of next 5sts* repeat around, join with ss (36)
17. ch1, *sc, sc , sc, dec, sc* repeat around, join with ss (30)
18. ch1, *dec, sc, sc, sc* repeat around, join with ss (24)
Start stuffing
19. ch1, *sc, sc, dec* repeat around, join with ss (18)
20. ch1, *dec, sc* repeat around, join with ss (12)
Change colour (pink)
21. ch1, sc in each st around, join with ss (12)
22. ch1, *sc, inc* repeat around, join with ss (18)
23. ch1, *sc, inc, sc* repeat around, join with ss (24)
24.-26. ch1, sc in each st around, join with ss (24)
Stuff the head firmly
27. ch1, *sc in each of next 7sts, inc* repeat around, join wth ss (27)
28.-30. ch1, sc in each st around, join with ss (27)
31. ch1, *sc in each of next 8sts, inc* repeat around, join wth ss (30)
32.-34. ch1, sc in each st around, join with ss (30)
35. ch1, *sc in each of next 9sts, inc* repeat around, join wth ss (33)
36.-38. ch1, sc in each st around, join with ss (33)
39. ch1, *sc in each of next 10sts, inc* repeat around, join wth ss (36)
40.-44. ch1, sc in each st around, join with ss (36)
Fasten off, leaving a long tail for sewing
Arm (make 2): sleeves and hands are crocheted separately
Sleeve (make 2): with pink, make a magic ring ( leave a long tail for sewing in the beginning), work in rounds, close off each round with ss
1. 6sc into magic ring, join with ss (6)
2.-4. ch1, sc in each st around, join with ss (6)
5. ch1, *sc, sc, inc* repeat around, join with ss (8)
6. ch1, sc in each st around, join with ss (8)
7. ch1, *sc, sc, sc, inc* repeat around, join with ss (10)
8. ch1, sc in each st around, join with ss (10)
9. ch1, *sc, sc, sc, sc, inc* repeat around, join with ss (12)
10. ch1, sc in each st around, join with ss (12)
11. ch1, *sc, sc, sc, inc* repeat around, join with ss (15)
Fasten off, leaving a tail for sewing
Hand (make 2): with ecru, make a magic ring, work in rounds, close off each round with a ss
1. 6sc into magic rind, join with ss (6)
2.-7. ch1, sc in each st around, join with ss (6)
Fasten off
Оригинал: http://doubletrebletrinkets.co.uk/2016/01/25/angels-boys-and-girls/
Пальчиковые игрушки
19-03-2016 09:22
[показать]
[показать]
[показать]
Finger Puppets
This same pattern can be used to make any of the finger puppets, all you need to do is alter the colour of your thread and add various accessories of your choice (hats, bags, glasses…)
DMC Petra size 5 and 1.0mm hook (ecru, blue, white)
Abbreviations:
ch=chain, ss=slip stitch, sc=single crochet, 2sc=inc=increase (2sc in the same st), dec=decrease, hdc=half double crochet, dc=double crochet
Head: with ecru, make a magic ring, work in rounds, close off each round with ss
1. 6sc into magic ring, join with ss (6)
2. ch1, 2sc in each st around, join with ss (12)
3. ch1, *sc, inc* repeat around, join with ss (18)
4. ch1, *sc, inc, sc* repeat around, join with ss (24)
5. ch1, *inc, sc, sc, sc* repeat around, join with ss (30)
6. ch1, sc in each st around, join with ss (30)
7. ch1, *sc, sc, sc, sc, inc* repeat around, join with ss (36)
8. ch1, sc in each st around, join with ss (36)
9.-13. repeat round 8.
14. ch1, *dec, sc in each of next 4sts* repeat around, join with ss (30)
17. ch1, *sc, sc, dec, sc* repeat around, join with ss (24)
18. ch1, *dec, sc, sc* repeat around, join with ss (18)
Start stuffing
19. ch1, *sc, dec* repeat around, join with ss (12)
20. ch1, dec around, join with ss (6)
Fasten off, stuff more if needed
Body: with blue, work on head, crochet in rounds, close off each round with ss
1. make 12 sc around the last round of head, join with ss (12)
2. ch1, *sc, inc* repeat around, join with ss (18)
3. ch1, sc in each st around, join with ss (18)
4.-21. repeat round 3.
22. ss in each st around (18)
Fasten off, weave in loose ends
Apron: with white
Ch6
1. sc in 2nd ch from hook and in ch across, ch1 and turn
2. (sc, hdc) in 1st st, dc in next st, 2dc in next st, dc in next and (hdc, sc) in last st
Fasten off, leaving a tail for sewing
Collar: with white
Ch16
Sc in 2nd ch from hook and in each ch across
Fasten off, leaving a tail for sewing
Headdress: with white
Ch8
Sc in 2nd ch from hook, *3dc in next ch, sc in next* 3 times
Fasten off, leaving a tail for sewing
nose: between round 6 and 7, counting from neck
eyes: on round 7, counting from neck and 6-7 sts apart
Оригинал: http://doubletrebletrinkets.co.uk/2016/02/13/finger-puppets/
комментарии: 0
понравилось!
вверх^
к полной версии
[показать] [показать] [показать] Finger Puppets
This same pattern can be used to make any of the finger puppets, all you need to do is alter the colour of your thread and add various accessories of your choice (hats, bags, glasses…)
DMC Petra size 5 and 1.0mm hook (ecru, blue, white)
Abbreviations:
ch=chain, ss=slip stitch, sc=single crochet, 2sc=inc=increase (2sc in the same st), dec=decrease, hdc=half double crochet, dc=double crochet
Head: with ecru, make a magic ring, work in rounds, close off each round with ss
1. 6sc into magic ring, join with ss (6)
2. ch1, 2sc in each st around, join with ss (12)
3. ch1, *sc, inc* repeat around, join with ss (18)
4. ch1, *sc, inc, sc* repeat around, join with ss (24)
5. ch1, *inc, sc, sc, sc* repeat around, join with ss (30)
6. ch1, sc in each st around, join with ss (30)
7. ch1, *sc, sc, sc, sc, inc* repeat around, join with ss (36)
8. ch1, sc in each st around, join with ss (36)
9.-13. repeat round 8.
14. ch1, *dec, sc in each of next 4sts* repeat around, join with ss (30)
17. ch1, *sc, sc, dec, sc* repeat around, join with ss (24)
18. ch1, *dec, sc, sc* repeat around, join with ss (18)
Start stuffing
19. ch1, *sc, dec* repeat around, join with ss (12)
20. ch1, dec around, join with ss (6)
Fasten off, stuff more if needed
Body: with blue, work on head, crochet in rounds, close off each round with ss
1. make 12 sc around the last round of head, join with ss (12)
2. ch1, *sc, inc* repeat around, join with ss (18)
3. ch1, sc in each st around, join with ss (18)
4.-21. repeat round 3.
22. ss in each st around (18)
Fasten off, weave in loose ends
Apron: with white
Ch6
1. sc in 2nd ch from hook and in ch across, ch1 and turn
2. (sc, hdc) in 1st st, dc in next st, 2dc in next st, dc in next and (hdc, sc) in last st
Fasten off, leaving a tail for sewing
Collar: with white
Ch16
Sc in 2nd ch from hook and in each ch across
Fasten off, leaving a tail for sewing
Headdress: with white
Ch8
Sc in 2nd ch from hook, *3dc in next ch, sc in next* 3 times
Fasten off, leaving a tail for sewing
nose: between round 6 and 7, counting from neck
eyes: on round 7, counting from neck and 6-7 sts apart
Оригинал: http://doubletrebletrinkets.co.uk/2016/02/13/finger-puppets/
Мотив для Хеллуина
19-03-2016 09:19
комментарии: 0
понравилось!
вверх^
к полной версии
Christmas owls
19-03-2016 09:10
[показать]
[показать]
Christmas Owls
big owl DMC Petra size 5 with 1.0mm hook
small owl DMC Petra size 8 with 0.75mm hook
ch=chain, ss=slip stitch, sc=single crochet, st=stitch
Body: with brown, make a magic ring
1. 6sc into magic ring, join with ss (6)
2. ch1, 2sc in each st around, join with ss (12)
3. ch1, *sc, 2sc* repeat around, join with ss (18)
4. ch1, *sc, 2sc, sc* repeat around, join with ss (24)
5. ch1, *2sc, sc, sc, sc* repeat around, join with ss (30)
6.-8. ch1, sc in each st around, join with ss (30)
9. ch1, *dec, sc, sc, sc* repeat around, join with ss (24)
10.-11. ch1, sc in each st around, join with ss (24)
12. ch1, *dec, sc, sc* repeat around, join with ss (18)
13. ch1, sc in each st around, join with ss (18)
stuff the body
14. ch1, *dec, sc* repeat around, join with ss (12)
15. ch1, dec around, join with ss (6)
Stuff more if needed.
Fasten off, leaving a long tail (use it for making ears). Using a needle, weave the tail through the front loops of the last 6 st(s), pull tightly and close the opening.
Make ears (ch3, ss in 2nd from hook, sc in next)
Eye (make 2): with white, make a magic ring
8sc into magic ring, join with ss
Fasten off, leaving a tail for sewing
Wing (make 2): with brown, make a magic ring
1. 6sc into magic ring, join with ss (6)
2. ch1, 2sc in each of next 3st(s), ch2, ss in 2nd from hook, 2sc in each of next 3st(s), join with ss
fasten off, leaving a tail for sewing
Belly: with white, make a magic ring
1. 6sc into magic ring, join with ss (6)
2. ch1, 2sc in each st around, join with ss (12)
3. ch1, *sc, 2sc* repeat around, join with ss (18)
fasten off, leaving a tail for sewing
Hat: with red, make a magic ring
1. 6sc into magic ring, join with ss (6)
2. ch1, *sc, 2sc* repeat around, join with ss (9)
3. ch1, *sc, 2sc, sc* repeat around, join with ss (12)
4. ch1, *2sc, sc, sc, sc* repeat around, join with ss (15)
change colour (white)
5. ch1, *sc, sc, sc, 2sc, sc* repeat around, join with ss (18)
fasten off, leaving a tail for sewing and attach a pompom
Оригинал: http://doubletrebletrinkets.co.uk/2015/07/15/christmas-owls/
комментарии: 0
понравилось!
вверх^
к полной версии
[показать] [показать] Christmas Owls
big owl DMC Petra size 5 with 1.0mm hook
small owl DMC Petra size 8 with 0.75mm hook
ch=chain, ss=slip stitch, sc=single crochet, st=stitch
Body: with brown, make a magic ring
1. 6sc into magic ring, join with ss (6)
2. ch1, 2sc in each st around, join with ss (12)
3. ch1, *sc, 2sc* repeat around, join with ss (18)
4. ch1, *sc, 2sc, sc* repeat around, join with ss (24)
5. ch1, *2sc, sc, sc, sc* repeat around, join with ss (30)
6.-8. ch1, sc in each st around, join with ss (30)
9. ch1, *dec, sc, sc, sc* repeat around, join with ss (24)
10.-11. ch1, sc in each st around, join with ss (24)
12. ch1, *dec, sc, sc* repeat around, join with ss (18)
13. ch1, sc in each st around, join with ss (18)
stuff the body
14. ch1, *dec, sc* repeat around, join with ss (12)
15. ch1, dec around, join with ss (6)
Stuff more if needed.
Fasten off, leaving a long tail (use it for making ears). Using a needle, weave the tail through the front loops of the last 6 st(s), pull tightly and close the opening.
Make ears (ch3, ss in 2nd from hook, sc in next)
Eye (make 2): with white, make a magic ring
8sc into magic ring, join with ss
Fasten off, leaving a tail for sewing
Wing (make 2): with brown, make a magic ring
1. 6sc into magic ring, join with ss (6)
2. ch1, 2sc in each of next 3st(s), ch2, ss in 2nd from hook, 2sc in each of next 3st(s), join with ss
fasten off, leaving a tail for sewing
Belly: with white, make a magic ring
1. 6sc into magic ring, join with ss (6)
2. ch1, 2sc in each st around, join with ss (12)
3. ch1, *sc, 2sc* repeat around, join with ss (18)
fasten off, leaving a tail for sewing
Hat: with red, make a magic ring
1. 6sc into magic ring, join with ss (6)
2. ch1, *sc, 2sc* repeat around, join with ss (9)
3. ch1, *sc, 2sc, sc* repeat around, join with ss (12)
4. ch1, *2sc, sc, sc, sc* repeat around, join with ss (15)
change colour (white)
5. ch1, *sc, sc, sc, 2sc, sc* repeat around, join with ss (18)
fasten off, leaving a tail for sewing and attach a pompom
Оригинал: http://doubletrebletrinkets.co.uk/2015/07/15/christmas-owls/
Мотив "Овечка"
14-03-2016 14:32
[показать]
[показать]
[показать]
After finishing my Bobble Stitch Blanket, I started getting ideas of other projects I could do with the bobble stitch. The bobbles reminded me of sheep wool and so the idea of a sheep granny square was born! Little did I know this small project would require so much math. I swear I mapped out that grid dozens of times.
Finally I think I have it right! Each square in the graph equals one single crochet with exception to the “o”… those represent the places where you will make the bobbles. You can also see where you need to make the color changes. Feel free to back the background any color you want (I chose green).
Here is a video tutorial on how to make a bobble:
Finished sheep square with border measures approximately 10.5×10.5
Materials:
-Size H Crochet Hook
-Worsted weight yarn. I used Lion Brand Vanna’s choose in white, charcoal grey, and fern.
-Tapestry needle
Abbreviations:
SC = Single Crochet
DC = Double Crochet
Bobble Stitch video tutorial above
Pattern:
Starting with green (background color)
Chain 29, SC in second chain from hook and the rest of the way down chain, chain 1, turn (28 SC)
Row 2-4: SC in each stitch across, chain 1, turn
Row 5: SC in first 19, change to white and make your first bobble, SC in next, bobble, SC, change back to green and SC in the last 5 stitches, chain 1, turn
Row 6: SC in first 5 with green, SC in next 4 with white, SC in last 19 stitches with green, chain 1, turn
Row 7: SC in first 17 with green, with white yarn bobble, SC, bobble, SC, bobble, SC, bobble, SC, change to green and SC in last 4 stitches, chain 1, turn
Row 8: SC in first 4 with green, SC in next 7 with gray yarn, change back to green and SC in last 17 stitches, chain 1, turn
Row 9: SC in first 16 with green, change to white and bobble in next, SC in next 7 with gray, bobble in next with white, change to green and SC in last 3 stitches, chain 1, turn
Row 10: SC in first 3 with green, SC in next 9 with gray, change to green and SC in last 16 stitches, chain 1, turn
Row 11: SC in first 6 with green, change to white and *bobble, SC over next 10 stitches, SC in next 10 with gray, SC in last 2 with green, chain 1, turn
Row 12: SC in first 2 with green, SC in next 10 with gray, SC in next 10 with white, SC in last 6 with green, chain 1, turn
Row 13: SC in first 5 with green, change to white and *bobble, SC over next 10 stitch THEN make one more bobble with white, SC in next two with gray, bobble in next stitch with white, SC in next 4 with gray, SC in next stitch with green, SC in next two with gray, SC in last two with green, chain 1, turn
Row 14: SC in first 5 with green, SC in next 4 with gray, SC in next 14 with white, SC in last 5 with green, chain 1, turn
Row 15: SC in first 2 with green, SC in next two with gray, with white *bobble, SC over next 14 stitches THEN make one more bobble with white, SC in next 3 with gray, SC in next 6 with green, chain 1, turn
Row 16: SC in first 9 with green, SC in next 15 with white, SC in next 2 with gray, SC in last 2 with green, chain 1, turn
Row 17: SC in first 2 with green, SC in next with gray, with white *bobble, SC over next 16 stitches and then make on more bobble with white, SC in last 8 with green, chain 1, turn
Row 18: SC in first 8 with green, SC in next 17 with white, SC in last 3 with green, chain 1, turn
Row 19: SC in first 4 with green, with white *bobble, SC over next 14 and then make one more bobble with white, SC in last 9 with green, chain 1, turn
Row 20: SC in first 9 with green, SC in next 15 with white, SC in last 4 with green, chain 1, turn
Row 21: SC in first 5 with green, with white *bobble, SC over next 12 then make one more bobble with white, SC in last 10 with green, chain 1, turn
Row 22: SC in first 10 with green, SC in next 13 with white, SC in last 5 with green, chain 1, turn
Row 23: SC in first 6 with green, with white bobble, SC in next, SC in next two with gray, with white *bobble, SC over next 6, SC in next two with gray, SC in last 10 with green, chain 1, turn
Row 24: SC in first 9 with green, SC in next 2 with gray, SC in next 6 with green, SC in next two with gray, SC over last 8 with green, chain 1, turn
Row 25: SC in first 8 with green, SC in next 2 with gray, SC in next 6 with green, SC in next two with gray, SC over last 10 with green, chain 1, turn
Row 26-28: SC in each stitch across with green, chain 1, turn
SC around edges with green.
To make picket fence border:
Row 1: SC with green, Spike Stitch with white around endure edge making SC + chain 2 in each corner with just green
Row 2: Alternate DC in green and white matching up color toЧитать далее...
комментарии: 0
понравилось!
вверх^
к полной версии
[показать] [показать] [показать] After finishing my Bobble Stitch Blanket, I started getting ideas of other projects I could do with the bobble stitch. The bobbles reminded me of sheep wool and so the idea of a sheep granny square was born! Little did I know this small project would require so much math. I swear I mapped out that grid dozens of times.
Finally I think I have it right! Each square in the graph equals one single crochet with exception to the “o”… those represent the places where you will make the bobbles. You can also see where you need to make the color changes. Feel free to back the background any color you want (I chose green).
Here is a video tutorial on how to make a bobble:
Finished sheep square with border measures approximately 10.5×10.5
Materials:
-Size H Crochet Hook
-Worsted weight yarn. I used Lion Brand Vanna’s choose in white, charcoal grey, and fern.
-Tapestry needle
Abbreviations:
SC = Single Crochet
DC = Double Crochet
Bobble Stitch video tutorial above
Pattern:
Starting with green (background color)
Chain 29, SC in second chain from hook and the rest of the way down chain, chain 1, turn (28 SC)
Row 2-4: SC in each stitch across, chain 1, turn
Row 5: SC in first 19, change to white and make your first bobble, SC in next, bobble, SC, change back to green and SC in the last 5 stitches, chain 1, turn
Row 6: SC in first 5 with green, SC in next 4 with white, SC in last 19 stitches with green, chain 1, turn
Row 7: SC in first 17 with green, with white yarn bobble, SC, bobble, SC, bobble, SC, bobble, SC, change to green and SC in last 4 stitches, chain 1, turn
Row 8: SC in first 4 with green, SC in next 7 with gray yarn, change back to green and SC in last 17 stitches, chain 1, turn
Row 9: SC in first 16 with green, change to white and bobble in next, SC in next 7 with gray, bobble in next with white, change to green and SC in last 3 stitches, chain 1, turn
Row 10: SC in first 3 with green, SC in next 9 with gray, change to green and SC in last 16 stitches, chain 1, turn
Row 11: SC in first 6 with green, change to white and *bobble, SC over next 10 stitches, SC in next 10 with gray, SC in last 2 with green, chain 1, turn
Row 12: SC in first 2 with green, SC in next 10 with gray, SC in next 10 with white, SC in last 6 with green, chain 1, turn
Row 13: SC in first 5 with green, change to white and *bobble, SC over next 10 stitch THEN make one more bobble with white, SC in next two with gray, bobble in next stitch with white, SC in next 4 with gray, SC in next stitch with green, SC in next two with gray, SC in last two with green, chain 1, turn
Row 14: SC in first 5 with green, SC in next 4 with gray, SC in next 14 with white, SC in last 5 with green, chain 1, turn
Row 15: SC in first 2 with green, SC in next two with gray, with white *bobble, SC over next 14 stitches THEN make one more bobble with white, SC in next 3 with gray, SC in next 6 with green, chain 1, turn
Row 16: SC in first 9 with green, SC in next 15 with white, SC in next 2 with gray, SC in last 2 with green, chain 1, turn
Row 17: SC in first 2 with green, SC in next with gray, with white *bobble, SC over next 16 stitches and then make on more bobble with white, SC in last 8 with green, chain 1, turn
Row 18: SC in first 8 with green, SC in next 17 with white, SC in last 3 with green, chain 1, turn
Row 19: SC in first 4 with green, with white *bobble, SC over next 14 and then make one more bobble with white, SC in last 9 with green, chain 1, turn
Row 20: SC in first 9 with green, SC in next 15 with white, SC in last 4 with green, chain 1, turn
Row 21: SC in first 5 with green, with white *bobble, SC over next 12 then make one more bobble with white, SC in last 10 with green, chain 1, turn
Row 22: SC in first 10 with green, SC in next 13 with white, SC in last 5 with green, chain 1, turn
Row 23: SC in first 6 with green, with white bobble, SC in next, SC in next two with gray, with white *bobble, SC over next 6, SC in next two with gray, SC in last 10 with green, chain 1, turn
Row 24: SC in first 9 with green, SC in next 2 with gray, SC in next 6 with green, SC in next two with gray, SC over last 8 with green, chain 1, turn
Row 25: SC in first 8 with green, SC in next 2 with gray, SC in next 6 with green, SC in next two with gray, SC over last 10 with green, chain 1, turn
Row 26-28: SC in each stitch across with green, chain 1, turn
SC around edges with green.
To make picket fence border:
Row 1: SC with green, Spike Stitch with white around endure edge making SC + chain 2 in each corner with just green
Row 2: Alternate DC in green and white matching up color to
Плед-игрушка "Машинки"
14-03-2016 14:30
[показать]
[показать]
[показать]
I know a little boy who isn’t feeling so well and is in need of some cheering up this week. That is when the idea of the “Playnket” hit me! It’s a crochet play mat and lovey blanket all in one! Snuggle with it or lay it flat on the floor and race the cars on the track. Perfect for sick days on the couch but also a soft activity toy that is a great size to take on the go! Of course you could alway double, triple, or quadruple the pattern to make an even larger blanket. The one I made measures about 23 inches long by 19 inches wide. The small size works up extremely quickly making it an easy gift idea. I’ve already decided that this will be the first of many “playnket” designs so stay tuned!
Materials:
– Worsted weight yarn. I used Lion Brand Vanna’s Choice in Lime, Mustard, Charcoal Grey, and Silver Grey.
I used 2 skeins of Lime, 1 skein of Charcoal Grey and less than a half skein of Mustard and Silver.
The cars are made using Lion Brand Vanna’s Choice in Scarlet, Colonial Blue, and Mustard.
– Size I (5.5mm) crochet hook
– Tapestry needle
– Poly-fil stuffing (for cars)
– Large black buttons (for cars)
Abbreviations:
SC = Single Crochet
Ch = Chain
Note about pattern: The pattern is very simple! SC + chain 1, skip a stitch, SC + chain 1, repeat. But here is the catch… You need to make sure you start and end each row with a SC stitch. On the odd number rows, this happens naturally. You will see that you SC + chain 1, skip a stitch and then you are able to end with a SC in the last stitch. BUT in the even number rows (starting with row 2), you will notice you have one extra stitch left on the end and so you will end up with two single crochets next to each other.
Same goes for the beginning of the rows. The odd number rows you can begin as usual (SC + chain 1, skip a stitch, SC in next space)… but on the even number rows you need to make a SC in the first stitch and then begin your SC + chain, skip a stitch, SC in next space)
Don’t let this confuse you. You will see this happen naturally when you begin the pattern.
I really love this stitch. It looks the same from the front and back gives a great texture. It’s the same stitch I used in my Crochet “I love You” Blanket.
Race Track Blanket
with green yarn…
Chain 70, SC in second chain from hook, chain 1, skip a chain, SC in next, repeat down chain, chain 1 , turn
Row 2: SC in first, SC in chain space + chain 1, skip a stitch, SC + chain 1 in next chain space, repeat until end, SC in last, chain 1, turn
Row 3: SC + chain 1 in first, skip stitch, SC + chain 1 in next chain space, repeat, chain 1, turn
Row 4-14: repeat rows 2-3 (alternating).. remember it’s the same pattern, you just need to start and end with an “extra” SC on the even rows.
change to dark gray yarn
Row 15-18: continue repeating pattern where you left off
change to yellow yarn
Row 19: continue repeating pattern where you left off
change to dark gray yarn
Row 19-22: continue repeating pattern where you left off
Repeat entire pattern until you have 3 race tracks and 4 patches of green. Each block of green is 14 rows. Each race track has 4 rows of gray + one row of yellow + 4 rows of gray.
Of course you can make to the blanket as long and wide as you’d like! When you are finished, fasten off and weave in ends before starting on border.
Border: Starting at any point on the blankets edge, attach light gray yarn and use the same pattern on the border as you did in the blanket: SC + chain 1, skip a stitch, SC all the way around. On the first round of the border make 2 SC + Chain 1 the corners. Make 3 rounds of the border before fastening off and weaving in ends.
Crochet Cars: I made the cars by using a size G hook and following THIS TINY CROCHET CARS PATTERN by the talented Dedri of Look What I Made. I love her version of these cute little cars, but in order to simplify it, I stopped after round 11 of her pattern and began making SC Decreases until closed. The remaining rounds will look like this:
Round 12: SC Decrease, SC in next 3, repeat around
Round 13: SC Decrease, SC in next 2, repeat around
Round 14: SC Decrease, SC in next, repeat around
Round 15: SC Decrease until closed.
Be sure to stuff the car and weave in ends before sewing shut!!
Оригинал: http://www.repeatcrafterme.com/2015/02/crochet-race-car-playnket-play-mat-and.html
комментарии: 0
понравилось!
вверх^
к полной версии
[показать] [показать] [показать] I know a little boy who isn’t feeling so well and is in need of some cheering up this week. That is when the idea of the “Playnket” hit me! It’s a crochet play mat and lovey blanket all in one! Snuggle with it or lay it flat on the floor and race the cars on the track. Perfect for sick days on the couch but also a soft activity toy that is a great size to take on the go! Of course you could alway double, triple, or quadruple the pattern to make an even larger blanket. The one I made measures about 23 inches long by 19 inches wide. The small size works up extremely quickly making it an easy gift idea. I’ve already decided that this will be the first of many “playnket” designs so stay tuned!
Materials:
– Worsted weight yarn. I used Lion Brand Vanna’s Choice in Lime, Mustard, Charcoal Grey, and Silver Grey.
I used 2 skeins of Lime, 1 skein of Charcoal Grey and less than a half skein of Mustard and Silver.
The cars are made using Lion Brand Vanna’s Choice in Scarlet, Colonial Blue, and Mustard.
– Size I (5.5mm) crochet hook
– Tapestry needle
– Poly-fil stuffing (for cars)
– Large black buttons (for cars)
Abbreviations:
SC = Single Crochet
Ch = Chain
Note about pattern: The pattern is very simple! SC + chain 1, skip a stitch, SC + chain 1, repeat. But here is the catch… You need to make sure you start and end each row with a SC stitch. On the odd number rows, this happens naturally. You will see that you SC + chain 1, skip a stitch and then you are able to end with a SC in the last stitch. BUT in the even number rows (starting with row 2), you will notice you have one extra stitch left on the end and so you will end up with two single crochets next to each other.
Same goes for the beginning of the rows. The odd number rows you can begin as usual (SC + chain 1, skip a stitch, SC in next space)… but on the even number rows you need to make a SC in the first stitch and then begin your SC + chain, skip a stitch, SC in next space)
Don’t let this confuse you. You will see this happen naturally when you begin the pattern.
I really love this stitch. It looks the same from the front and back gives a great texture. It’s the same stitch I used in my Crochet “I love You” Blanket.
Race Track Blanket
with green yarn…
Chain 70, SC in second chain from hook, chain 1, skip a chain, SC in next, repeat down chain, chain 1 , turn
Row 2: SC in first, SC in chain space + chain 1, skip a stitch, SC + chain 1 in next chain space, repeat until end, SC in last, chain 1, turn
Row 3: SC + chain 1 in first, skip stitch, SC + chain 1 in next chain space, repeat, chain 1, turn
Row 4-14: repeat rows 2-3 (alternating).. remember it’s the same pattern, you just need to start and end with an “extra” SC on the even rows.
change to dark gray yarn
Row 15-18: continue repeating pattern where you left off
change to yellow yarn
Row 19: continue repeating pattern where you left off
change to dark gray yarn
Row 19-22: continue repeating pattern where you left off
Repeat entire pattern until you have 3 race tracks and 4 patches of green. Each block of green is 14 rows. Each race track has 4 rows of gray + one row of yellow + 4 rows of gray.
Of course you can make to the blanket as long and wide as you’d like! When you are finished, fasten off and weave in ends before starting on border.
Border: Starting at any point on the blankets edge, attach light gray yarn and use the same pattern on the border as you did in the blanket: SC + chain 1, skip a stitch, SC all the way around. On the first round of the border make 2 SC + Chain 1 the corners. Make 3 rounds of the border before fastening off and weaving in ends.
Crochet Cars: I made the cars by using a size G hook and following THIS TINY CROCHET CARS PATTERN by the talented Dedri of Look What I Made. I love her version of these cute little cars, but in order to simplify it, I stopped after round 11 of her pattern and began making SC Decreases until closed. The remaining rounds will look like this:
Round 12: SC Decrease, SC in next 3, repeat around
Round 13: SC Decrease, SC in next 2, repeat around
Round 14: SC Decrease, SC in next, repeat around
Round 15: SC Decrease until closed.
Be sure to stuff the car and weave in ends before sewing shut!!
Оригинал: http://www.repeatcrafterme.com/2015/02/crochet-race-car-playnket-play-mat-and.html
Аппликация "Кит"
14-03-2016 14:28
[показать]
I have a feeling you will be able to use this whale on multiple projects! Whales seem to be popular and trendy among kids decor. In fact, my kids have a whale-themed bathroom! I look forward to seeing all the places you use this appliqué.
Materials:
– Worsted weight yarn. I used Lion Brand Vanna’s Choice in Aqua (it’s one of their baby yarns) and a little black for the eye and mouth.
– Size G Crochet Hook (the bigger the hook the bigger the appliqué and vice versa)
– Tapestry needle
Abbreviations:
Magic Ring Tutorial
Sl St = Slip Stitch
SC = Single Crochet
SC Decrease = Single Crochet Decrease
HDC = Half Double Crochet
DC = Double Crochet
Whale Applique Pattern:
Magic ring, chain 1 and make 8 SC in ring, join, chain 1
Round 2: 2 SC in first, SC in next, repeat around, join, chain 2
Round 3: 2 DC in first 4, 2 HDC in next, 2 SC in next, 2 HDC in next, DC in last 5, chain 1, turn
Row 4: SC in next 5, ch 1, turn
Row 5: SC decrease, SC, SC Decrease, chain 1, turn
Row 6: SC in each stitch across, chain 1, turn (3 SC)
Row 7: SC in first, SC Decrease, chain 1, turn
Row 8: SC in first, chain 6, SC in 2nd chain from hook, HDC in last 4 chains… Chain 6 again, SC in 2nd chain from hook, HDC in last 4 chains, join to second stitch from row 8,
Continue to sC around whale body, fasten off when you get back around to tail.
Stich on a small smile with black yarn.
Make a french knot for the eye.
Оригинал: http://www.repeatcrafterme.com/2014/10/w-is-for-whale-crochet-whale-applique.html
комментарии: 0
понравилось!
вверх^
к полной версии
[показать] I have a feeling you will be able to use this whale on multiple projects! Whales seem to be popular and trendy among kids decor. In fact, my kids have a whale-themed bathroom! I look forward to seeing all the places you use this appliqué.
Materials:
– Worsted weight yarn. I used Lion Brand Vanna’s Choice in Aqua (it’s one of their baby yarns) and a little black for the eye and mouth.
– Size G Crochet Hook (the bigger the hook the bigger the appliqué and vice versa)
– Tapestry needle
Abbreviations:
Magic Ring Tutorial
Sl St = Slip Stitch
SC = Single Crochet
SC Decrease = Single Crochet Decrease
HDC = Half Double Crochet
DC = Double Crochet
Whale Applique Pattern:
Magic ring, chain 1 and make 8 SC in ring, join, chain 1
Round 2: 2 SC in first, SC in next, repeat around, join, chain 2
Round 3: 2 DC in first 4, 2 HDC in next, 2 SC in next, 2 HDC in next, DC in last 5, chain 1, turn
Row 4: SC in next 5, ch 1, turn
Row 5: SC decrease, SC, SC Decrease, chain 1, turn
Row 6: SC in each stitch across, chain 1, turn (3 SC)
Row 7: SC in first, SC Decrease, chain 1, turn
Row 8: SC in first, chain 6, SC in 2nd chain from hook, HDC in last 4 chains… Chain 6 again, SC in 2nd chain from hook, HDC in last 4 chains, join to second stitch from row 8,
Continue to sC around whale body, fasten off when you get back around to tail.
Stich on a small smile with black yarn.
Make a french knot for the eye.
Оригинал: http://www.repeatcrafterme.com/2014/10/w-is-for-whale-crochet-whale-applique.html
Аппликация "Котенок"
14-03-2016 14:27
[показать]
[показать]
C is for Cat
This friendly feline can be made in any colors you choose! How about an orange tabby or a white persian or a siamese?! I used to have a gray cat named Smoki (before my black cat, Romeo) so this little gray appliqué reminded me of her :) Remember that I also have a Crochet Cat Hat Pattern that is purrrrfect for cat lovers!
Materials:
– Worsted weight yarn in any color! I used Lion Brand Vanna’s Choice in Silver Grey and Pink.
– Size G Crochet Hook (the bigger the hook the bigger the appliqué and vice versa)
– Tapestry needle
Abbreviations:
SC = Single Crochet
HDC = Half Double Crochet
DC = Double Crochet
TC = Triple Crochet
Crochet Cat Applique Pattern:
Magic ring, chain 1 and make 10 SC in ring, join to first SC, chain 1
Round 2: 2 SC in each stitch around, join, chain 1 (20 SC)
Round 3: 2 SC in first stitch, SC in next, repeat around, join, chain 1 (30 SC)
Round 4: SC in first 10 stitches, DC in next 5, SC in next 10, DC in next 5, join to first SC.
Round 5: Chain 4, * HDC in 2nd chain from hook, DC in next, TC in last chain, skip one stitch in round and join with a slip stitch to next stitch. Slip stitch in next 4, chain 4 and repeat from * to make other ear. Fasten off leaving long tail.
Use tapestry needle to stitch on inside of ears, nose, whiskers and mouth.
I made a french knot for each eye. HERE is a tutorial on how to make a french knot.
Оригинал: http://www.repeatcrafterme.com/2014/10/c-is-for-cat-crochet-cat-applique.html
комментарии: 0
понравилось!
вверх^
к полной версии
[показать] [показать] C is for Cat
This friendly feline can be made in any colors you choose! How about an orange tabby or a white persian or a siamese?! I used to have a gray cat named Smoki (before my black cat, Romeo) so this little gray appliqué reminded me of her :) Remember that I also have a Crochet Cat Hat Pattern that is purrrrfect for cat lovers!
Materials:
– Worsted weight yarn in any color! I used Lion Brand Vanna’s Choice in Silver Grey and Pink.
– Size G Crochet Hook (the bigger the hook the bigger the appliqué and vice versa)
– Tapestry needle
Abbreviations:
SC = Single Crochet
HDC = Half Double Crochet
DC = Double Crochet
TC = Triple Crochet
Crochet Cat Applique Pattern:
Magic ring, chain 1 and make 10 SC in ring, join to first SC, chain 1
Round 2: 2 SC in each stitch around, join, chain 1 (20 SC)
Round 3: 2 SC in first stitch, SC in next, repeat around, join, chain 1 (30 SC)
Round 4: SC in first 10 stitches, DC in next 5, SC in next 10, DC in next 5, join to first SC.
Round 5: Chain 4, * HDC in 2nd chain from hook, DC in next, TC in last chain, skip one stitch in round and join with a slip stitch to next stitch. Slip stitch in next 4, chain 4 and repeat from * to make other ear. Fasten off leaving long tail.
Use tapestry needle to stitch on inside of ears, nose, whiskers and mouth.
I made a french knot for each eye. HERE is a tutorial on how to make a french knot.
Оригинал: http://www.repeatcrafterme.com/2014/10/c-is-for-cat-crochet-cat-applique.html
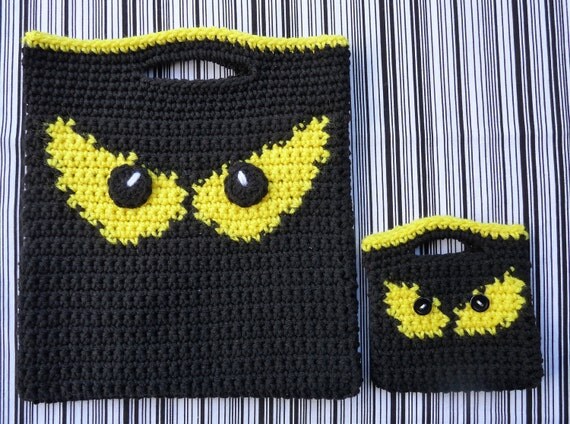
Слюнявчик-монстр
14-03-2016 14:24
[показать]
[показать]
I am having a lot of fun with this new Lion Brand Modern Baby Yarn! The colors are bright, cheerful, and the perfect palette for these fun Crochet Monster Baby Bibs! The yarn is washable so bibs can be worn and washed. Although I would recommend using them for drools instead of foods :)
Materials:
– Lion Brand Modern Baby Yarn. I used Purple, Turquoise, Chartreuse, and Yellow. Keep in mind this is a light worsted weight yarn. You can purchase and read more about this yarn HERE. I did use a bit of worsted weight white and black yarn for face embellishments.
– Size H Crochet Hook
– Button or velcro depending how which closure you choose
– Tapestry needle
Abbreviations:
Magic Ring Tutorial
Ch = Chain
SC = Single Crochet
SC Decrease = Single Crochet Decrease
HDC = Half Double Crochet
DC = Double Crochet
TC = Triple Crochet
Bib Pattern:
Starting with color 1 (example: yellow)
Chain 21, SC in 2nd chain from hook and in each chain across, ch 1, turn (20 SC)
Row 2: 2 SC in first stitch, SC in next 18, 2 SC in last, ch 1, turn (22 SC)
Row 3: SC in each stitch, ch 1, turn (22 SC)
Row 4: 2 SC in first, SC in next 20, 2 SC in last, ch 1, turn (24 SC)
Row 5-10: SC in each stitch, ch 1, turn (24 SC)
change to white yarn
Row 10-11: SC in each stitch, ch 1, turn (24 SC)
change to color 2 (example: blue)
Row 12-29: SC in each stitch, ch 1, turn (24 SC)
Row 30 (a): SC in first 10, ch 1, turn (10 SC) – this is the start of your first bib strap
Row 31 (a): SC Decrease, SC in next 6, SC Decrease, ch 1, turn
Row 32 (a): SC in each stitch, ch 1, turn (8 SC)
Row 33 (a): SC Decrease, SC in next 4, SC Decrease, ch 1, turn
Row 34-37 (a): SC in each stitch, ch 1, turn (6 SC)
Row 38 (a): SC Decrease, SC in next 2, SC Decrease, ch 1, turn
Row 39 (a): SC in each stitch, ch 1, turn, (4 SC)
Row 40 (a): SC Decrease over last 2, fasten off leaving long tail.
Row 30 (b): Skip 4 SC after your first bib strap in Row 30. Attach yarn and SC over last 10, ch 1, turn (10 SC)
Row 31 (b): SC Decrease, SC in next 6, SC Decrease, ch 1, turn
Row 32 (b): SC in each stitch, ch 1, turn (8 SC)
Row 33 (b): SC Decrease, SC in next 4, SC Decrease, ch 1, turn
Row 34-37 (b): SC in each stitch, ch 1, turn (6 SC)
Row 38 (b): SC Decrease, SC in next 2, SC Decrease, ch 1, turn
Row 39 (b): SC in each stitch, ch 1, turn, (4 SC)
Row 40 (b): SC Decrease over last 2, continue to SC around bib. when you get to color 1 at the bottom, you will want to switch to that color and continue to SC around the edge, switch back to color 2 when you reach the other side.
If making a button closure: Chain 8 when you get to the top of the first bib strap (to create a loop), join back to the top of bib strap and continue finishing your SC around the edge.
Sew button on other bib strap for chain loop to connect to.
OR you can sew on velcro pieces. The ones you see in the picture are stick-ons. I will have to find a better solution if I am going to wash it!
Monster Teeth: (make as many as you want!)
Chain 5, SC in second chain from hook, HDC in next, DC in next, TC in last. Fasten off leaving long tail and sew along white row.
Monster Eyes:
Large Eye:
with white…
Magic Ring, ch 1 and make 6 SC in ring, join, ch 1 (6 SC)
Round 2: 2 SC in each stitch around, join, ch 1 (12 SC)
Round 3: 2 SC in first stitch, SC in next, repeat around, join, ch 1 (18 SC)
Round 4: 2 SC in first, SC in next 2, repeat around, join (24 SC)
Fasten off leaving long tail to sew onto bib.
Use a black button for eye ball OR using black yarn Magic Ring, Make 6 SC in ring, pull tight and join. Sew onto large eye.
Small Eye:
with white…
Magic Ring, ch 1 and make 5 SC in ring, join, ch 1 (5 SC)
Round 2: 2 SC in each stitch around, join, ch 1 (10 SC)
Round 3: 2 SC in first stitch, SC in next, repeat around, join (15 SC)
Fasten off leaving long tail to sew onto bib.
Use a black button for eye ball OR using black yarn Magic Ring, Make 5 SC in ring, pull tight and join. Sew onto large eye.
Оригинал: http://www.repeatcrafterme.com/2014/08/crochet-monster-baby-bibs.html
комментарии: 0
понравилось!
вверх^
к полной версии
[показать] [показать] I am having a lot of fun with this new Lion Brand Modern Baby Yarn! The colors are bright, cheerful, and the perfect palette for these fun Crochet Monster Baby Bibs! The yarn is washable so bibs can be worn and washed. Although I would recommend using them for drools instead of foods :)
Materials:
– Lion Brand Modern Baby Yarn. I used Purple, Turquoise, Chartreuse, and Yellow. Keep in mind this is a light worsted weight yarn. You can purchase and read more about this yarn HERE. I did use a bit of worsted weight white and black yarn for face embellishments.
– Size H Crochet Hook
– Button or velcro depending how which closure you choose
– Tapestry needle
Abbreviations:
Magic Ring Tutorial
Ch = Chain
SC = Single Crochet
SC Decrease = Single Crochet Decrease
HDC = Half Double Crochet
DC = Double Crochet
TC = Triple Crochet
Bib Pattern:
Starting with color 1 (example: yellow)
Chain 21, SC in 2nd chain from hook and in each chain across, ch 1, turn (20 SC)
Row 2: 2 SC in first stitch, SC in next 18, 2 SC in last, ch 1, turn (22 SC)
Row 3: SC in each stitch, ch 1, turn (22 SC)
Row 4: 2 SC in first, SC in next 20, 2 SC in last, ch 1, turn (24 SC)
Row 5-10: SC in each stitch, ch 1, turn (24 SC)
change to white yarn
Row 10-11: SC in each stitch, ch 1, turn (24 SC)
change to color 2 (example: blue)
Row 12-29: SC in each stitch, ch 1, turn (24 SC)
Row 30 (a): SC in first 10, ch 1, turn (10 SC) – this is the start of your first bib strap
Row 31 (a): SC Decrease, SC in next 6, SC Decrease, ch 1, turn
Row 32 (a): SC in each stitch, ch 1, turn (8 SC)
Row 33 (a): SC Decrease, SC in next 4, SC Decrease, ch 1, turn
Row 34-37 (a): SC in each stitch, ch 1, turn (6 SC)
Row 38 (a): SC Decrease, SC in next 2, SC Decrease, ch 1, turn
Row 39 (a): SC in each stitch, ch 1, turn, (4 SC)
Row 40 (a): SC Decrease over last 2, fasten off leaving long tail.
Row 30 (b): Skip 4 SC after your first bib strap in Row 30. Attach yarn and SC over last 10, ch 1, turn (10 SC)
Row 31 (b): SC Decrease, SC in next 6, SC Decrease, ch 1, turn
Row 32 (b): SC in each stitch, ch 1, turn (8 SC)
Row 33 (b): SC Decrease, SC in next 4, SC Decrease, ch 1, turn
Row 34-37 (b): SC in each stitch, ch 1, turn (6 SC)
Row 38 (b): SC Decrease, SC in next 2, SC Decrease, ch 1, turn
Row 39 (b): SC in each stitch, ch 1, turn, (4 SC)
Row 40 (b): SC Decrease over last 2, continue to SC around bib. when you get to color 1 at the bottom, you will want to switch to that color and continue to SC around the edge, switch back to color 2 when you reach the other side.
If making a button closure: Chain 8 when you get to the top of the first bib strap (to create a loop), join back to the top of bib strap and continue finishing your SC around the edge.
Sew button on other bib strap for chain loop to connect to.
OR you can sew on velcro pieces. The ones you see in the picture are stick-ons. I will have to find a better solution if I am going to wash it!
Monster Teeth: (make as many as you want!)
Chain 5, SC in second chain from hook, HDC in next, DC in next, TC in last. Fasten off leaving long tail and sew along white row.
Monster Eyes:
Large Eye:
with white…
Magic Ring, ch 1 and make 6 SC in ring, join, ch 1 (6 SC)
Round 2: 2 SC in each stitch around, join, ch 1 (12 SC)
Round 3: 2 SC in first stitch, SC in next, repeat around, join, ch 1 (18 SC)
Round 4: 2 SC in first, SC in next 2, repeat around, join (24 SC)
Fasten off leaving long tail to sew onto bib.
Use a black button for eye ball OR using black yarn Magic Ring, Make 6 SC in ring, pull tight and join. Sew onto large eye.
Small Eye:
with white…
Magic Ring, ch 1 and make 5 SC in ring, join, ch 1 (5 SC)
Round 2: 2 SC in each stitch around, join, ch 1 (10 SC)
Round 3: 2 SC in first stitch, SC in next, repeat around, join (15 SC)
Fasten off leaving long tail to sew onto bib.
Use a black button for eye ball OR using black yarn Magic Ring, Make 5 SC in ring, pull tight and join. Sew onto large eye.
Оригинал: http://www.repeatcrafterme.com/2014/08/crochet-monster-baby-bibs.html
Аппликация "Радуга с тучкой"
14-03-2016 14:23
[показать]
[показать]
My son was invited to a Rainbow themed birthday party yesterday and as I was wrapping the gift I quickly realized I didn’t have a card. No problem for this crafter! A crochet rainbow appliqué was easy to make and made for a pretty embellishment for the top of a plain note card!
Materials:
– Worsted weight yarn in red, orange, yellow, green, blue, purple and white
– Size H or G Crochet Hook
– Tapestry Needle
Abbreviations:
Magic Ring Tutorial
SC = Single Crochet
HDC = Half Double Crochet
Rainbow Pattern:
starting with purple yarn
Magic Ring, chain 1 and make 8 SC inside ring. Pull tight but do not join. You should have a half circle.
attach blue yarn, chain 1, turn
Row 2: SC in each stitch, (8 SC)
attach green yarn, chain 1, turn
Row 3: 2 SC in first stitch, SC in next, repeat until end of row (12 SC)
attach yellow yarn, chain 1, turn
Row 4: SC in each a stitch (12 SC)
attach orange yarn, chain 1, turn
Row 5: 2 SC in first stitch, SC in next (18 SC)
attach red yarn, chain 1, tun
Row 6: SC in each stitch across (18 SC)
Fasten off and weave in all ends.
Cloud Pattern:
Chain 13, 4 HDC in 3rd chain from hook, *skip a stitch and join to next stitch with a slip stitch, skip a stitch and make 4 HDC in the next stitch, continue from * all the way down chain. You should have 3 cloud humps. Make 4 HDC in the last stitch, join to stitch on the other side of chain. Make 4 HDC in the next stitch, skip a stitch and join with a slip stitch to next stitch, continue same pattern along the other side of chain to make another 3 cloud humps. Make 4 HDC in the last chain to complete your clouds! Fasten off leaving a long tail to sew onto edge of rainbow.
Оригинал: http://www.repeatcrafterme.com/2014/06/crochet-rainbow-applique.html
комментарии: 0
понравилось!
вверх^
к полной версии
[показать] [показать] My son was invited to a Rainbow themed birthday party yesterday and as I was wrapping the gift I quickly realized I didn’t have a card. No problem for this crafter! A crochet rainbow appliqué was easy to make and made for a pretty embellishment for the top of a plain note card!
Materials:
– Worsted weight yarn in red, orange, yellow, green, blue, purple and white
– Size H or G Crochet Hook
– Tapestry Needle
Abbreviations:
Magic Ring Tutorial
SC = Single Crochet
HDC = Half Double Crochet
Rainbow Pattern:
starting with purple yarn
Magic Ring, chain 1 and make 8 SC inside ring. Pull tight but do not join. You should have a half circle.
attach blue yarn, chain 1, turn
Row 2: SC in each stitch, (8 SC)
attach green yarn, chain 1, turn
Row 3: 2 SC in first stitch, SC in next, repeat until end of row (12 SC)
attach yellow yarn, chain 1, turn
Row 4: SC in each a stitch (12 SC)
attach orange yarn, chain 1, turn
Row 5: 2 SC in first stitch, SC in next (18 SC)
attach red yarn, chain 1, tun
Row 6: SC in each stitch across (18 SC)
Fasten off and weave in all ends.
Cloud Pattern:
Chain 13, 4 HDC in 3rd chain from hook, *skip a stitch and join to next stitch with a slip stitch, skip a stitch and make 4 HDC in the next stitch, continue from * all the way down chain. You should have 3 cloud humps. Make 4 HDC in the last stitch, join to stitch on the other side of chain. Make 4 HDC in the next stitch, skip a stitch and join with a slip stitch to next stitch, continue same pattern along the other side of chain to make another 3 cloud humps. Make 4 HDC in the last chain to complete your clouds! Fasten off leaving a long tail to sew onto edge of rainbow.
Оригинал: http://www.repeatcrafterme.com/2014/06/crochet-rainbow-applique.html
Zombie doll
14-03-2016 14:20
[показать]
[показать]
[показать]
If you are a fan of The Walking Dead TV show or you just happen to like zombies then I think you might like this crocheted zombie! Unlike typical zombies who are mindless, reanimated corpses with a hunger for human flesh, this little guy is very friendly and likes to snuggle :) Mark your calendars for Feb. 9, 2014 for the Season 5 Premiere of The Walking Dead on AMC!
Materials:
-Green worsted weight yarn (I used Lion Brand Vanna’s Choice Dusty Green), you will also need a little bit of white, black and red yarn as well.
-Size G crochet hook
-Poly-fil stuffing
-Stitch marker
-Tapestry needle
-One small safety eye or button
Abbreviations:
Magic Ring Tutorial
SC = Single Crochet
SC Decrease = Single Crochet Decrease
HDC = Half Double Crochet
DC = Double Crochet
Finished Doll measures 6.5 x 6.5 (from head to toe and arm to arm)
Zombie Head/Body: Make 2
Chain 13, SC in second chain from hook and the rest of the way down chain, chain 1, turn (12 SC)
Row 2-14: SC in each stitch across, chain 1, turn (12 SC)
Fasten off leaving a long tail on one of the pieces.
After you have attached the eyes (pattern below) and mouth (stitch on with tapestry needle and black yarn) to one of the head pieces, sew the two pieces together. Stuff lightly with poly-fil before you close it up.
Surface slip stitch (tutorial HERE) the red blood on the mouth if you want. Do this before you sew the two head pieces together as well.
Zombie Eyes:
Large Eye:
Magic ring, chain 1 and make 5 SC in ring, join, chain 1
Round 2: 2 SC in each stitch around, join, chain 1 (10 SC)
Round 3: S SC in first, SC in next stitch, repeat around, join (15 SC)
Fasten off leaving long tail to sew on to head.
Small Eye:
Magic ring, chain 1 and make 6 SC in ring, join, chain 1
Round 2: 2 SC in each stitch around, join (12 SC)
Fasten off leaving long tail to sew on to head.
With your tapestry needle, sew both eyes onto one piece of the head. Use a small button or a safety eye in the middle of the bigger eye. Make and “X” with black yarn in the smaller eye.
Zombie Arms: Make 2
Magic ring, make 6 SC in ring, do not join, continue to SC in rounds
Round 2: 2 SC in first stitch, SC in next 2, repeat around (8 SC)
Round 3-6: SC in each stitch around (8 SC)
(feel free to make arms as long or short as you like)
Fasten off, stuff lightly with poly-fil and sew shut with tapestry needle.
Leave a long tail so you can sew it onto the body.
Zombie Legs: Make 2
Magic ring, 8 SC in ring, do not join, continue to SC in rounds
Round 2: 2 SC in first stitch, SC in next, repeat around (12 SC)
Round 3-6: SC in each stitch around (12 SC)
Round 7: SC Decrease, SC in next, repeat around (8 SC)
Round 8-9: SC in each stitch around (8 SC)
(feel free to make legs longer if you’d like)
Fasten off, stuff lightly with poly-fil and sew shut with tapestry needle.
Leave a long tail so you can sew it onto the body.
Don’t forget to tie on a couple strands of black yarn at the top for some spiky hair!
Оригинал: http://www.repeatcrafterme.com/2014/01/friendly-crochet-zombie-doll.html
комментарии: 0
понравилось!
вверх^
к полной версии
[показать] [показать] [показать] If you are a fan of The Walking Dead TV show or you just happen to like zombies then I think you might like this crocheted zombie! Unlike typical zombies who are mindless, reanimated corpses with a hunger for human flesh, this little guy is very friendly and likes to snuggle :) Mark your calendars for Feb. 9, 2014 for the Season 5 Premiere of The Walking Dead on AMC!
Materials:
-Green worsted weight yarn (I used Lion Brand Vanna’s Choice Dusty Green), you will also need a little bit of white, black and red yarn as well.
-Size G crochet hook
-Poly-fil stuffing
-Stitch marker
-Tapestry needle
-One small safety eye or button
Abbreviations:
Magic Ring Tutorial
SC = Single Crochet
SC Decrease = Single Crochet Decrease
HDC = Half Double Crochet
DC = Double Crochet
Finished Doll measures 6.5 x 6.5 (from head to toe and arm to arm)
Zombie Head/Body: Make 2
Chain 13, SC in second chain from hook and the rest of the way down chain, chain 1, turn (12 SC)
Row 2-14: SC in each stitch across, chain 1, turn (12 SC)
Fasten off leaving a long tail on one of the pieces.
After you have attached the eyes (pattern below) and mouth (stitch on with tapestry needle and black yarn) to one of the head pieces, sew the two pieces together. Stuff lightly with poly-fil before you close it up.
Surface slip stitch (tutorial HERE) the red blood on the mouth if you want. Do this before you sew the two head pieces together as well.
Zombie Eyes:
Large Eye:
Magic ring, chain 1 and make 5 SC in ring, join, chain 1
Round 2: 2 SC in each stitch around, join, chain 1 (10 SC)
Round 3: S SC in first, SC in next stitch, repeat around, join (15 SC)
Fasten off leaving long tail to sew on to head.
Small Eye:
Magic ring, chain 1 and make 6 SC in ring, join, chain 1
Round 2: 2 SC in each stitch around, join (12 SC)
Fasten off leaving long tail to sew on to head.
With your tapestry needle, sew both eyes onto one piece of the head. Use a small button or a safety eye in the middle of the bigger eye. Make and “X” with black yarn in the smaller eye.
Zombie Arms: Make 2
Magic ring, make 6 SC in ring, do not join, continue to SC in rounds
Round 2: 2 SC in first stitch, SC in next 2, repeat around (8 SC)
Round 3-6: SC in each stitch around (8 SC)
(feel free to make arms as long or short as you like)
Fasten off, stuff lightly with poly-fil and sew shut with tapestry needle.
Leave a long tail so you can sew it onto the body.
Zombie Legs: Make 2
Magic ring, 8 SC in ring, do not join, continue to SC in rounds
Round 2: 2 SC in first stitch, SC in next, repeat around (12 SC)
Round 3-6: SC in each stitch around (12 SC)
Round 7: SC Decrease, SC in next, repeat around (8 SC)
Round 8-9: SC in each stitch around (8 SC)
(feel free to make legs longer if you’d like)
Fasten off, stuff lightly with poly-fil and sew shut with tapestry needle.
Leave a long tail so you can sew it onto the body.
Don’t forget to tie on a couple strands of black yarn at the top for some spiky hair!
Оригинал: http://www.repeatcrafterme.com/2014/01/friendly-crochet-zombie-doll.html
Шапка "Божья коровка"
14-03-2016 14:18
[показать]
[показать]
[показать]
Источник и описание: http://www.repeatcrafterme.com/2013/12/crochet-ladybug-hat-pattern.html
комментарии: 0
понравилось!
вверх^
к полной версии
[показать] [показать] [показать] Источник и описание: http://www.repeatcrafterme.com/2013/12/crochet-ladybug-hat-pattern.html
Плед из мотивов "Пироженка"
14-03-2016 14:16
[показать]
[показать]
Оригинал и частичное описание: http://www.repeatcrafterme.com/2015/05/crochet-cupcake-pixel-blanket.html
комментарии: 0
понравилось!
вверх^
к полной версии
[показать] [показать] Оригинал и частичное описание: http://www.repeatcrafterme.com/2015/05/crochet-cupcake-pixel-blanket.html
Плед Сова
14-03-2016 14:08
[показать]
[показать]
Описание и источник: http://www.repeatcrafterme.com/2015/11/crochet-owl...nket-with-lion-brand-yarn.html
комментарии: 0
понравилось!
вверх^
к полной версии
[показать] [показать] Описание и источник: http://www.repeatcrafterme.com/2015/11/crochet-owl...nket-with-lion-brand-yarn.html