Продолжение 2
05-05-2012 11:58
к комментариям - к полной версии
- понравилось!
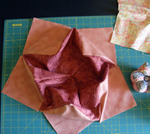
11) Add the remaining 3 side squares in the same manner, as indicated by the arrows above.
 [475x425]
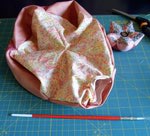
The result should look like this (above).
 [475x338]
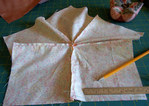
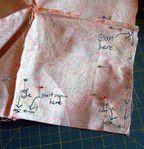
12) Find your top piece, and place it right-side-down on your table in the same position as I have. On the bottom right square, mark a line 1/4″ from the bottom edge, that runs from the left dot, and is 1″ long. Do the same on the other side, from the right dot. These are sewing lines, and the space in between is a gap you will leave for turning right-side-out, and for stuffing the cushion. The gap will be 3 1/2″ wide – if you think your hand will need a wider gap, mark slightly shorter lines.
 [475x621]
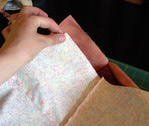
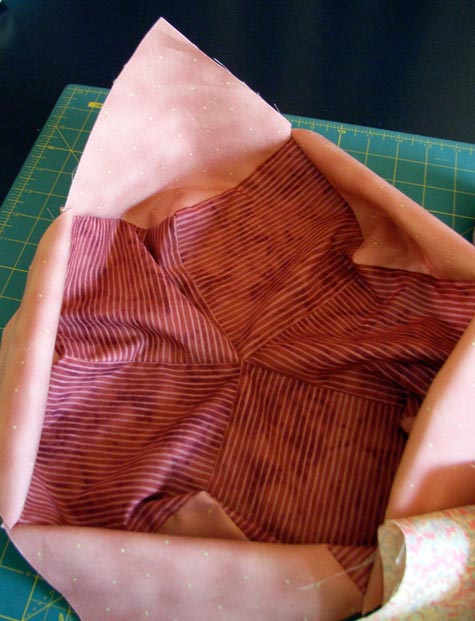
13) Joining the Top to the Bottom. Place the Bottom/Sides component of the cushion on your table, with the right side in, as shown above.
 [475x402]
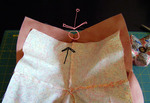
14) With the top part right-side-in, place it on top, so that the “points” of the squares meet as shown above.
 [475x327]
This will mean that the seam between the squares on the top piece is meeting the intersection of three squares on the bottom pieces.
 [475x564]
Pin the top and bottom/sides pieces all the way around, like so
 [475x383]
15) Sew around the top in 5 sections. Follow the photo above for each section, back stitching at the start and end of each square segment.
 [475x492]
When you sew the segment that has the gap-for-turning marked on it, follow the picture above. You will be sewing two separate sections with 4 lots of back stitching.
 [475x432]
вверх^
к полной версии
понравилось!
в evernote
[475x432]
вверх^
к полной версии
понравилось!
в evernote
11) Add the remaining 3 side squares in the same manner, as indicated by the arrows above.
[475x425]The result should look like this (above).
[475x338]12) Find your top piece, and place it right-side-down on your table in the same position as I have. On the bottom right square, mark a line 1/4″ from the bottom edge, that runs from the left dot, and is 1″ long. Do the same on the other side, from the right dot. These are sewing lines, and the space in between is a gap you will leave for turning right-side-out, and for stuffing the cushion. The gap will be 3 1/2″ wide – if you think your hand will need a wider gap, mark slightly shorter lines.
 [475x621]
13) Joining the Top to the Bottom. Place the Bottom/Sides component of the cushion on your table, with the right side in, as shown above.
[475x402]14) With the top part right-side-in, place it on top, so that the “points” of the squares meet as shown above.
[475x327]This will mean that the seam between the squares on the top piece is meeting the intersection of three squares on the bottom pieces.
[475x564]Pin the top and bottom/sides pieces all the way around, like so
[475x383]15) Sew around the top in 5 sections. Follow the photo above for each section, back stitching at the start and end of each square segment.
[475x492]When you sew the segment that has the gap-for-turning marked on it, follow the picture above. You will be sewing two separate sections with 4 lots of back stitching.
[475x432]
Вы сейчас не можете прокомментировать это сообщение.
Дневник Продолжение 2 | Joardana - Дневник Trois_couleurs_de_la_vie |
Лента друзей Joardana
/ Полная версия
Добавить в друзья
Страницы:
раньше»