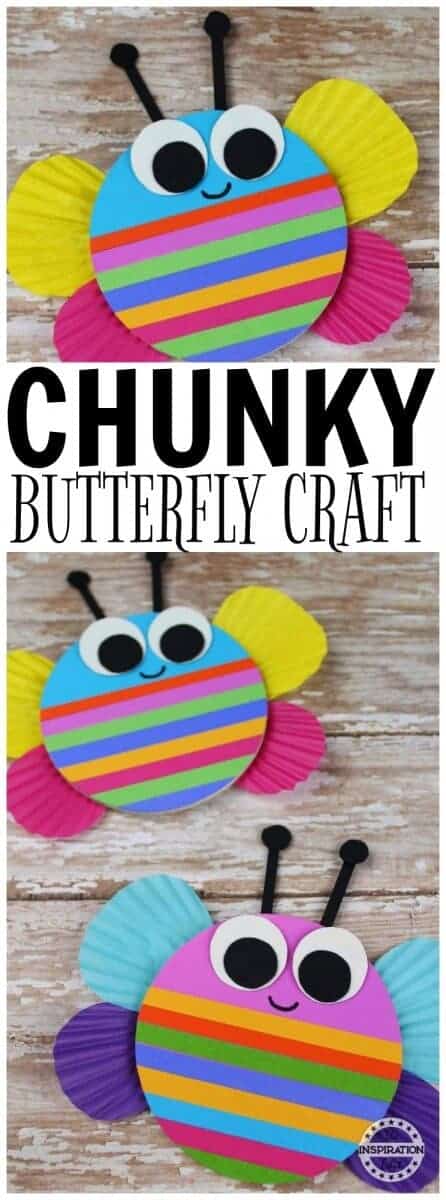
Chunky Rainbow Butterfly Craft For Kids
Today we have a fantastic cute and fun chunky rainbow butterfly craft which is perfect to make at home with the little ones or in the preschool setting with kids.

I love rainbows and I love butterflies so this is the perfect bright and colourful craft to try out. You can use paper eyes or googly eyes the choice is yours. Enjoy.
 /www.theinspirationedit.com/wp-content/uploads/2018/05/IMG_2227-2-735x1103.jpg" target="_blank">https://www.theinspirationedit.com/wp-content/uploads/2018/05/IMG_2227-2-735x1103.jpg 735w" width="800" />
*I use affiliate links in this post. If you buy anything from my links I will earn a small commission*
What You Will Need For These Butterfly Crafts
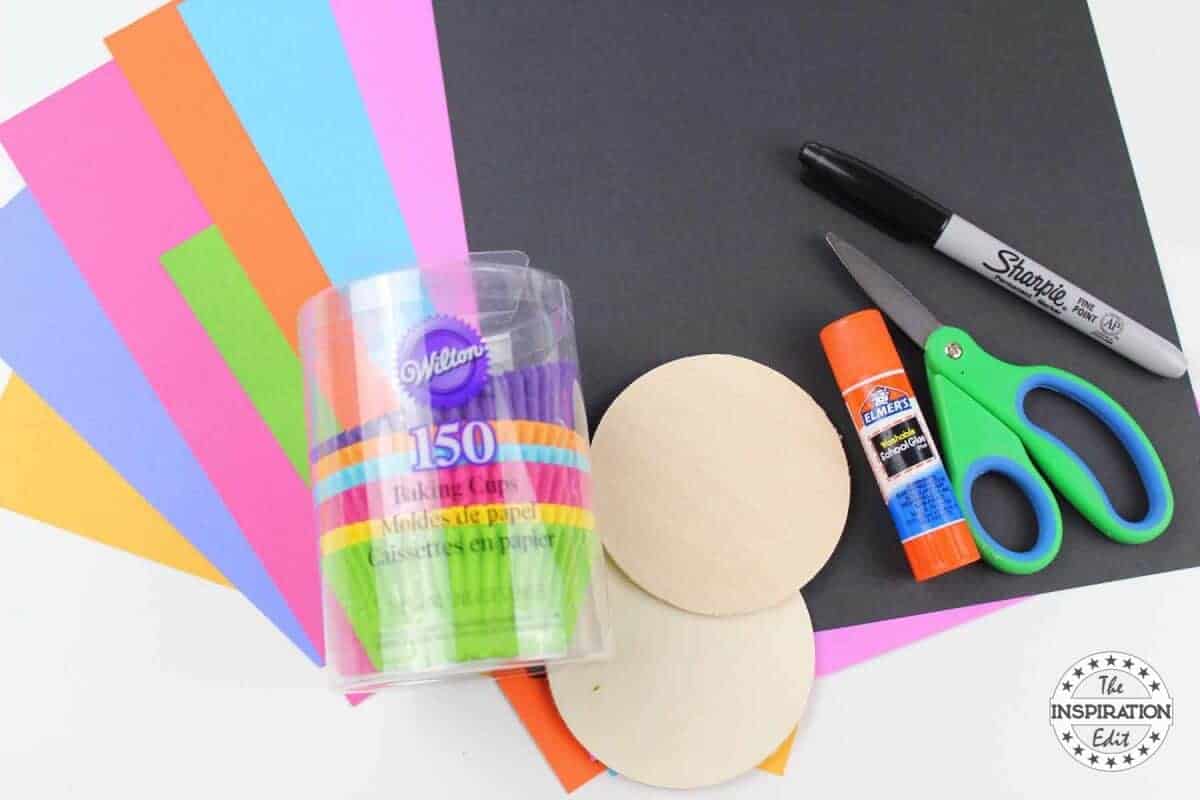 /www.theinspirationedit.com/wp-content/uploads/2018/05/IMG_2119.jpg" target="_blank">https://www.theinspirationedit.com/wp-content/uploads/2018/05/IMG_2119.jpg 1200w, https://www.theinspirationedit.com/wp-content/uploads/2018/05/IMG_2119-735x490.jpg 735w" width="800" />
Glue the wooden circles onto coloured cardstock. Cut the excess paper off.
 /www.theinspirationedit.com/wp-content/uploads/2018/05/IMG_2120-800x533.jpg" target="_blank">https://www.theinspirationedit.com/wp-content/uploads/2018/05/IMG_2120-800x533.jpg
 /www.theinspirationedit.com/wp-content/uploads/2018/05/IMG_2121-800x533.jpg" target="_blank">https://www.theinspirationedit.com/wp-content/uploads/2018/05/IMG_2121-800x533.jpg
Cut thin strips of coloured cardstock.
 /www.theinspirationedit.com/wp-content/uploads/2018/05/IMG_2122.jpg" target="_blank">https://www.theinspirationedit.com/wp-content/uploads/2018/05/IMG_2122.jpg 1200w, https://www.theinspirationedit.com/wp-content/uploads/2018/05/IMG_2122-735x490.jpg 735w" width="800" />
Glue the strips of coloured cardstock onto the wood circles.
Leave at least an inch of space at the top of the circle. Cut excess paper off.
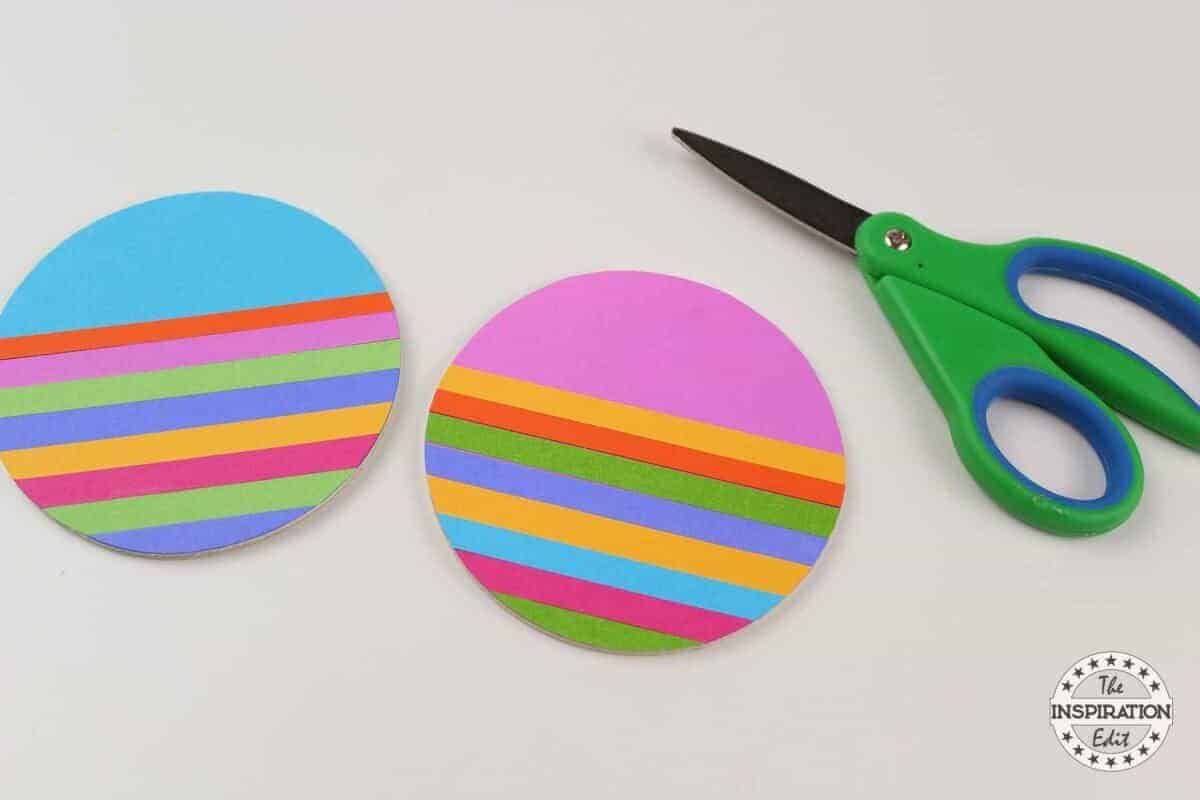 /www.theinspirationedit.com/wp-content/uploads/2018/05/IMG_2123.jpg" target="_blank">https://www.theinspirationedit.com/wp-content/uploads/2018/05/IMG_2123.jpg 1200w, https://www.theinspirationedit.com/wp-content/uploads/2018/05/IMG_2123-735x490.jpg 735w" width="800" />
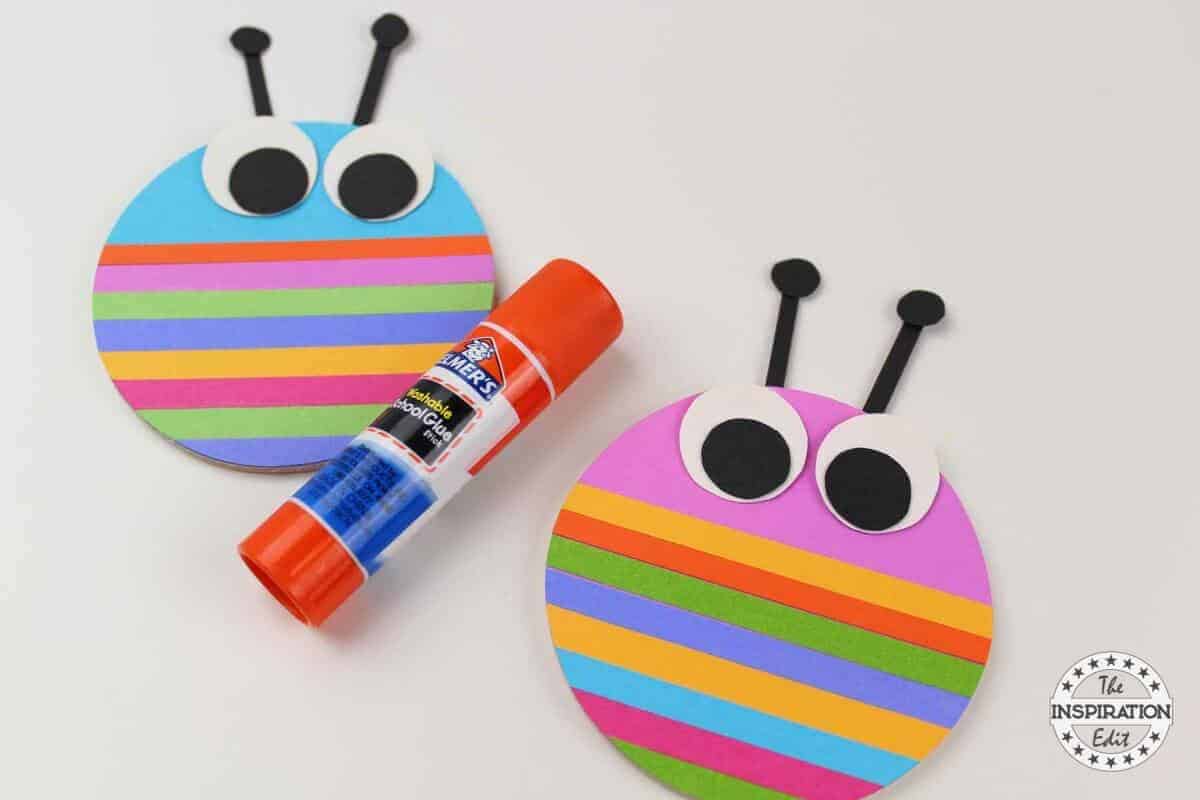
Cut 2 white circles from cardstock and 2 smaller black circles.
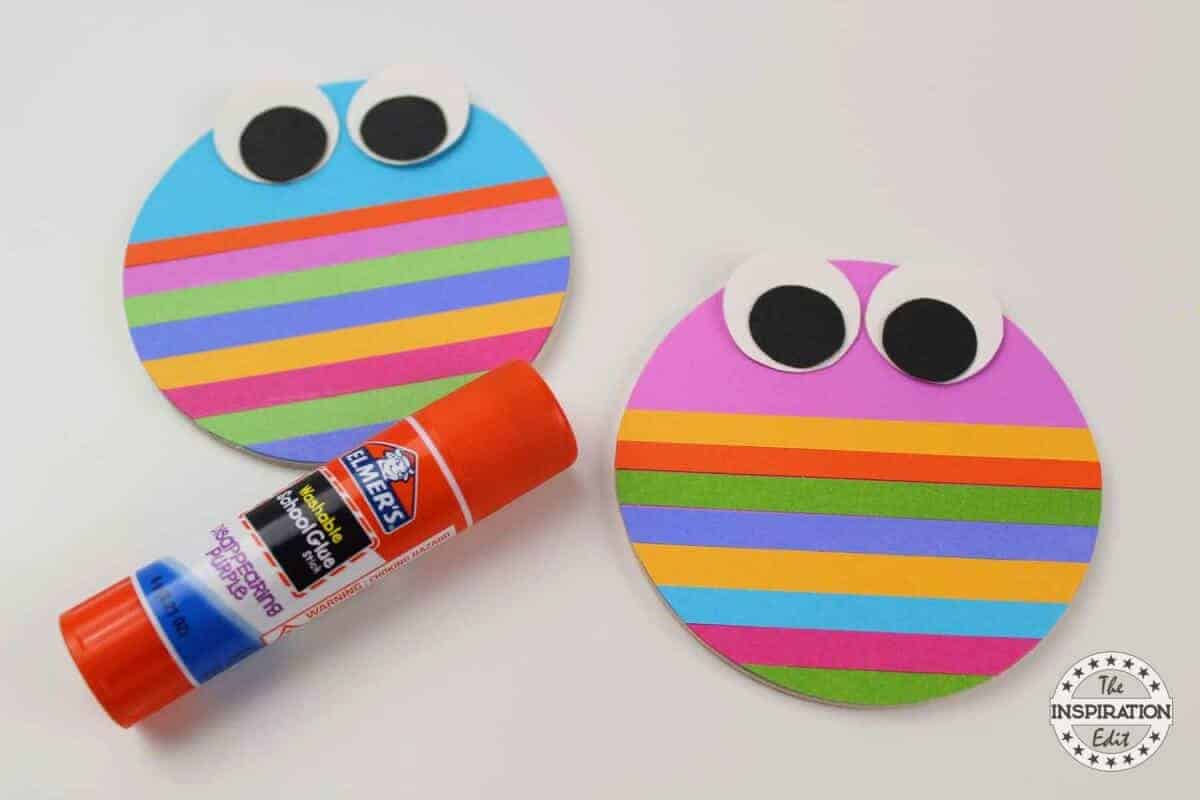 /www.theinspirationedit.com/wp-content/uploads/2018/05/IMG_2124.jpg" target="_blank">https://www.theinspirationedit.com/wp-content/uploads/2018/05/IMG_2124.jpg 1200w, https://www.theinspirationedit.com/wp-content/uploads/2018/05/IMG_2124-735x490.jpg 735w" width="800" />
Glue the eyes together and then glue the eyes onto the top of the wood circles. Glue small strips of scrapbook paper onto the top of the butterflies.
Use a hole punch to make 2 small black circles and glue those at the top of the strips.
 /www.theinspirationedit.com/wp-content/uploads/2018/05/IMG_2125.jpg" target="_blank">https://www.theinspirationedit.com/wp-content/uploads/2018/05/IMG_2125.jpg 1200w, https://www.theinspirationedit.com/wp-content/uploads/2018/05/IMG_2125-735x490.jpg 735w" width="800" />
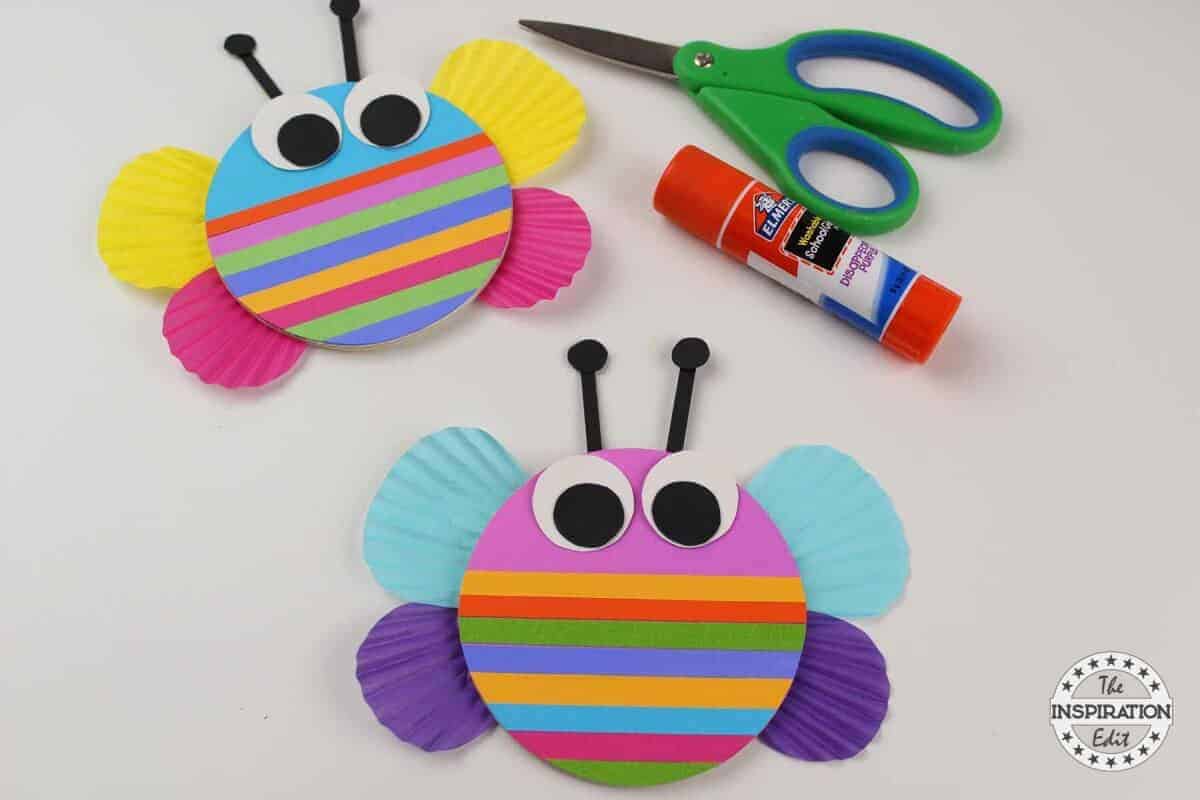
Fold a cupcake liner in half and cut out a large wing.
Repeat this step and cut out a smaller wing.
 /www.theinspirationedit.com/wp-content/uploads/2018/05/IMG_2126.jpg" target="_blank">https://www.theinspirationedit.com/wp-content/uploads/2018/05/IMG_2126.jpg 1200w, https://www.theinspirationedit.com/wp-content/uploads/2018/05/IMG_2126-735x490.jpg 735w" width="800" />
Glue the wings onto the back of the wood circles.
 /www.theinspirationedit.com/wp-content/uploads/2018/05/IMG_2127.jpg" target="_blank">https://www.theinspirationedit.com/wp-content/uploads/2018/05/IMG_2127.jpg 1200w, https://www.theinspirationedit.com/wp-content/uploads/2018/05/IMG_2127-735x490.jpg 735w" width="800" />
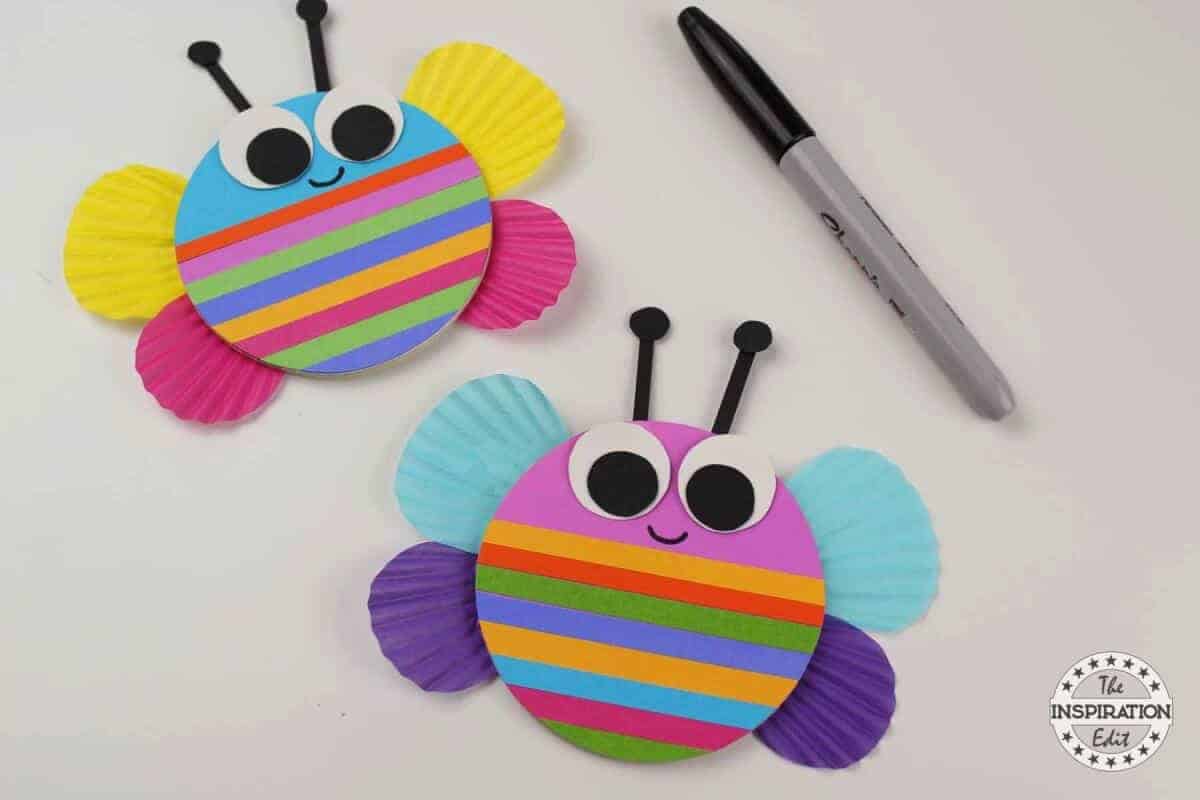
Use a black marker to add a smile to your butterflies.
 /www.theinspirationedit.com/wp-content/uploads/2018/05/IMG_2237-735x1103.jpg" target="_blank">https://www.theinspirationedit.com/wp-content/uploads/2018/05/IMG_2237-735x1103.jpg
 /www.theinspirationedit.com/wp-content/uploads/2018/05/IMG_2236-735x1103.jpg" target="_blank">https://www.theinspirationedit.com/wp-content/uploads/2018/05/IMG_2236-735x1103.jpg
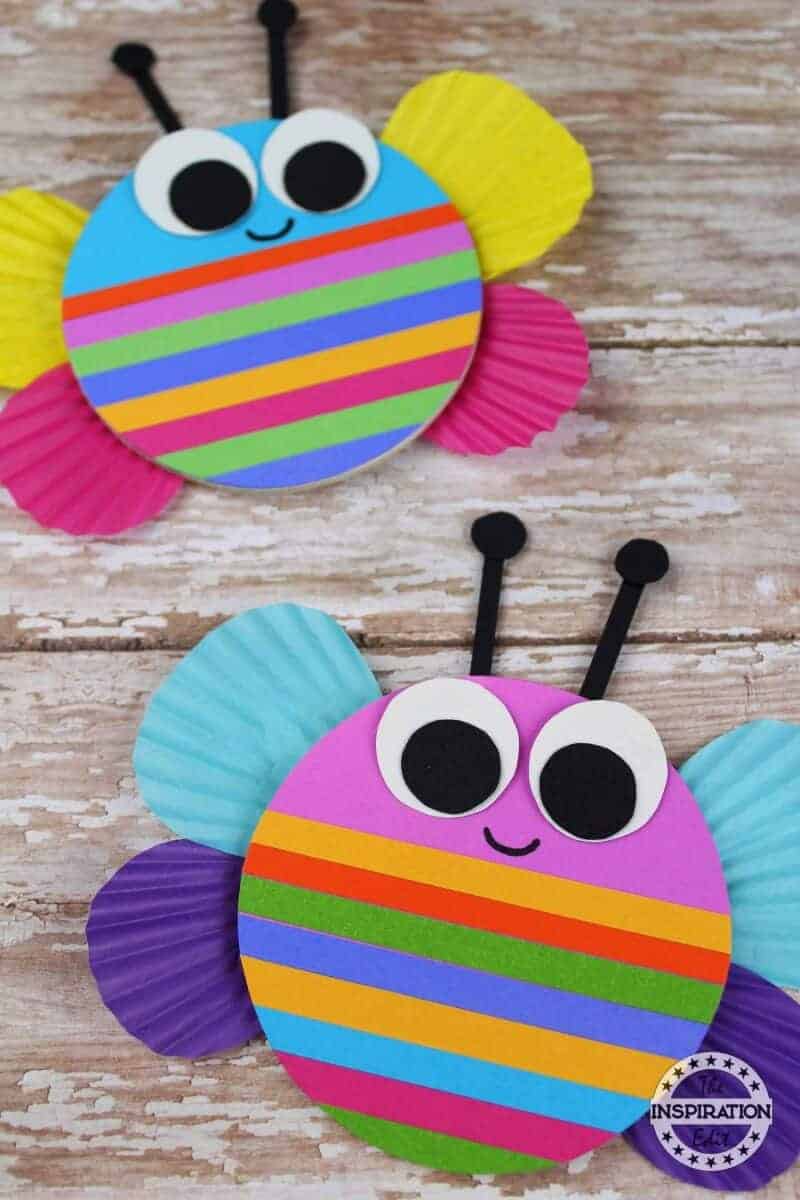
Your butterflies are finished!
 /www.theinspirationedit.com/wp-content/uploads/2018/05/IMG_2234-2-735x1103.jpg" target="_blank">https://www.theinspirationedit.com/wp-content/uploads/2018/05/IMG_2234-2-735x1103.jpg
Enjoy!
 /www.theinspirationedit.com/wp-content/uploads/2018/05/IMG_2230-2-735x1103.jpg" target="_blank">https://www.theinspirationedit.com/wp-content/uploads/2018/05/IMG_2230-2-735x1103.jpg 735w" width="800" />
Related Products
 Sharpie Permanent Marker, Fine Point, Black, Pack of 5

 Natural Unfinished Round Wood Circle Cutout 3 Inch – Bag of 25
 Wilton 300-Count Rainbow Bright Standard Baking Cups, 415-2179