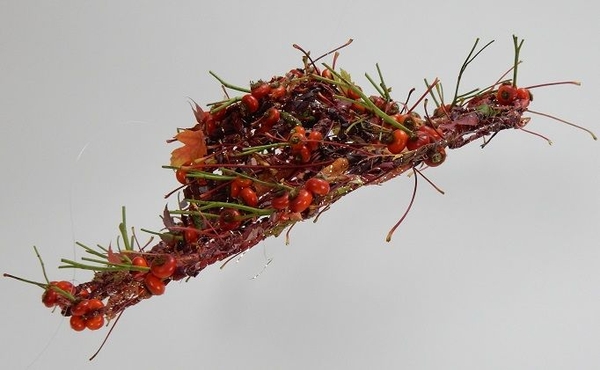
A long and pretty fall garland

Roll an autumn leaf into a tube

Place another leaf over the first and wrap the roll

Place another leaf over the first two leaves and wrap. I let the stems dangle, all pointing in the same direction up the length of my garland
To secure the garland I used copper wire. I find that most wires cut into the leaves so I use a very thin wire... that I unwrap from a copper pot scrubber. It is really a great wire to use in floral crafts and inexpensive enough to use generously. See the Tutorial below for instructions on how to unravel and roll wire from a pot scrubber

Place about a centimeter of wire into the leave tube and start to wrap the leaves tightly with the wire, pinching the wire in the tube to secure.
Wrap the leaves quite tightly to make sure it doesn't come undone when the leaf shrivels and dries.

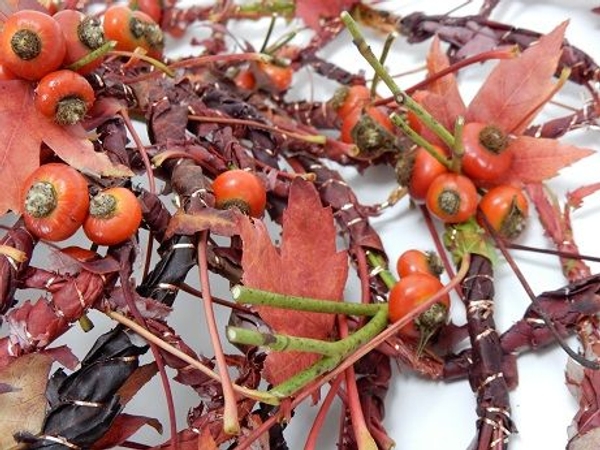
As you add leaves add a few rose hips into the garland. Do not cut the thin stems of the rose hips short as this adds to the strength of the garland. Cover the stems with an Autumn leaf and secure with wrapping wire

Add a few autumn leaves to create a pretty garland

Cover the stems with another leaf. Let the stem point up and secure with wire

Keep adding leaves to create a long garland.

... and add rose hips to decorate

The leaf garland is quite strong and robust. You can continue to add leaves to any length you require

Continue to add leaves, rolling the one over the one before and wrap it with wire. At the end of the garland knot the wire on itself and cut the wire short.

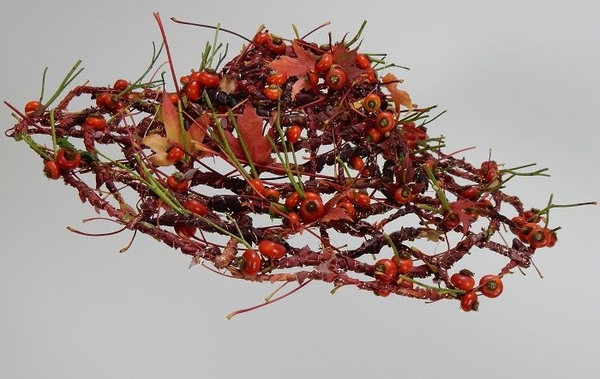
This is the basic pattern used to weave a hat. For my design I made the weave loose to show off the autumn leaf garland I used. (See the Tutorial below for instructions on how to make the garland)
You can also weave the hat from grass or raffia and close the weave tightly for a more practical hat.
It is actually very easy to weave. If you get the first strand (or garland) right it is just basic weaving until the hat is the size you need. See the Tutorial below for more information about basic weaving patterns

You will need 8 short garlands (to make it easier to follow I refer to them as strands) and one long one ( to make it easier to follow I refer to this as the garland) to weave with. Work on a flat surface to get the weave started. We start at the ball of the hat. Work in pairs and lay the first two pieces on your working surface.

Cross the next two strands over the first two

Weave in two more pairs of strands. The second pair was over the first but under the pair below. The pair next to the first goes under and the pair below over.

Wiggle the strands to close the weave
This is the only bit that is slightly tricky:

Start weaving in the long garland. Place the garland parallel to the four horizontal stands. The end of the garland should be as long as the horizontal strands on the left side so that it becomes a fifth horizontal strand on that side.

Bend the long side of the garland down to start the weave
Weave in a spiral. First weave the long garland through the middle garlands in couples.

Weave the garland over the first two and under the next two strands

Continue the weaving pattern around the strands. Include the new strand that was created with the garland. Move the rose hip and leaf pieces to show nicely as you go along

Weave another spiral

Be careful not to twist the garland and to keep the rose hips and leaves from damaging

Bend all the strands open to radiate out

Space out the strands to all the sides

Bend the strands up

Start weaving the garland to create the bowl of the hat

Weave the garland over or under every strand following the basic weaving pattern.

Be very careful not to damage the leaves nor the rose hips

Weave around and around creating the bowl of the hat

When you have a neat bowl, bend the strands down and straight out to create the brim
