котенок из флиса в коробке
18-09-2013 01:22
к комментариям - к полной версии
- понравилось!
 [показать]
[показать]STEP ONE: Using a pencil, trace the pattern onto your tissue paper. Cut it out, leaving about an inch around the perimeter.
STEP TWO: Cut your fleece.
Important: Be sure the stretch of your fleece runs left to right!
You will need:
2 light blue rectangles the same size as your tissue paper pattern
1 white rectangle large enough to cover the eyes and nose of your pattern1 black rectangle large enough to cover the pupils and nose of your pattern
[показать]STEP THREE: Layer as follows:
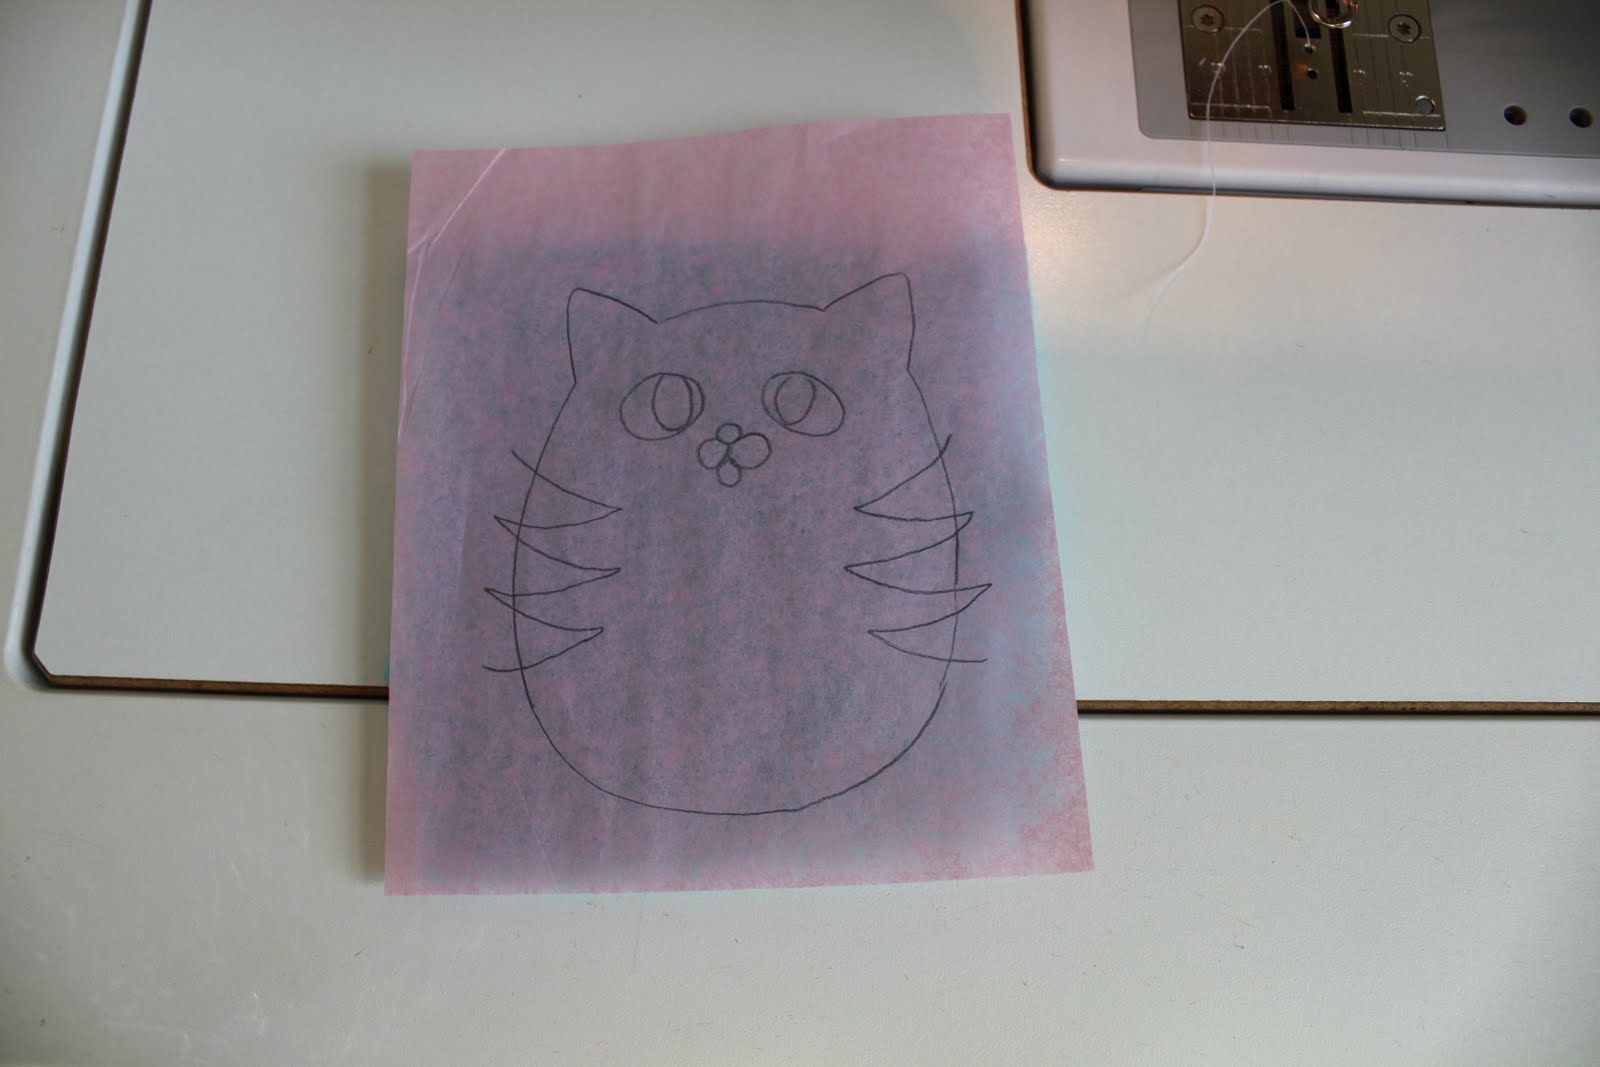
Place one light blue rectangle right side DOWN. Place your tissue paper on top. Lift it up and place your white rectangle over the area where the eyes and nose will be, then place it back down so the white is on the bottom and the tissue paper is on top.
[показать]Like this!
[показать]STEP FOUR: Sew around the eyes and the cheeks/chin. I use my free-motion foot for this, but if you don't have one you can do the needle-down-lift-the-foot-and-turn maneuver.
[показать]Here's what it will look like on the other side.
[показать]STEP FIVE: Using your scissors, carefully trim the excess fleece away from around your stitching lines.
[показать]STEP SIX: Layer your black rectangle over the eyes and nose.
[показать]Flip everything over to the pattern side and sew around the pupils and nose.
[показать]Trim away excess.
[показать]STEP SEVEN: Layer your dark blue rectangle over the stripe area of the light blue rectangle. Again, be sure the stretch of your fleece runs left to right.
[показать]STEP EIGHT: Flip over and sew the stripe lines. Trim away excess fleece.
[показать]STEP NINE: Layer your second light blue rectangle on top of your kitten's face, right sides together.
[показать]Flip over and sew on the line, leaving about two inches at the bottom open for turning and stuffing.
[показать]STEP TEN: Tear away as much of the tissue paper as you care to -- it doesn't matter if it's perfect because it will all hide inside!
[показать]STEP ELEVEN: Trim near your stitching line all the way around except at the bottom opening, as shown.
[показать]STEP TWELVE: Turn your kitten right side out, carefully poking the ears out with a blunt object. Stuff her!
[показать]STEP THIRTEEN: Carefully poke the seam allowances of the opening inside and hand sew the hole closed. (Look what happened to my apparently very weak needle! I was pulling it straight, and -- pow!)
[показать]Voila! A cute little kitten!
You can definitely get creative with colors. Look at these little special-request kittens I made for my nieces and nephew:
[показать]It's definitely extra work to give them colored eyes and pink noses, but they just turn out so cute that way!
[показать]The box pattern is on page 2 of the pattern file. I tried a few kinds of cardboard, but the cardboard from a pizza box was definitely the best scale.
Best of luck with your kittens!
Please pretty please post photos to my flickr group if you make one! :o)
вверх^
к полной версии
понравилось!
в evernote
Tiny Kitten in a Box
 [показать]
What you need:
~ fleece scraps -- black, white, and light and dark of a color of your choosing -- I will call it blue throughout the tutorial
~ fleece scraps -- black, white, and light and dark of a color of your choosing -- I will call it blue throughout the tutorial
~ thread (I used white for everything!)
~ tissue paper
~ pencil
~ finely pointed scissors
~ free-motion presser foot (optional but highly recommended!)
~ small amount of fiberfill stuffing
~ pattern -- click HERE! (pg 1 = cat, pg 2 = box)
Please read through the entire tutorial before starting -- the cutting directions will make SO much more sense that way!
~ free-motion presser foot (optional but highly recommended!)
~ small amount of fiberfill stuffing
~ pattern -- click HERE! (pg 1 = cat, pg 2 = box)
Please read through the entire tutorial before starting -- the cutting directions will make SO much more sense that way!
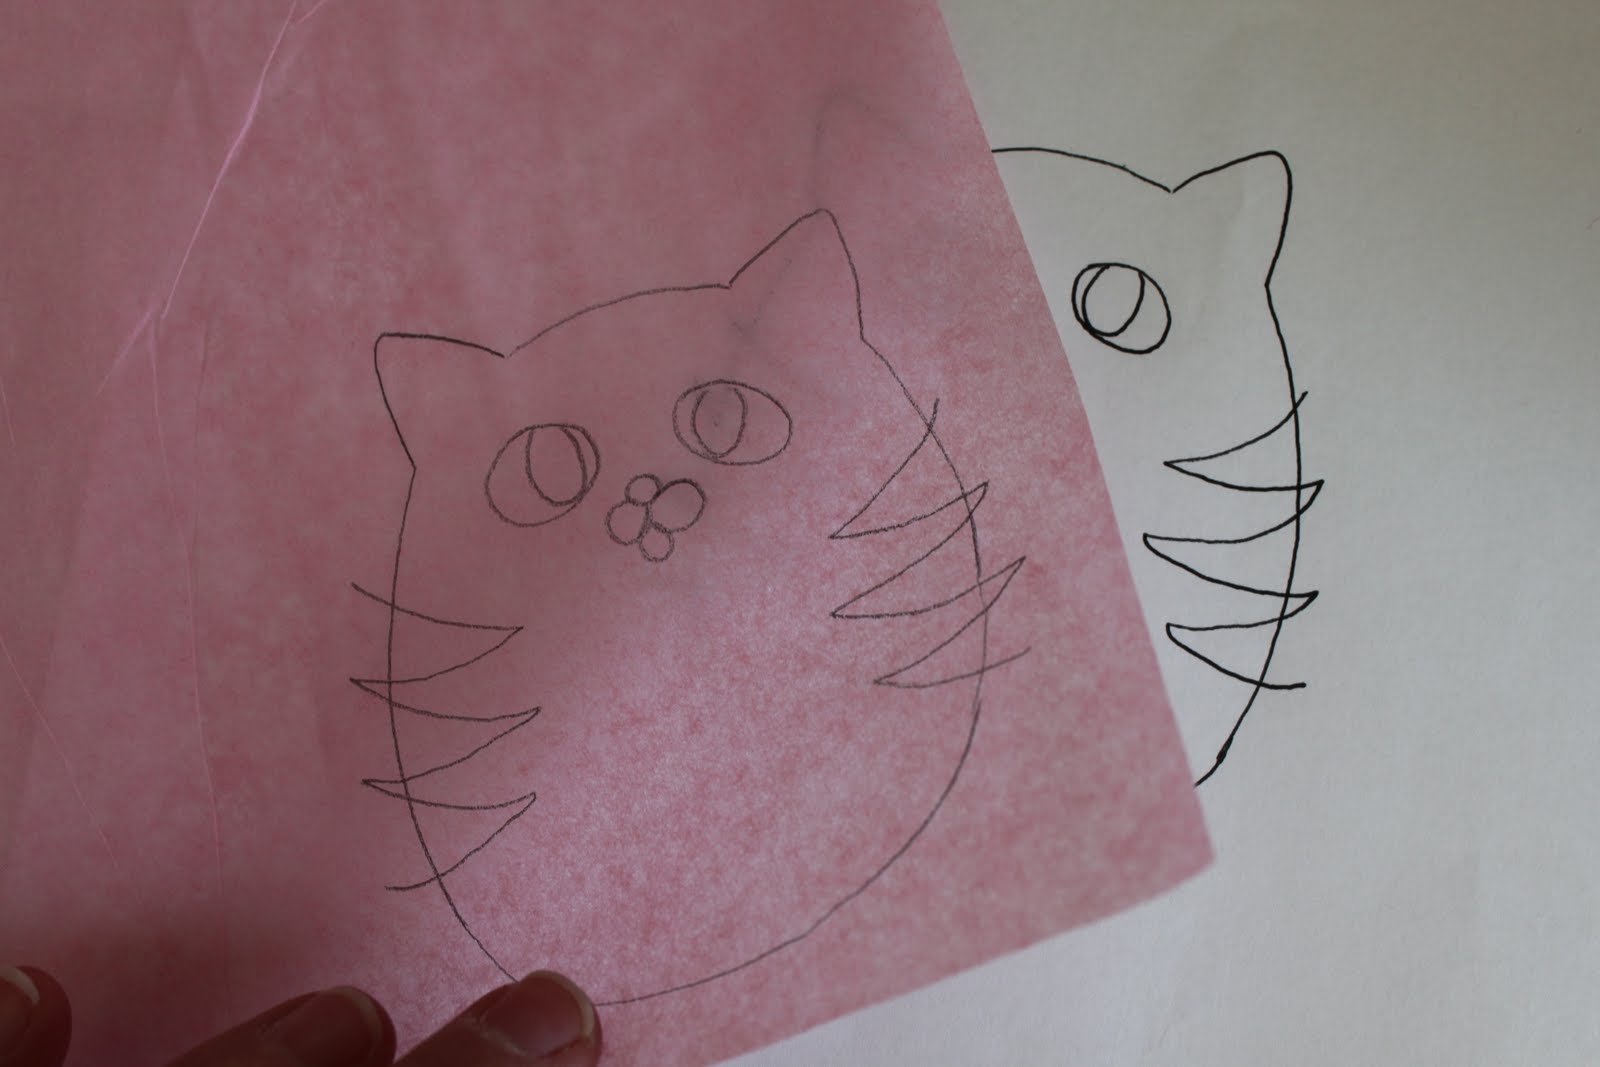 [показать]STEP ONE: Using a pencil, trace the pattern onto your tissue paper. Cut it out, leaving about an inch around the perimeter.
STEP TWO: Cut your fleece.
Important: Be sure the stretch of your fleece runs left to right!
You will need:
2 light blue rectangles the same size as your tissue paper pattern
1 dark blue rectangle large enough to cover the width of your pattern plus the height of the stripes
(You don't need to measure -- eyeball and chop. If all else fails, cut all your pieces the same size as your pattern!)
(You don't need to measure -- eyeball and chop. If all else fails, cut all your pieces the same size as your pattern!)
 [показать]STEP THREE: Layer as follows:
Place one light blue rectangle right side DOWN. Place your tissue paper on top. Lift it up and place your white rectangle over the area where the eyes and nose will be, then place it back down so the white is on the bottom and the tissue paper is on top.
 [показать]Like this!
 [показать]STEP FOUR: Sew around the eyes and the cheeks/chin. I use my free-motion foot for this, but if you don't have one you can do the needle-down-lift-the-foot-and-turn maneuver.
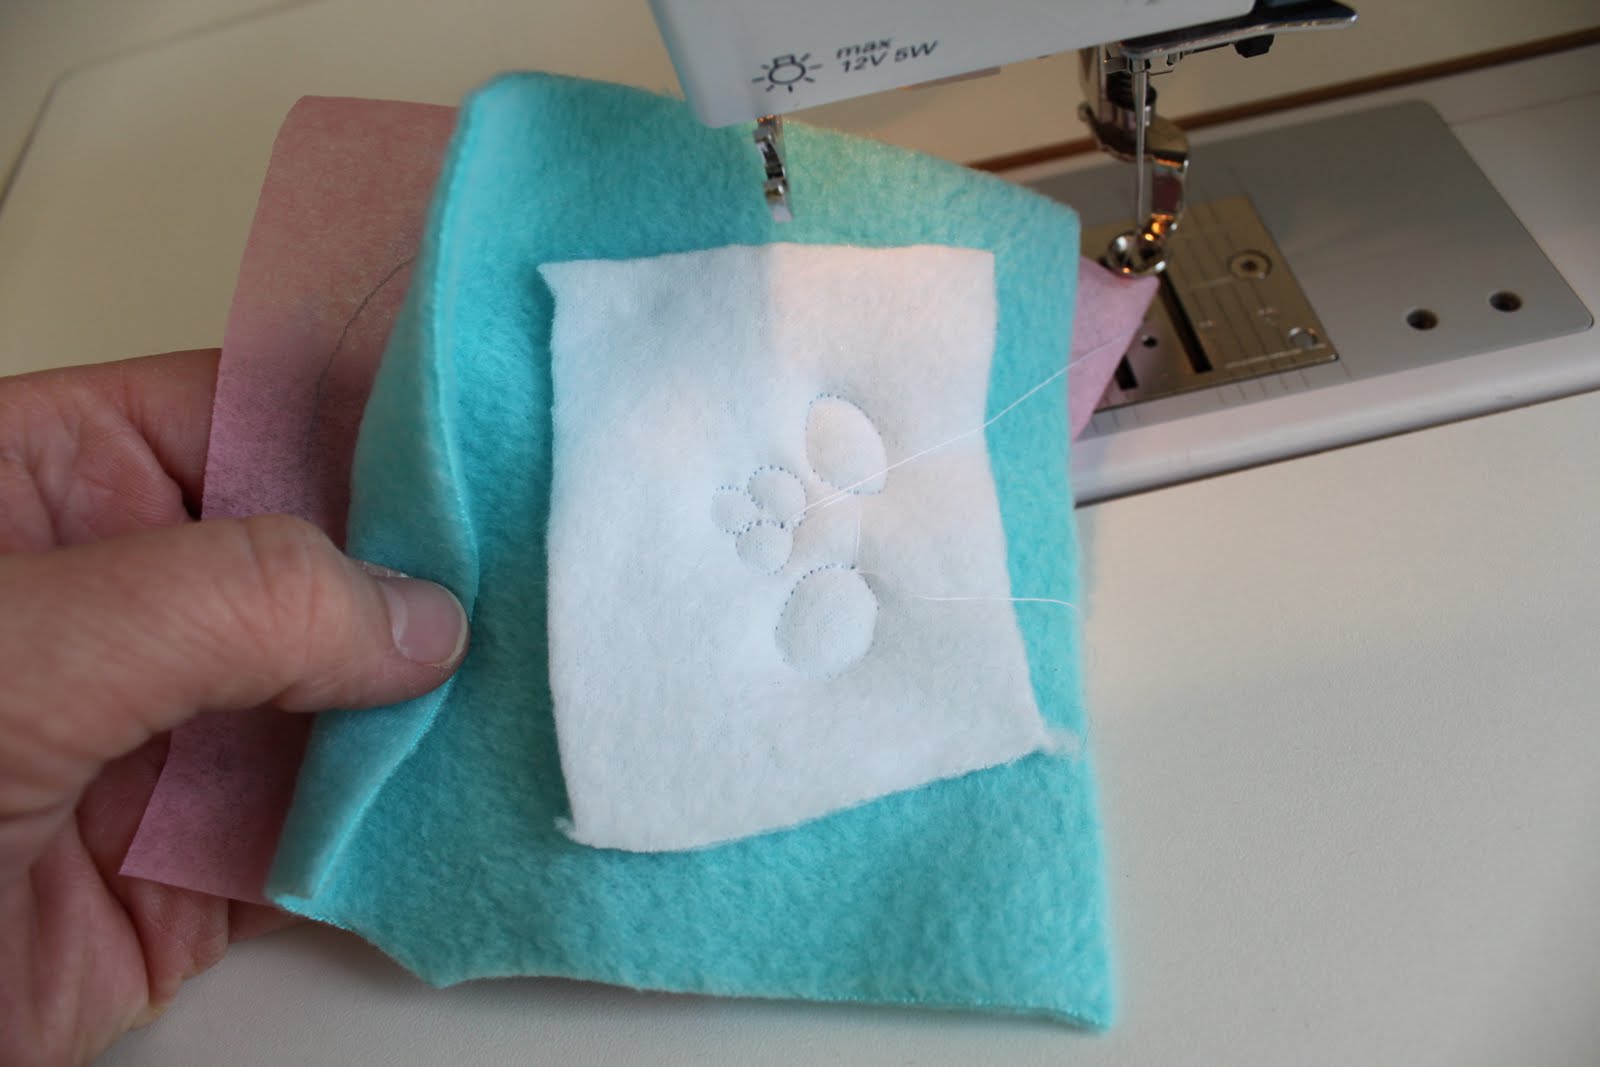 [показать]Here's what it will look like on the other side.
 [показать]STEP FIVE: Using your scissors, carefully trim the excess fleece away from around your stitching lines.
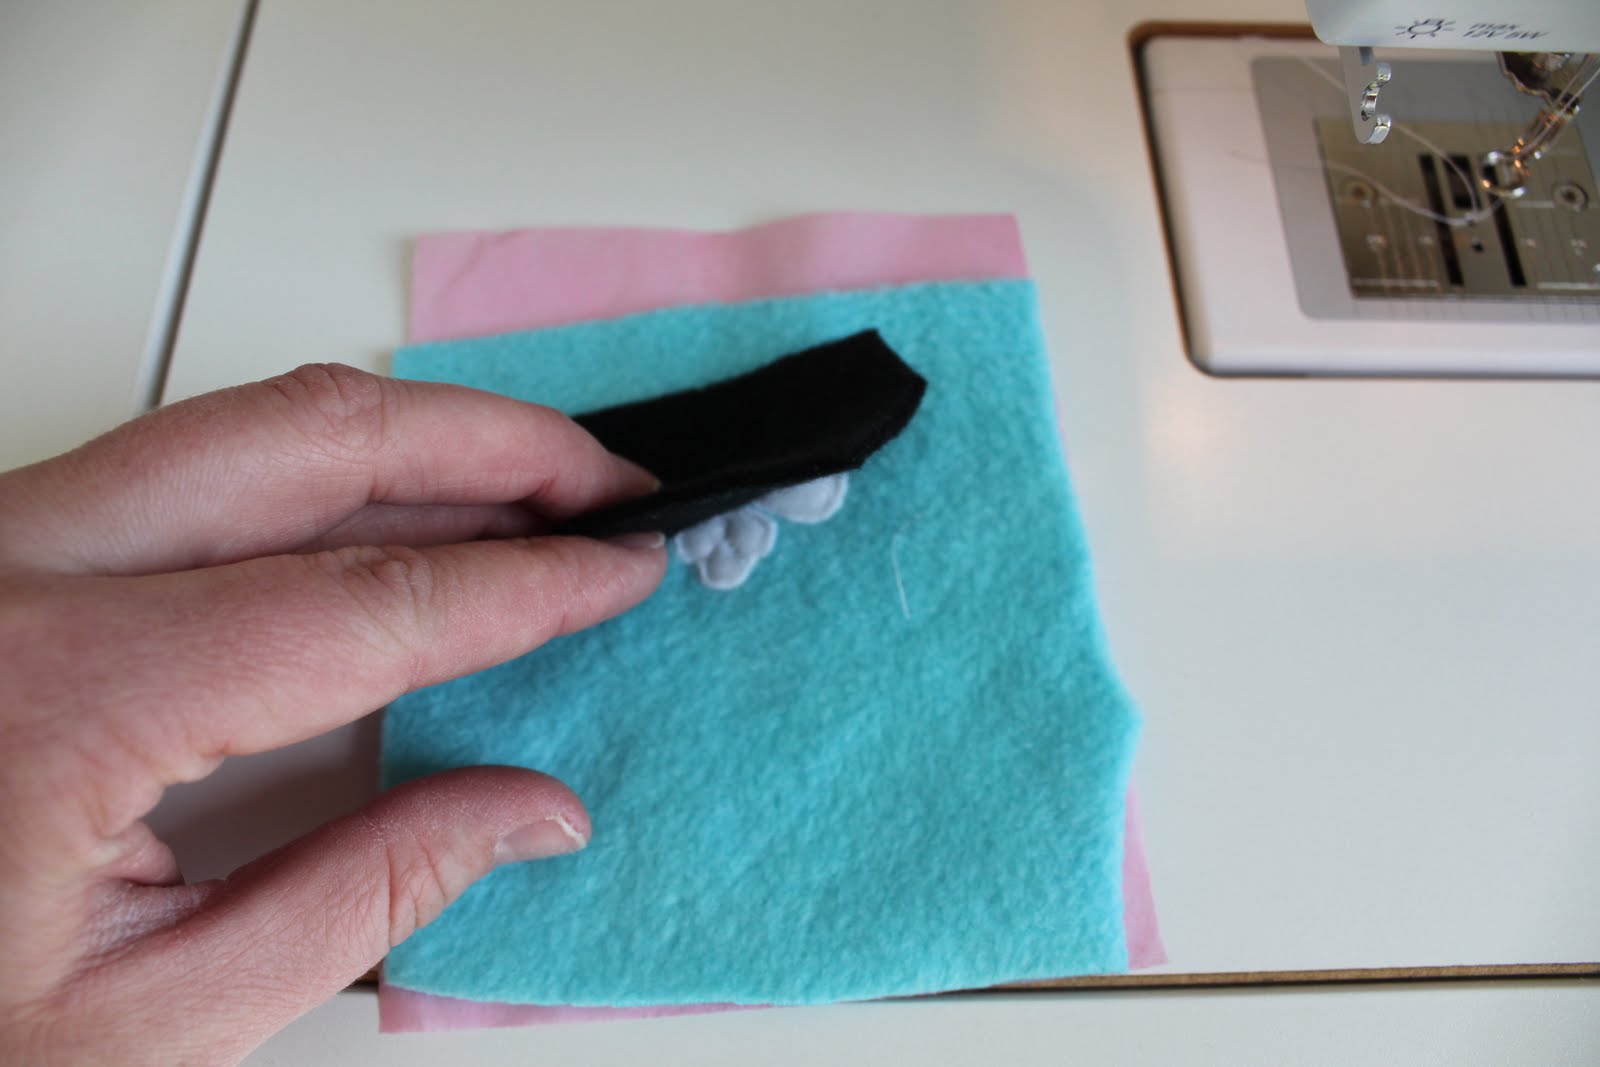 [показать]STEP SIX: Layer your black rectangle over the eyes and nose.
 [показать]Flip everything over to the pattern side and sew around the pupils and nose.
 [показать]Trim away excess.
 [показать]STEP SEVEN: Layer your dark blue rectangle over the stripe area of the light blue rectangle. Again, be sure the stretch of your fleece runs left to right.
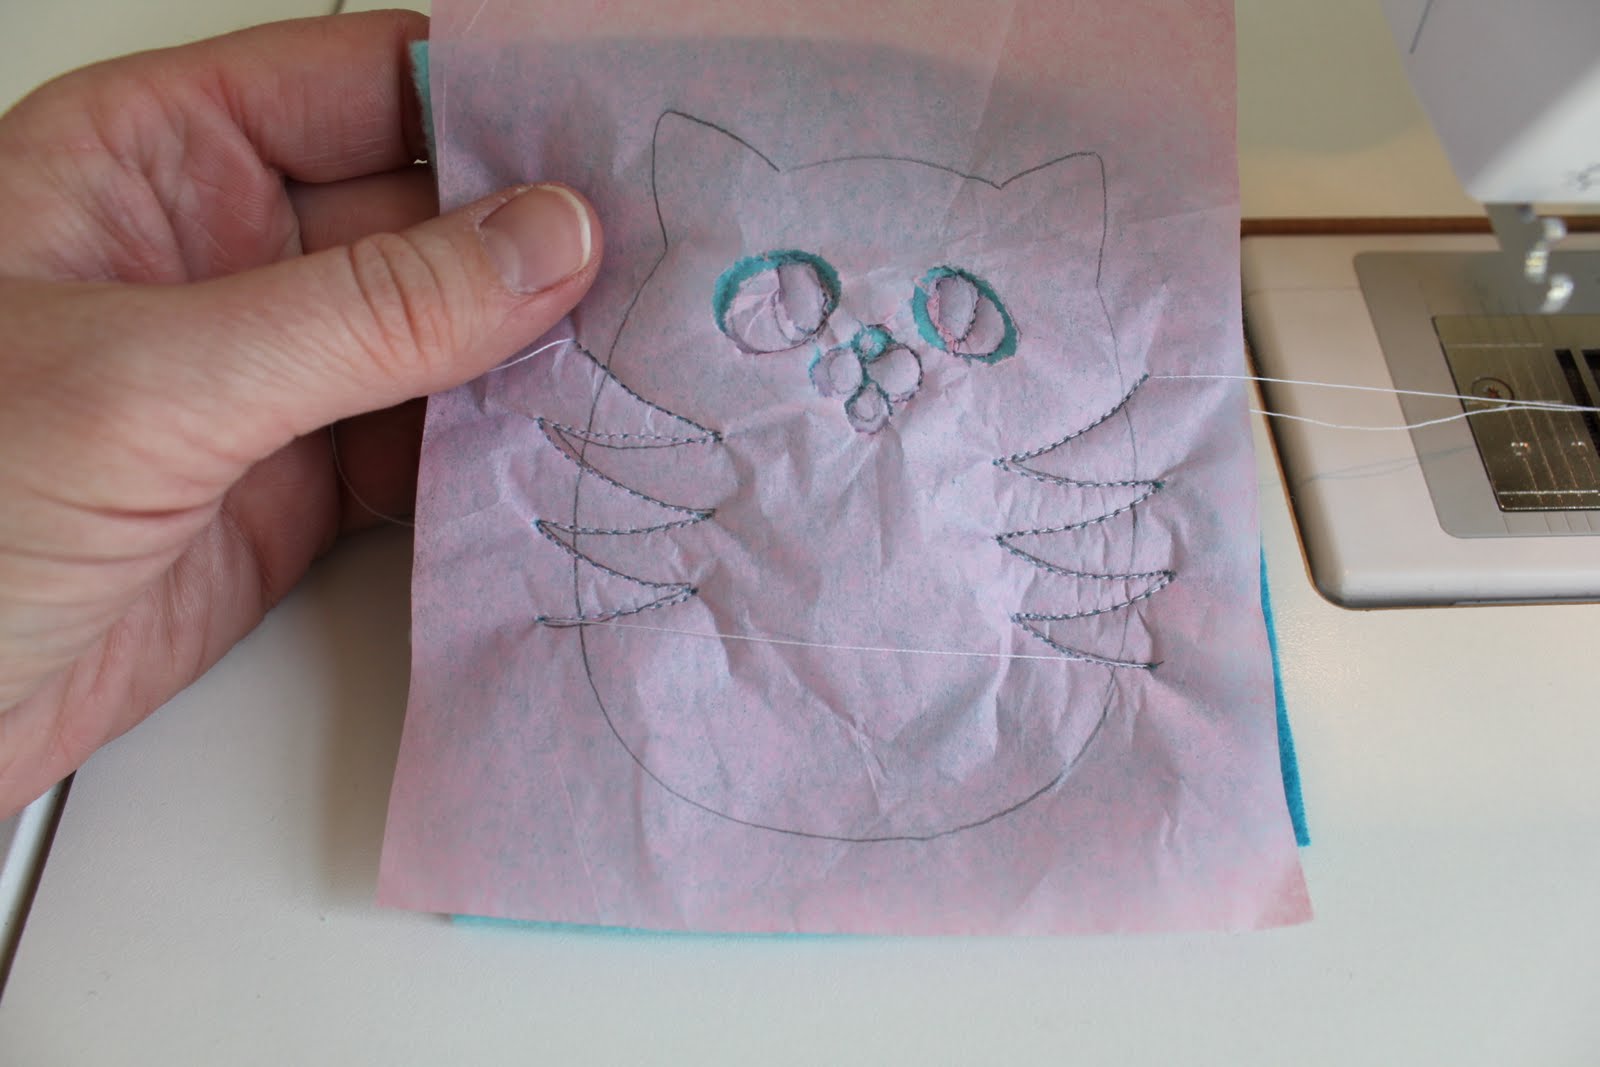 [показать]STEP EIGHT: Flip over and sew the stripe lines. Trim away excess fleece.
 [показать]STEP NINE: Layer your second light blue rectangle on top of your kitten's face, right sides together.
 [показать]Flip over and sew on the line, leaving about two inches at the bottom open for turning and stuffing.
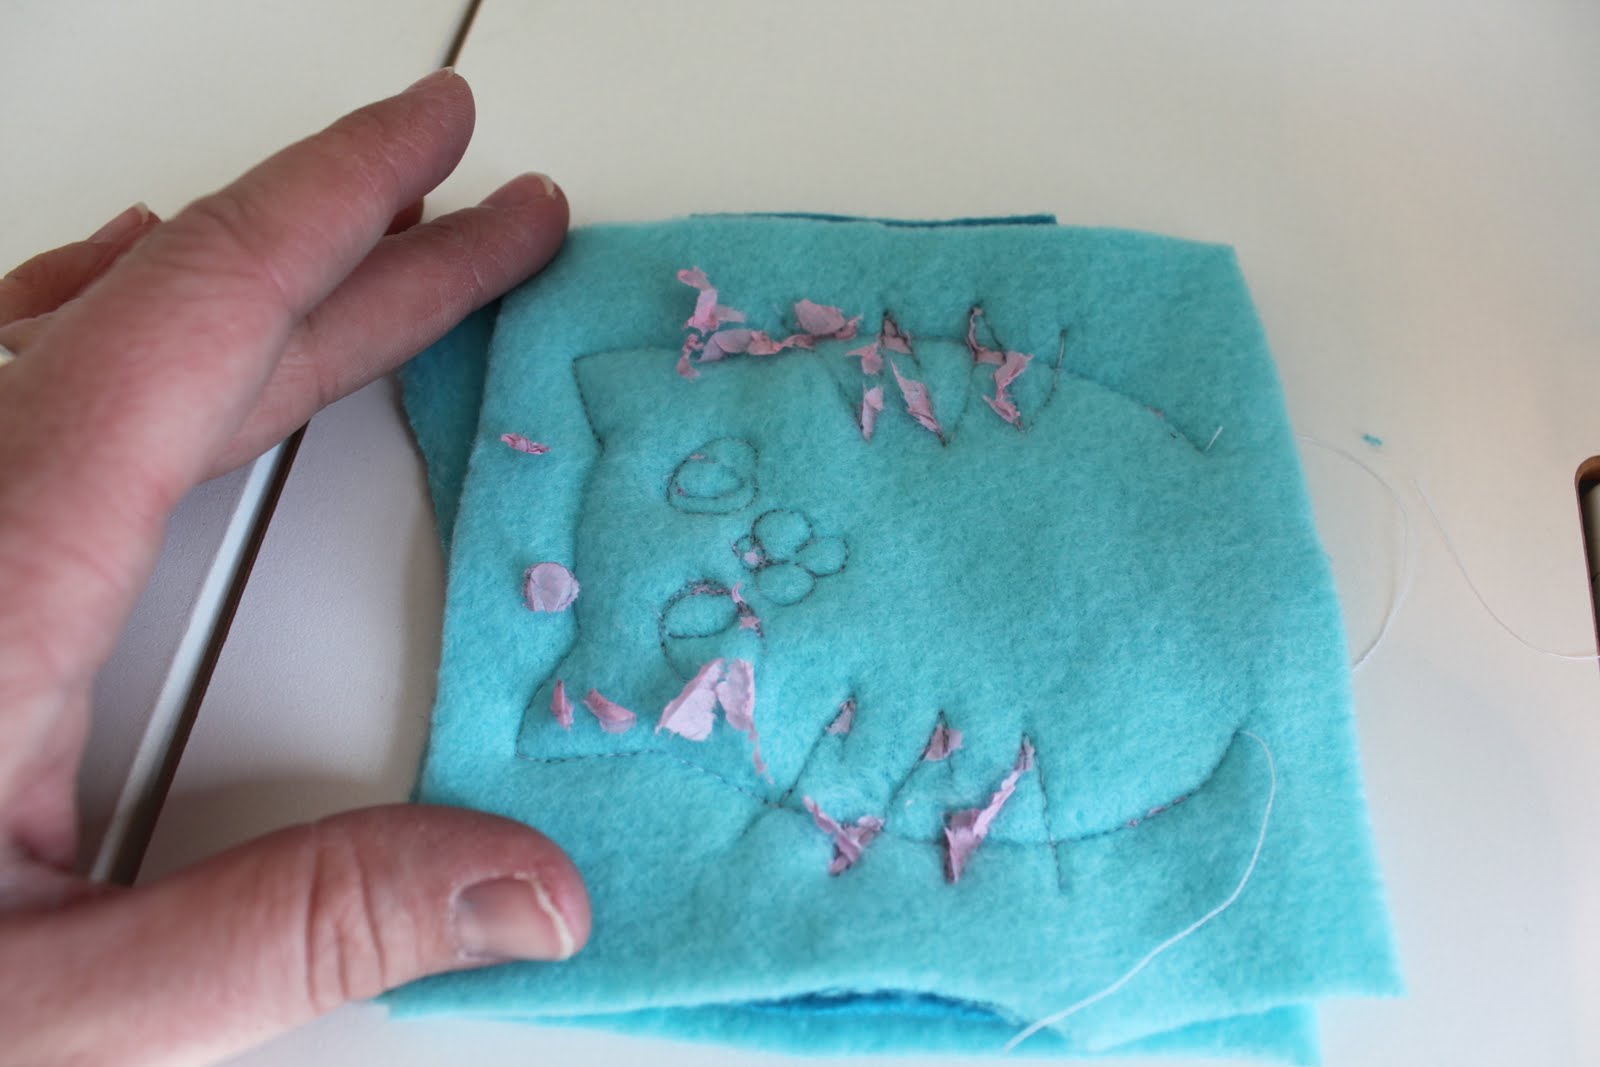 [показать]STEP TEN: Tear away as much of the tissue paper as you care to -- it doesn't matter if it's perfect because it will all hide inside!
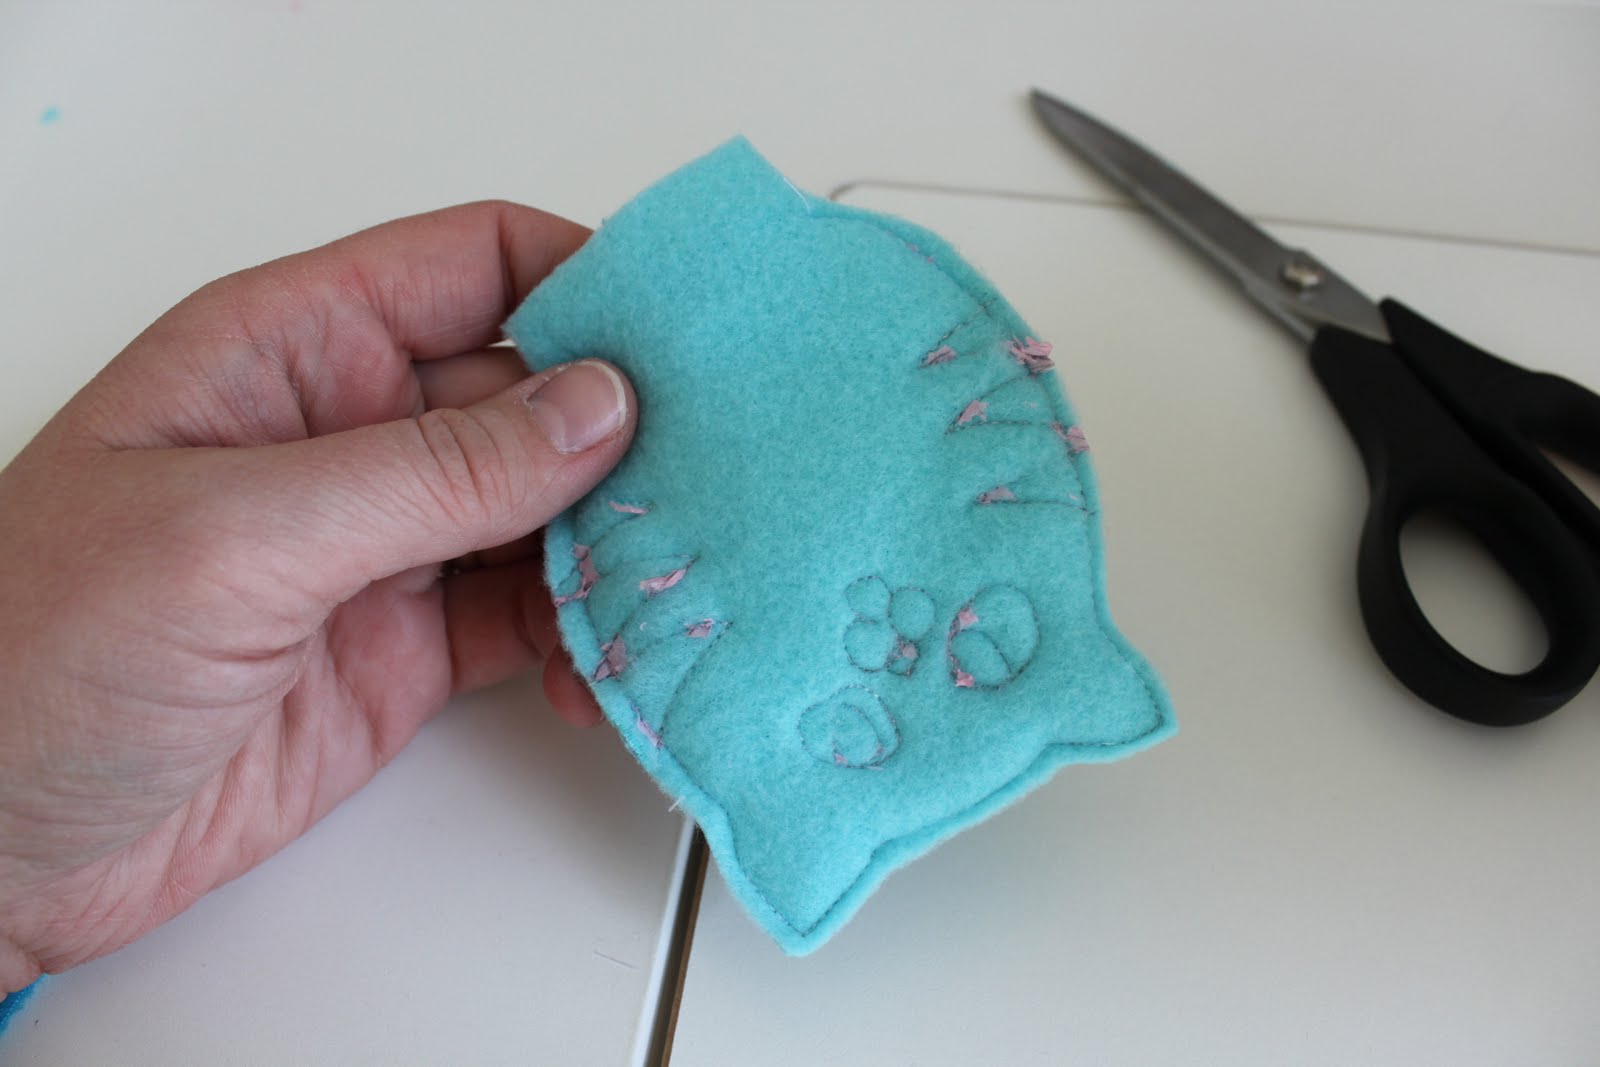 [показать]STEP ELEVEN: Trim near your stitching line all the way around except at the bottom opening, as shown.
 [показать]STEP TWELVE: Turn your kitten right side out, carefully poking the ears out with a blunt object. Stuff her!
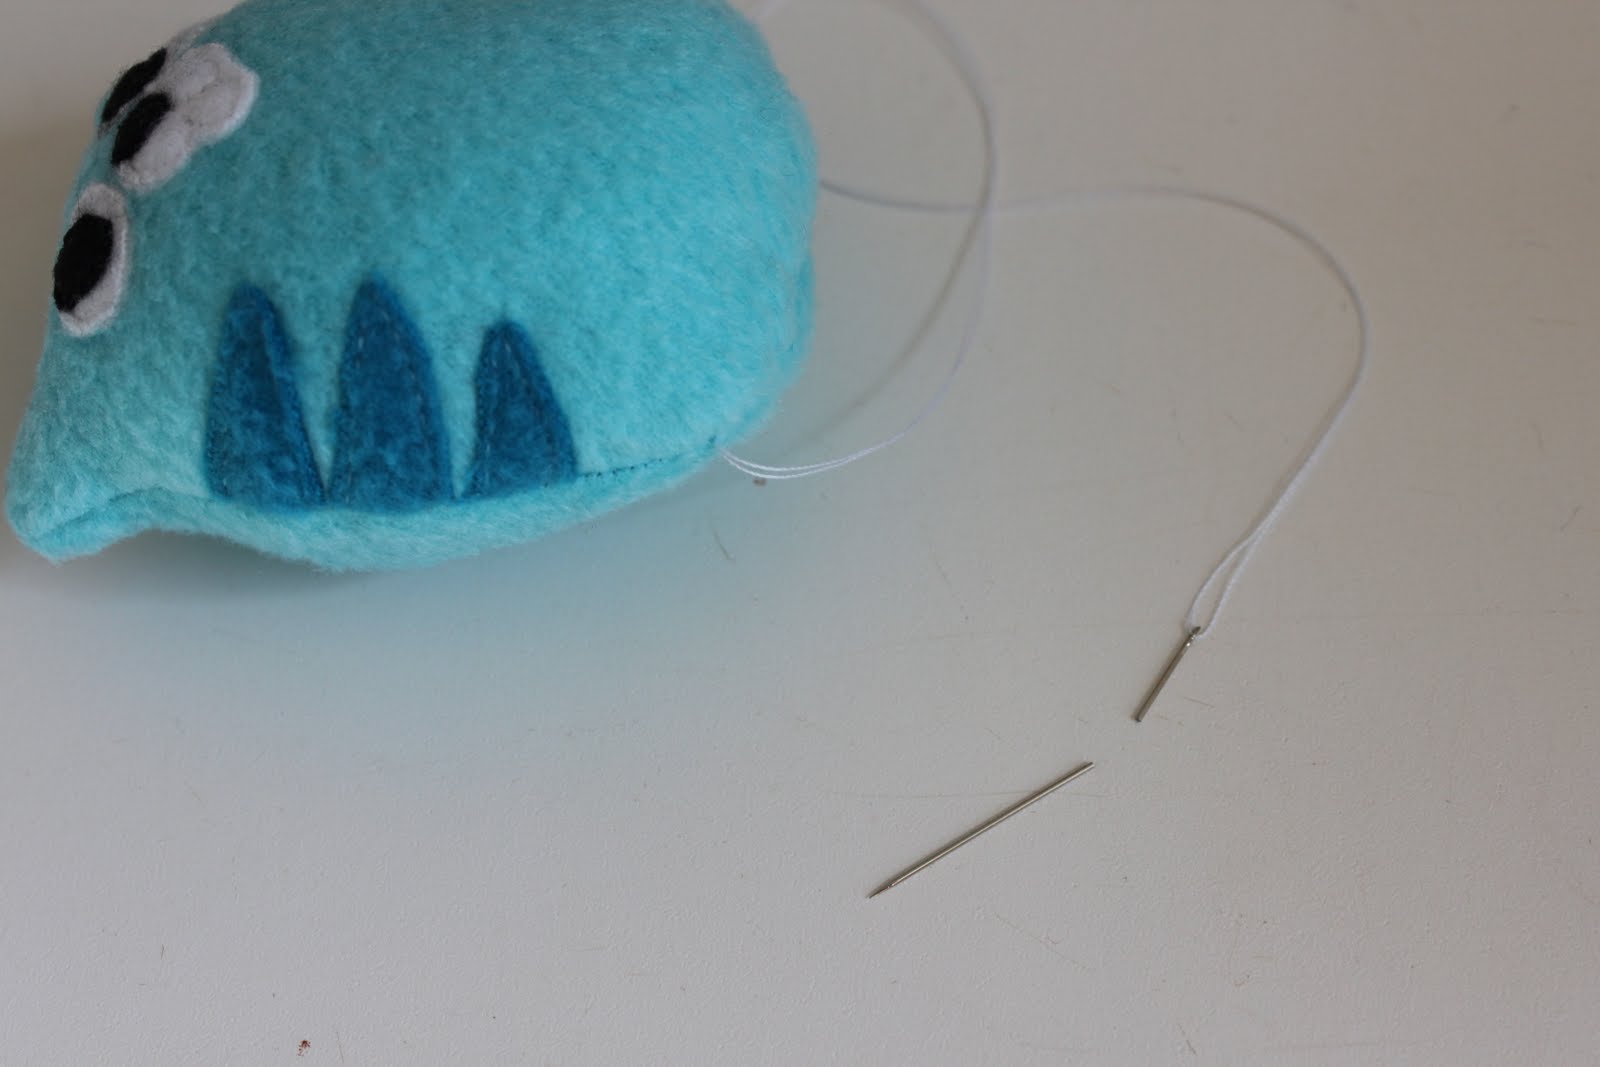 [показать]STEP THIRTEEN: Carefully poke the seam allowances of the opening inside and hand sew the hole closed. (Look what happened to my apparently very weak needle! I was pulling it straight, and -- pow!)
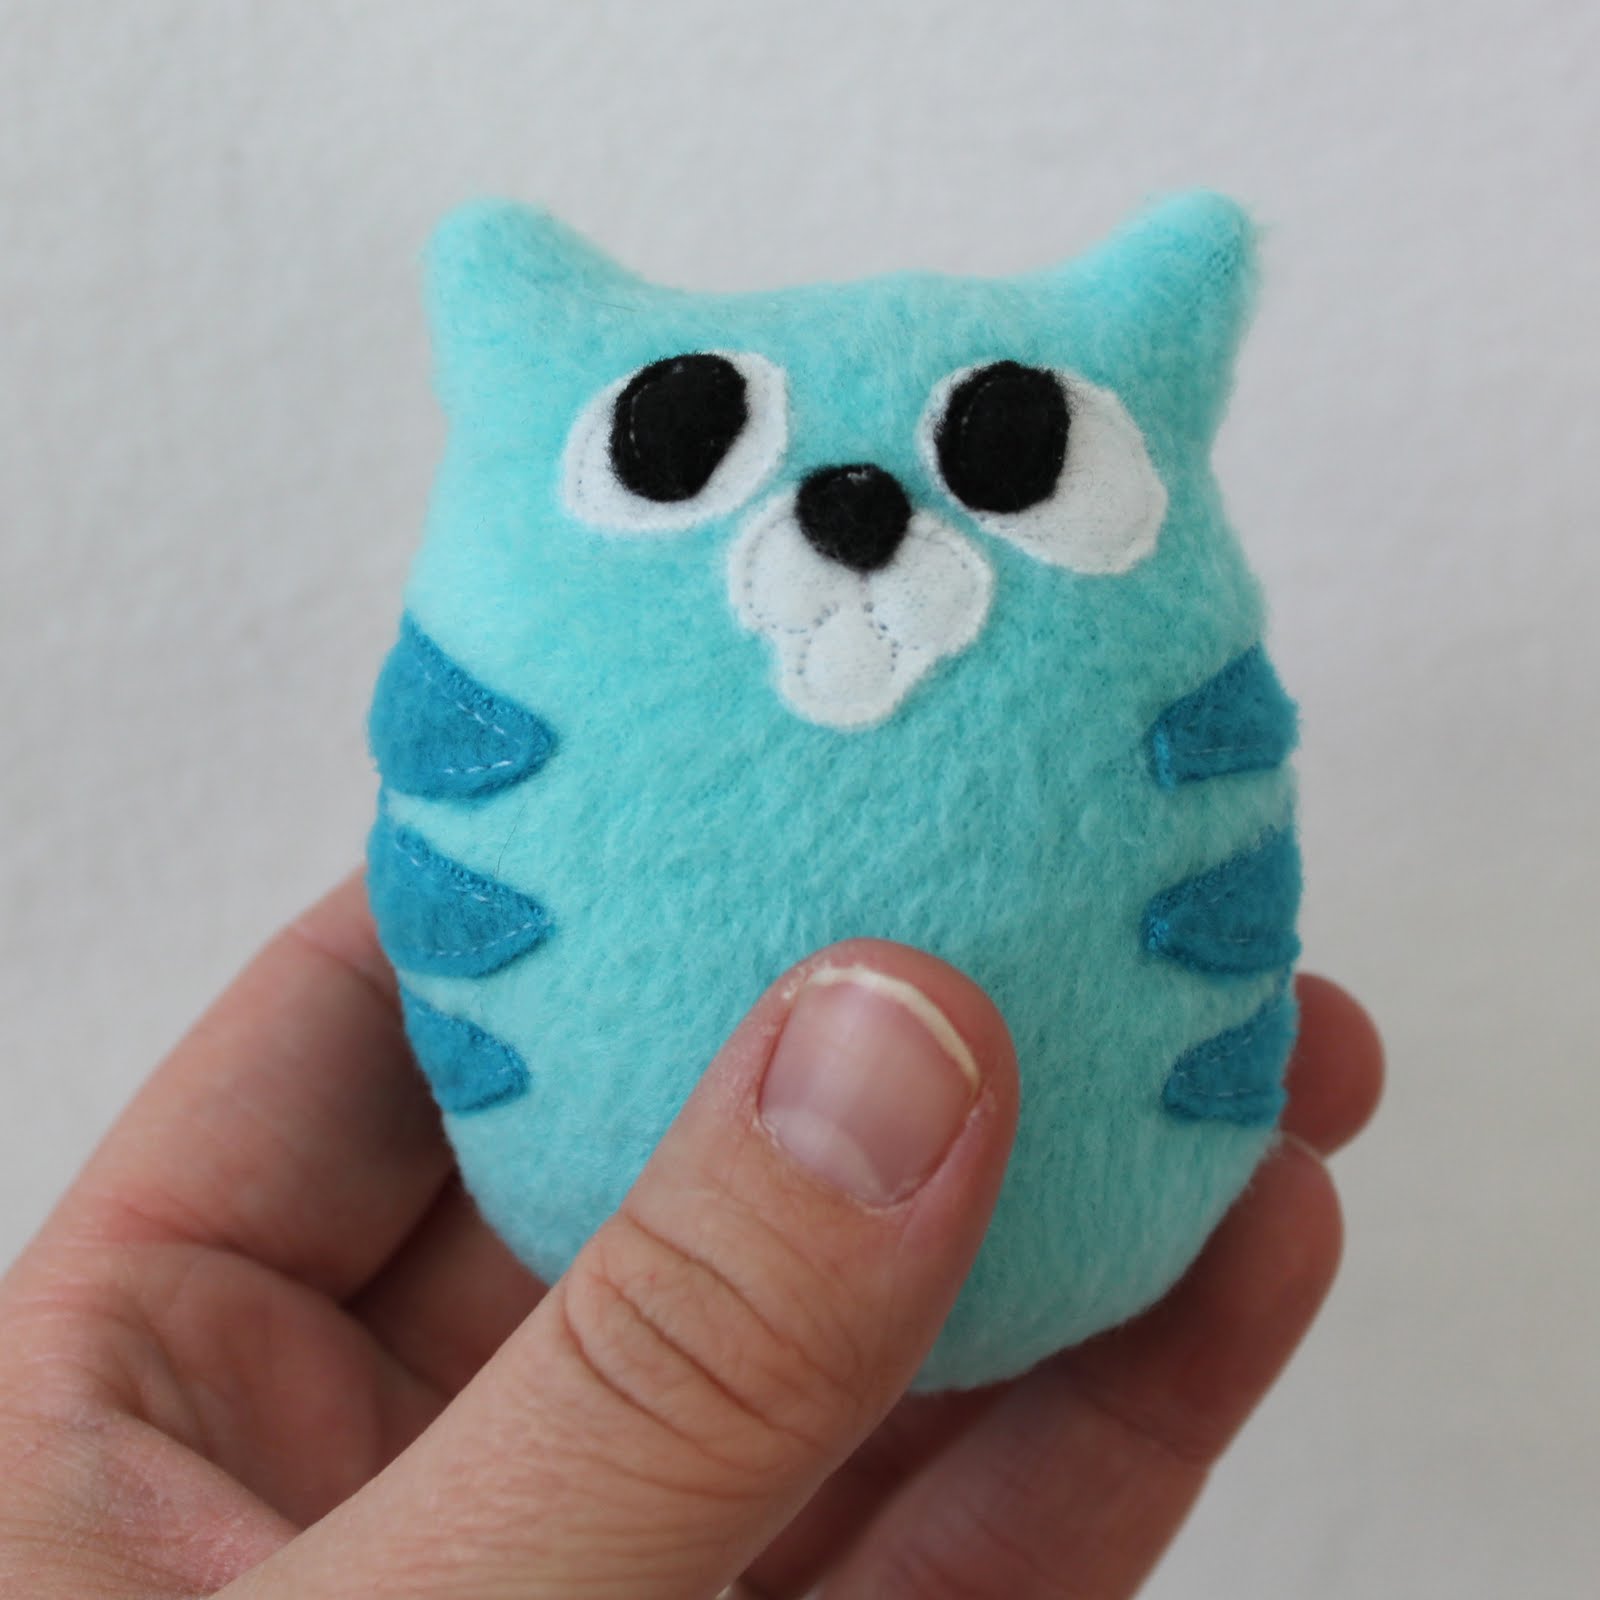 [показать]Voila! A cute little kitten!
You can definitely get creative with colors. Look at these little special-request kittens I made for my nieces and nephew:
 [показать]It's definitely extra work to give them colored eyes and pink noses, but they just turn out so cute that way!
 [показать]The box pattern is on page 2 of the pattern file. I tried a few kinds of cardboard, but the cardboard from a pizza box was definitely the best scale.
Best of luck with your kittens!
Please pretty please post photos to my flickr group if you make one! :o)
Вы сейчас не можете прокомментировать это сообщение.
Дневник котенок из флиса в коробке | VanillaSnow - Дневник VanillaSnow |
Лента друзей VanillaSnow
/ Полная версия
Добавить в друзья
Страницы:
раньше»