вышивка море
02-10-2020 10:32
к комментариям - к полной версии
- понравилось!
Это цитата сообщения MerlettKA Оригинальное сообщение
Объёмная вышивка - Морская звезда с 3D эффектом
вверх^
к полной версии
понравилось!
в evernote
Это цитата сообщения MerlettKA Оригинальное сообщение
Объёмная вышивка - Морская звезда с 3D эффектом
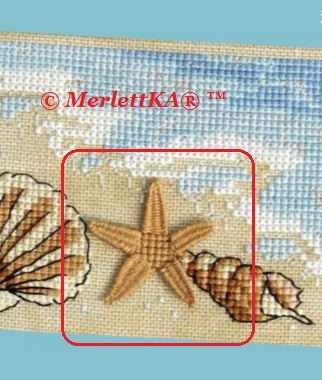 |
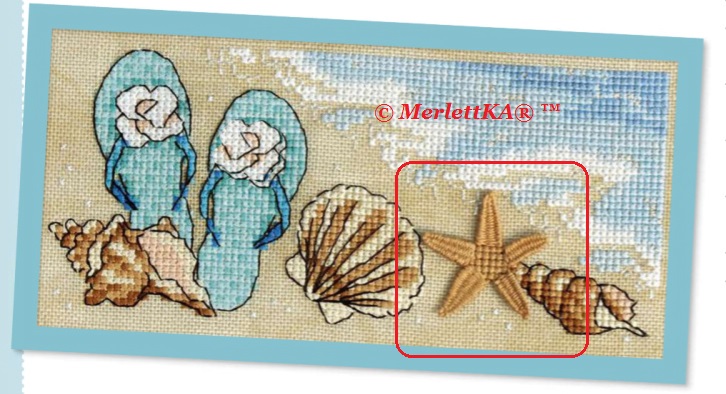
Воспоминания о лете и отпуске
Миниатюра вышитая крестом,
в которую вшита объёмная
морская звезда 3D эффектом
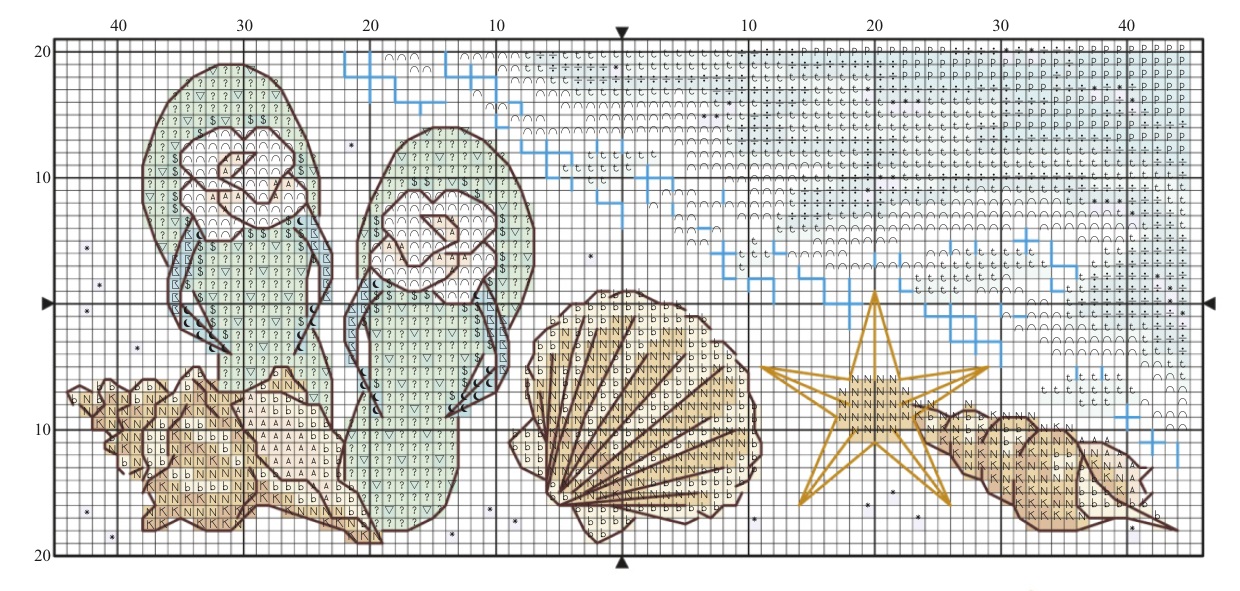
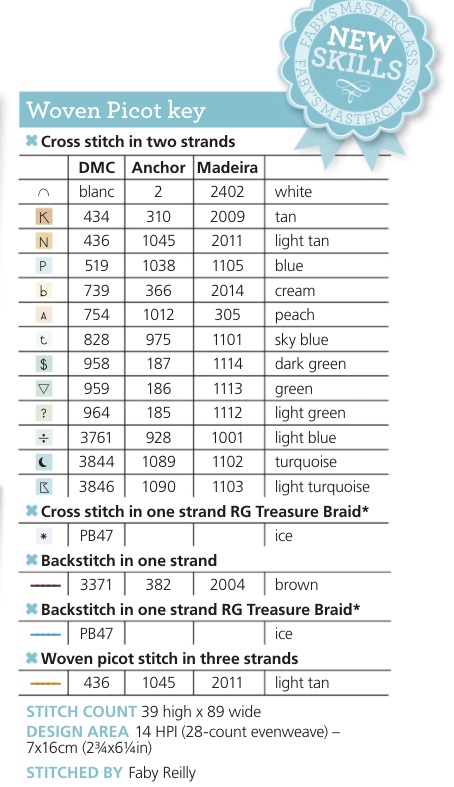
Мастер-класс по вышивке
Описание есть, но на английском
|
 |
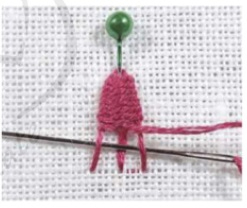
1 Position a pin vertically through
your fabric at the point of the first
arm of the starfish. Push your needle
and three strands of thread up at (1),
wrap behind the pin and push the
needle down at (2).
|
|
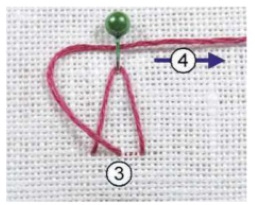 |
2 Bring the needle and thread up at (3),
wrap behind the pin head in the direction
of (4), creating three vertical stitches
to form the ‘frame’ of the woven picot
stitch.
|
|
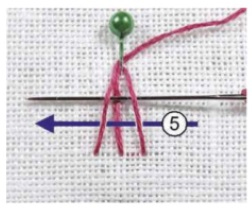 |
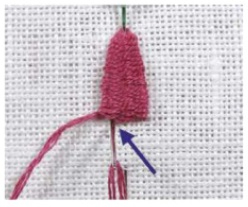
3 Next, start weaving the needle and
thread under and over the three vertical
stitches in the direction of (5).
Don’t stitch through the fabric at
any stage of your weaving.
|
|
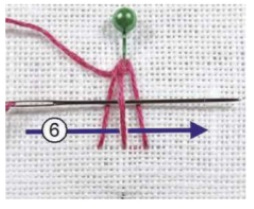 |
4 Then weave the needle over and under
the three vertical stitches in the
opposite direction, as per (6).
|
|
 |
5 Continue working back and forth,
alternating the weave direction, building
up your stitch down the length of the
three vertical stitches.
|
|
 |
6 When you get to the
base of the ‘frame’, push the needle to
the back of the fabric and secure under
nearby stitches, then remove the pin.
|
|
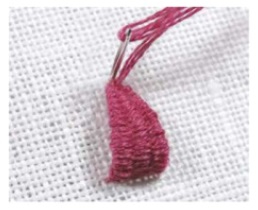 |
7 You can leave the woven picot stitch
as it is and have fun shaping the starfish
arm to create a 3D effect, or you can stitch
it to the fabric at the tip with a small
single stitch.
|
|
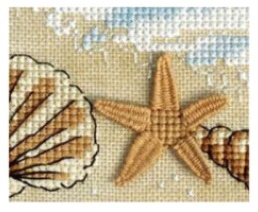 |
8 Repeat steps 1-7 to create four more
woven picot stitches at angles around your
central whole stitches, using the chart as
a guide.
This will create a 3D effect starfish!
|
Вы сейчас не можете прокомментировать это сообщение.
Дневник вышивка море | Milena_harmonia - Milena harmonia |
Лента друзей Milena_harmonia
/ Полная версия
Добавить в друзья
Страницы:
раньше»