Это цитата сообщения KPbJCA Оригинальное сообщение
Иногда бывает зацепишься глазом за какую нибудь красоту и прям хочется скорее бежать вязать повторять. А иной раз видишь вот тот же самый узор и равнодушно скользишь взглядом мимо. А всё почему? Да потому, что связан он другим цветом. Там был прямо таки взрыв цвета, приятный глазу, а тут - невзрачная обыденность. Ну у меня, по крайней мере, так.
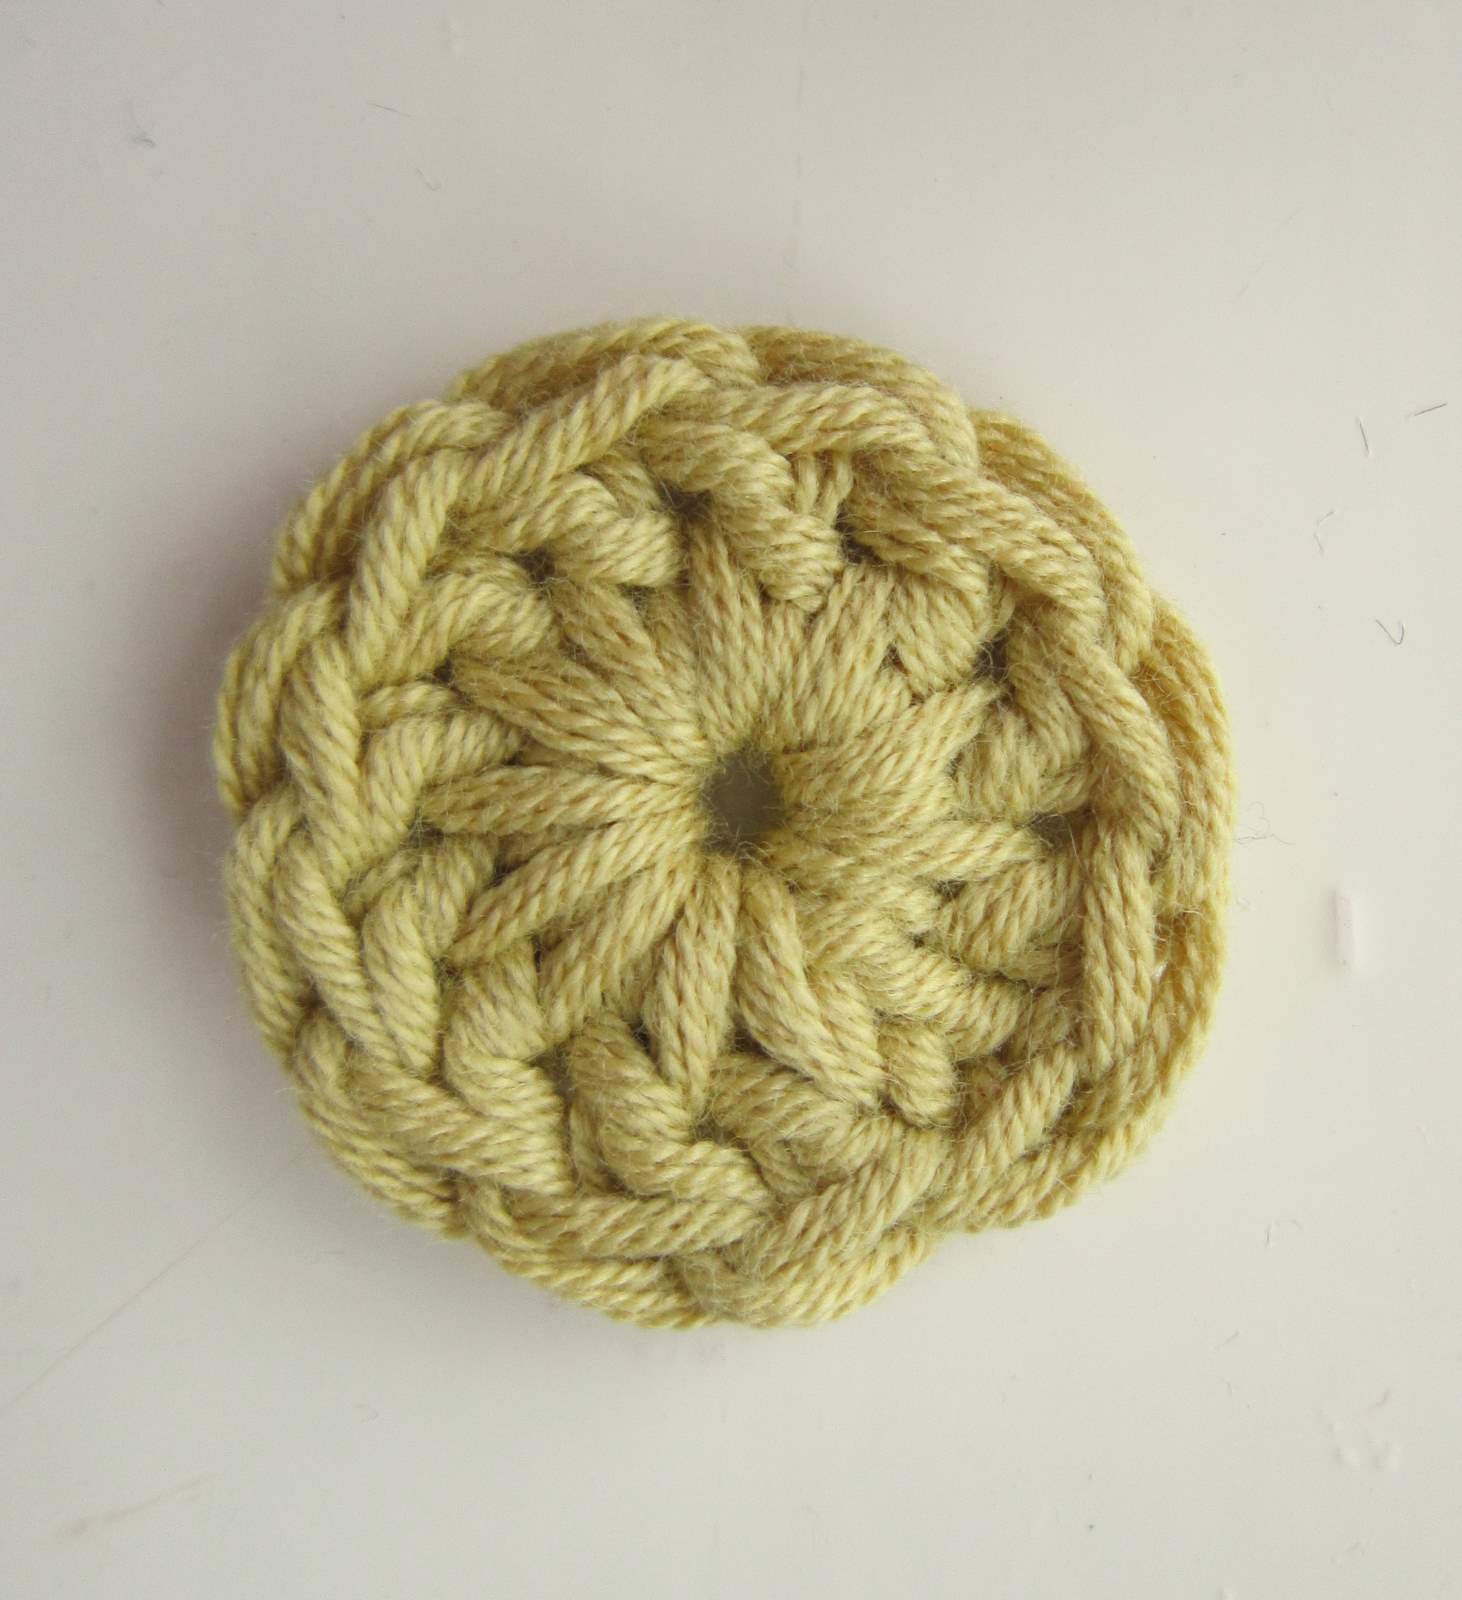
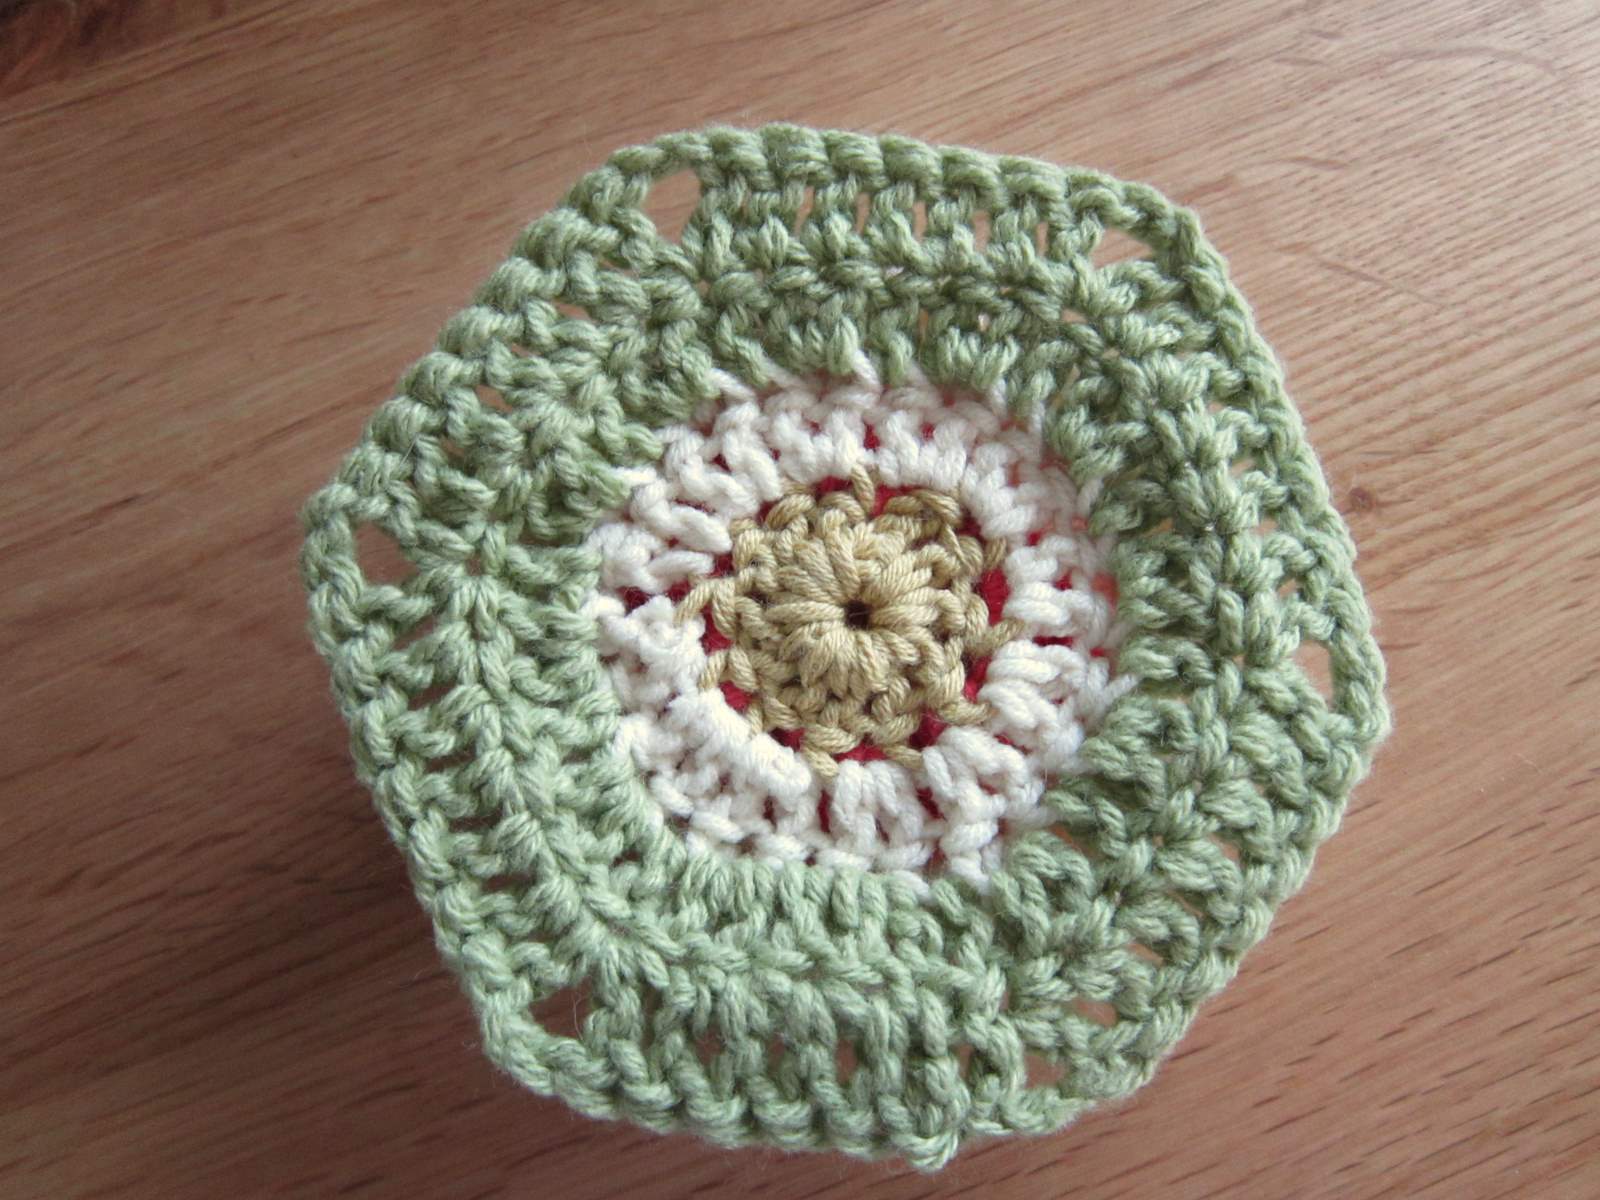
Попался мне на глаза этот цветок авторства Color'n Cream и прям загорелась я вся от восторга и желания немедленно заиметь такую же красоту:
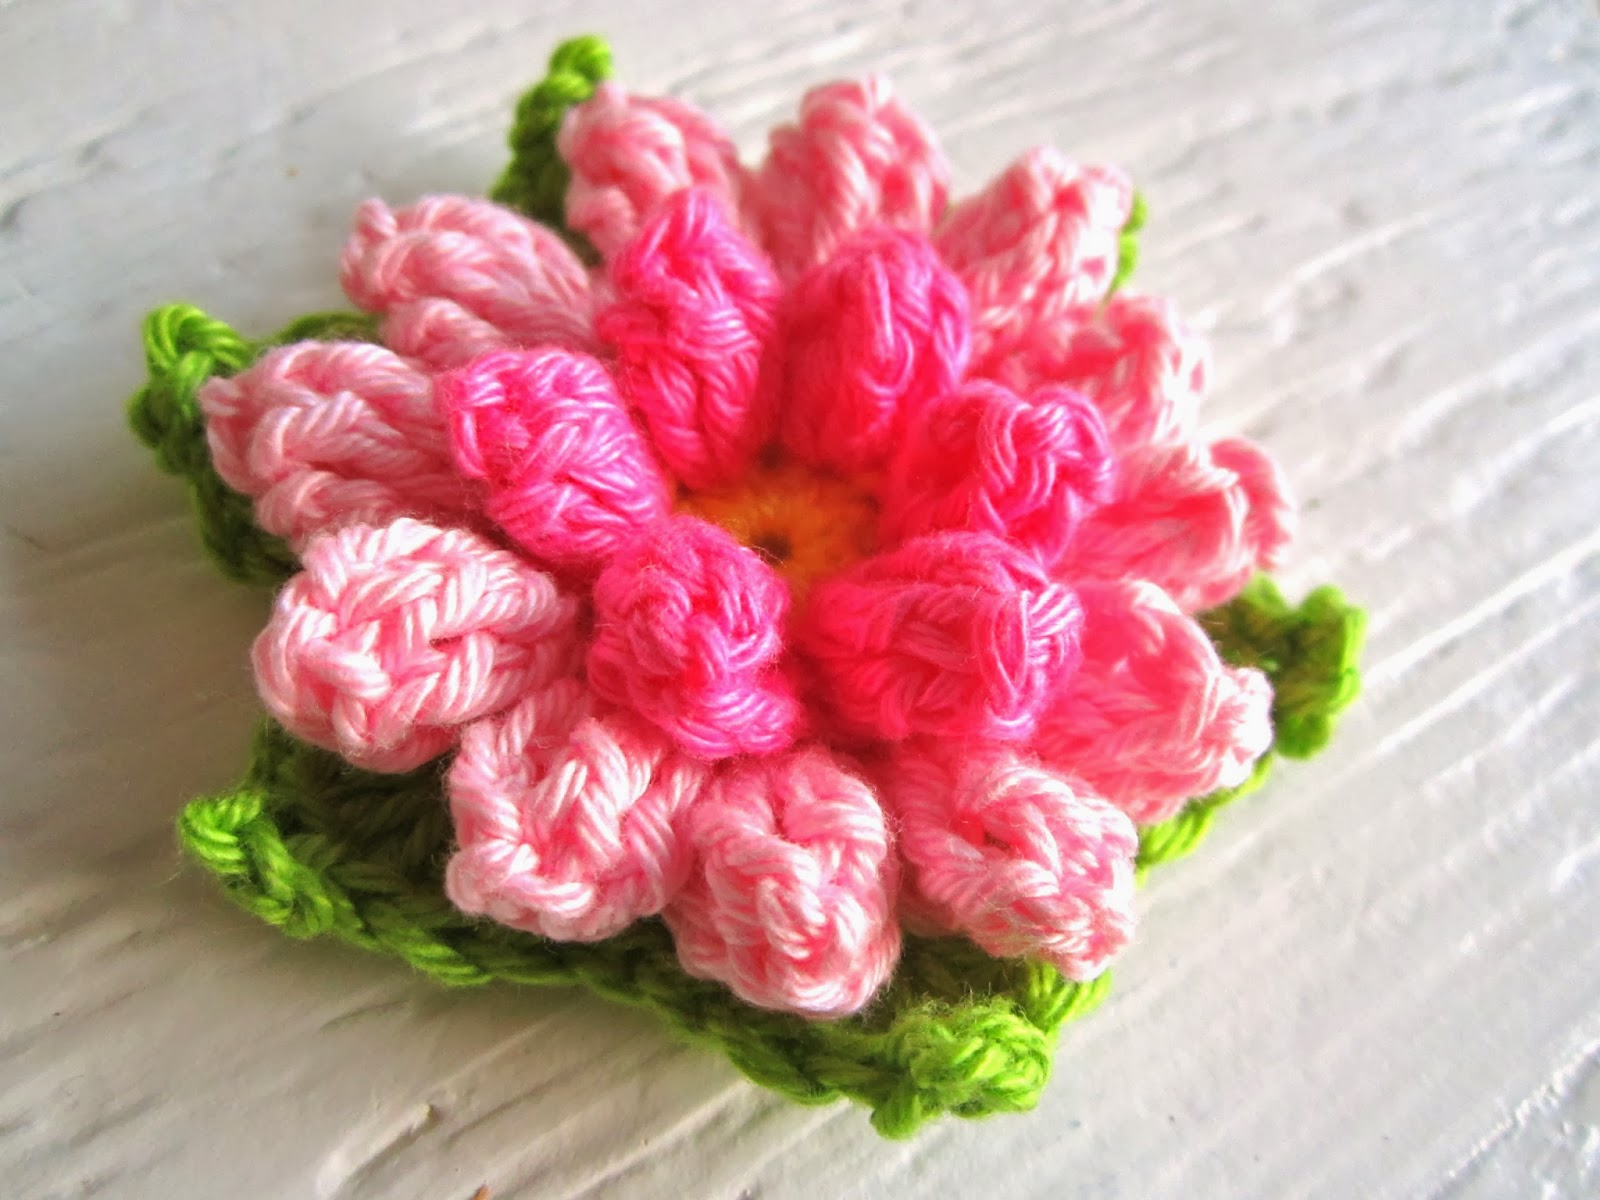
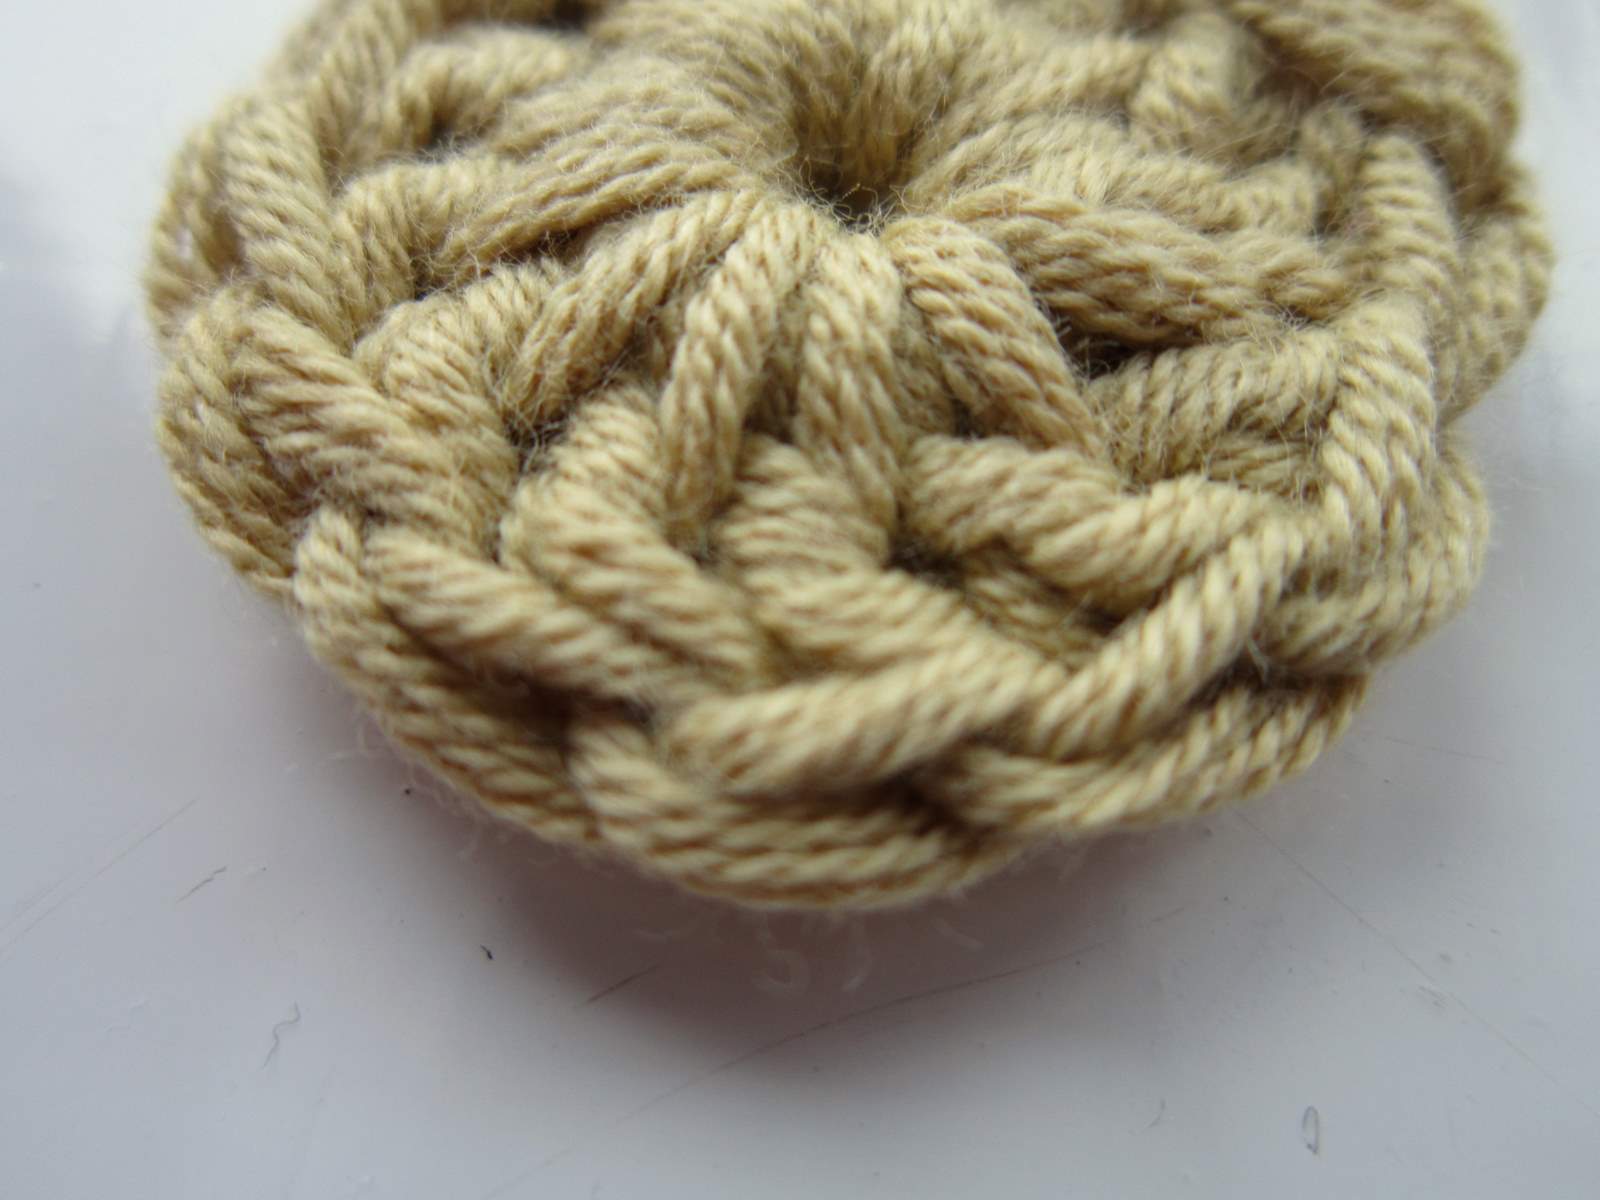
Посмотрела в блоге автора и нашла ссылку на МК по вязанию такого цветка. И разочаровано ахнула. Там вязание цветка описывается на таком невзрачном цветовом примере, что я и задаром бы на такой не позарилась! Какое же всё таки большое влияние на восприятие оказывает цвет!
I use american crochet terminology, dk cotton and a 4mm hook. Abbreviations – ch – chain; dc – double crochet; sl st – slip stitch; sts – stitches, tc – treble crochet.
FOR A PRINTABLE PDF OF THE PATTERN CLICK HERE.
1. Chain 4 stitches, and join into a circle. Chain 3, then work 11 dc into the round; join with a slip stitch to top of ch 3 and fasten off. (12 stitches)
2. Now can you see that the top of the stitches are made up of loops; we usually work under both loops, but you can work under just the front loops, or just under the back loops.
In order to make this project we are going to work a round in the front loops, and a second, separate round in the back loops….
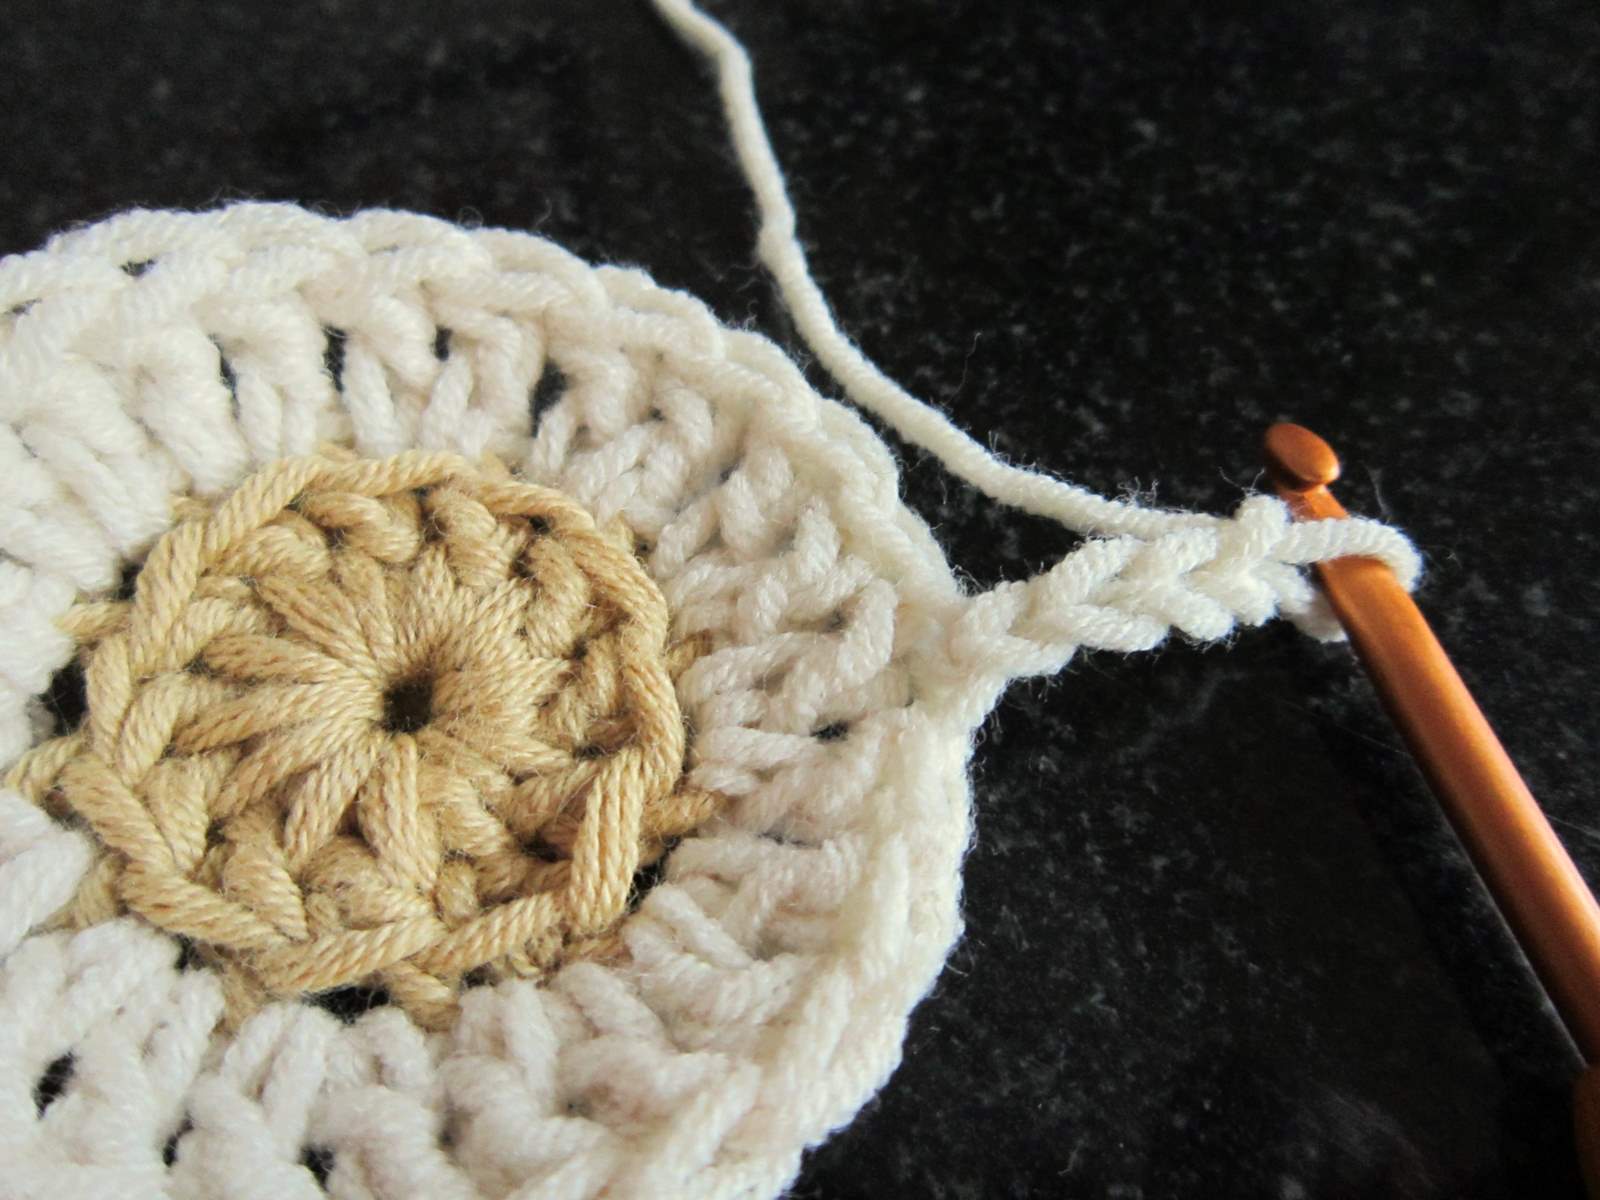
So, connect your second colour into one of the back loops with a sl st, and ch 3, REMEMBER YOU ARE WORKING ONLY IN THE BACK LOOPS OF THE STITCHES IN THIS ROUND; dc in the same st, *2dc in next stitch, rep from * 10 more times. Sl st into top of ch 3. (24 dc)
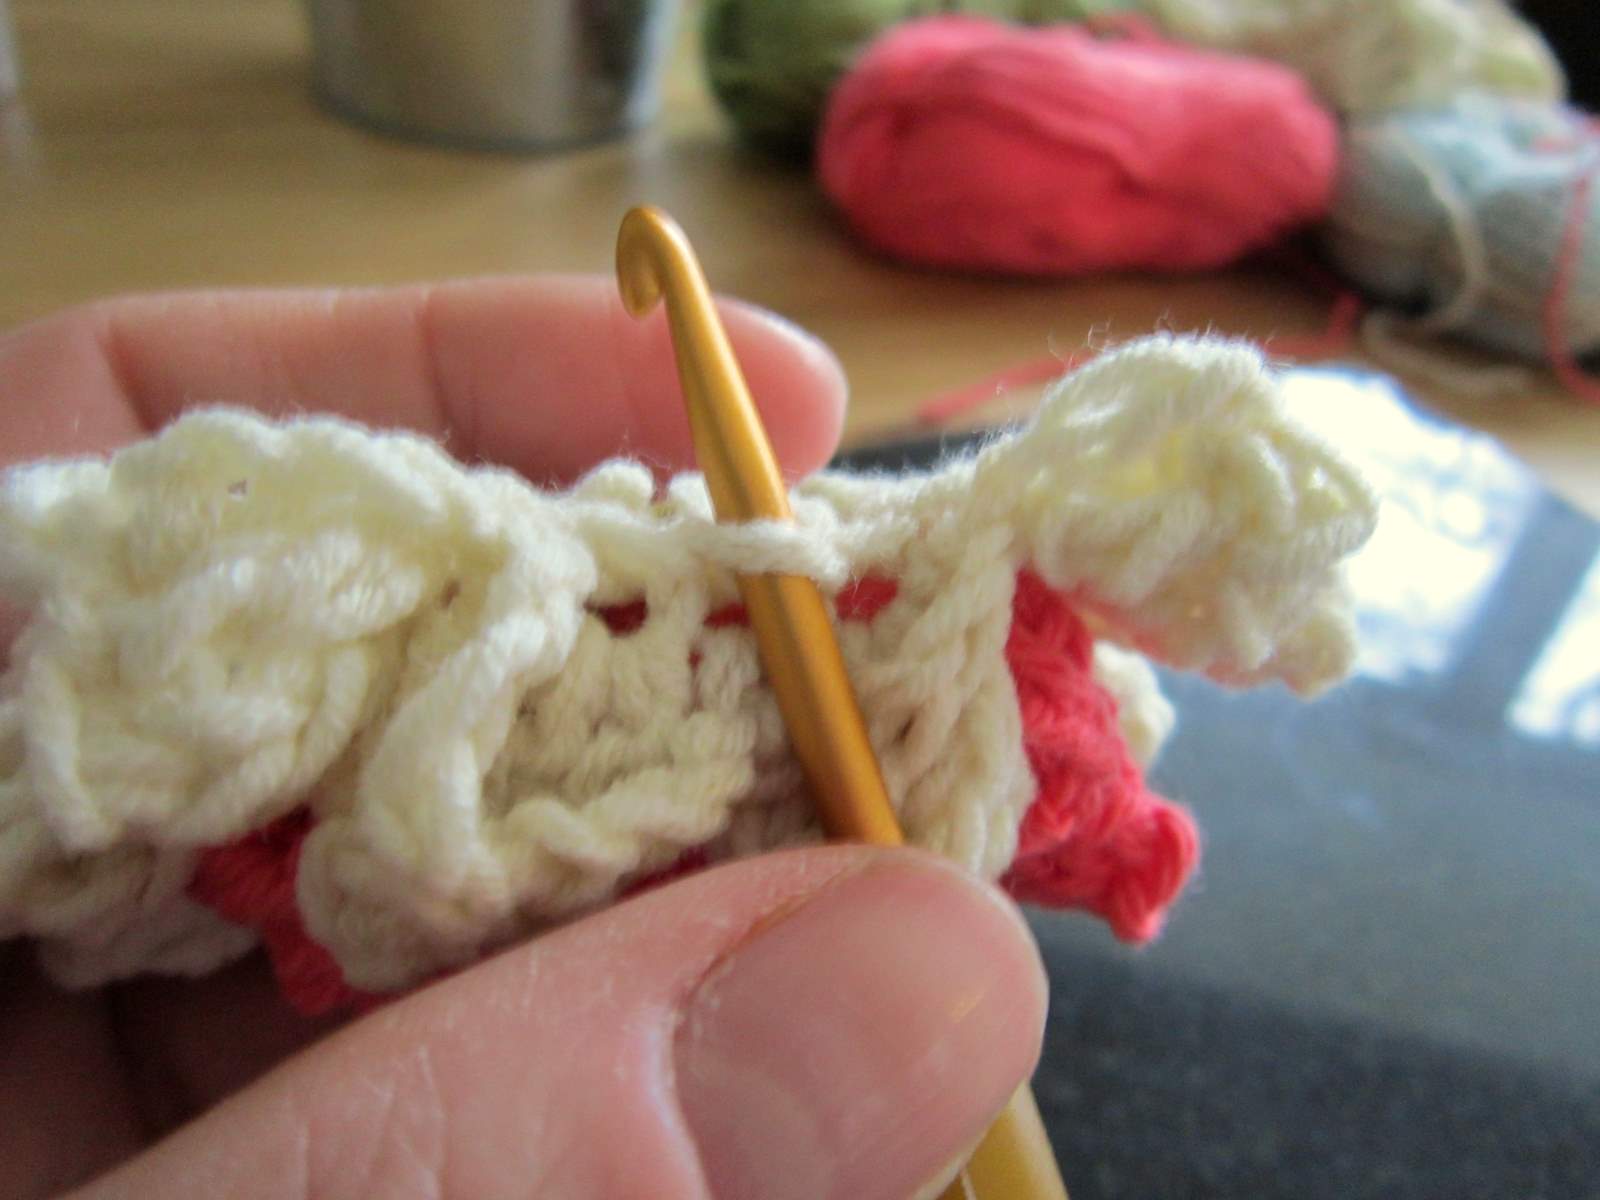
3. Now we are going to make the outer bobbles – ON THIS ROUND WE ARE WORKING ONLY IN THE FRONT LOOPS OF THE STITCHES. Ch 4.
4. Now work 4 tr into the front of the next st. Pull up the loop and drop from your hook.
5. Push your hook from front to back into the first treble worked.
6. Now also catch the dropped loop onto your hook.
7. Holding the yarn tight, pull the loop through the 1st treble to form a bobble. 1 bobble made…!
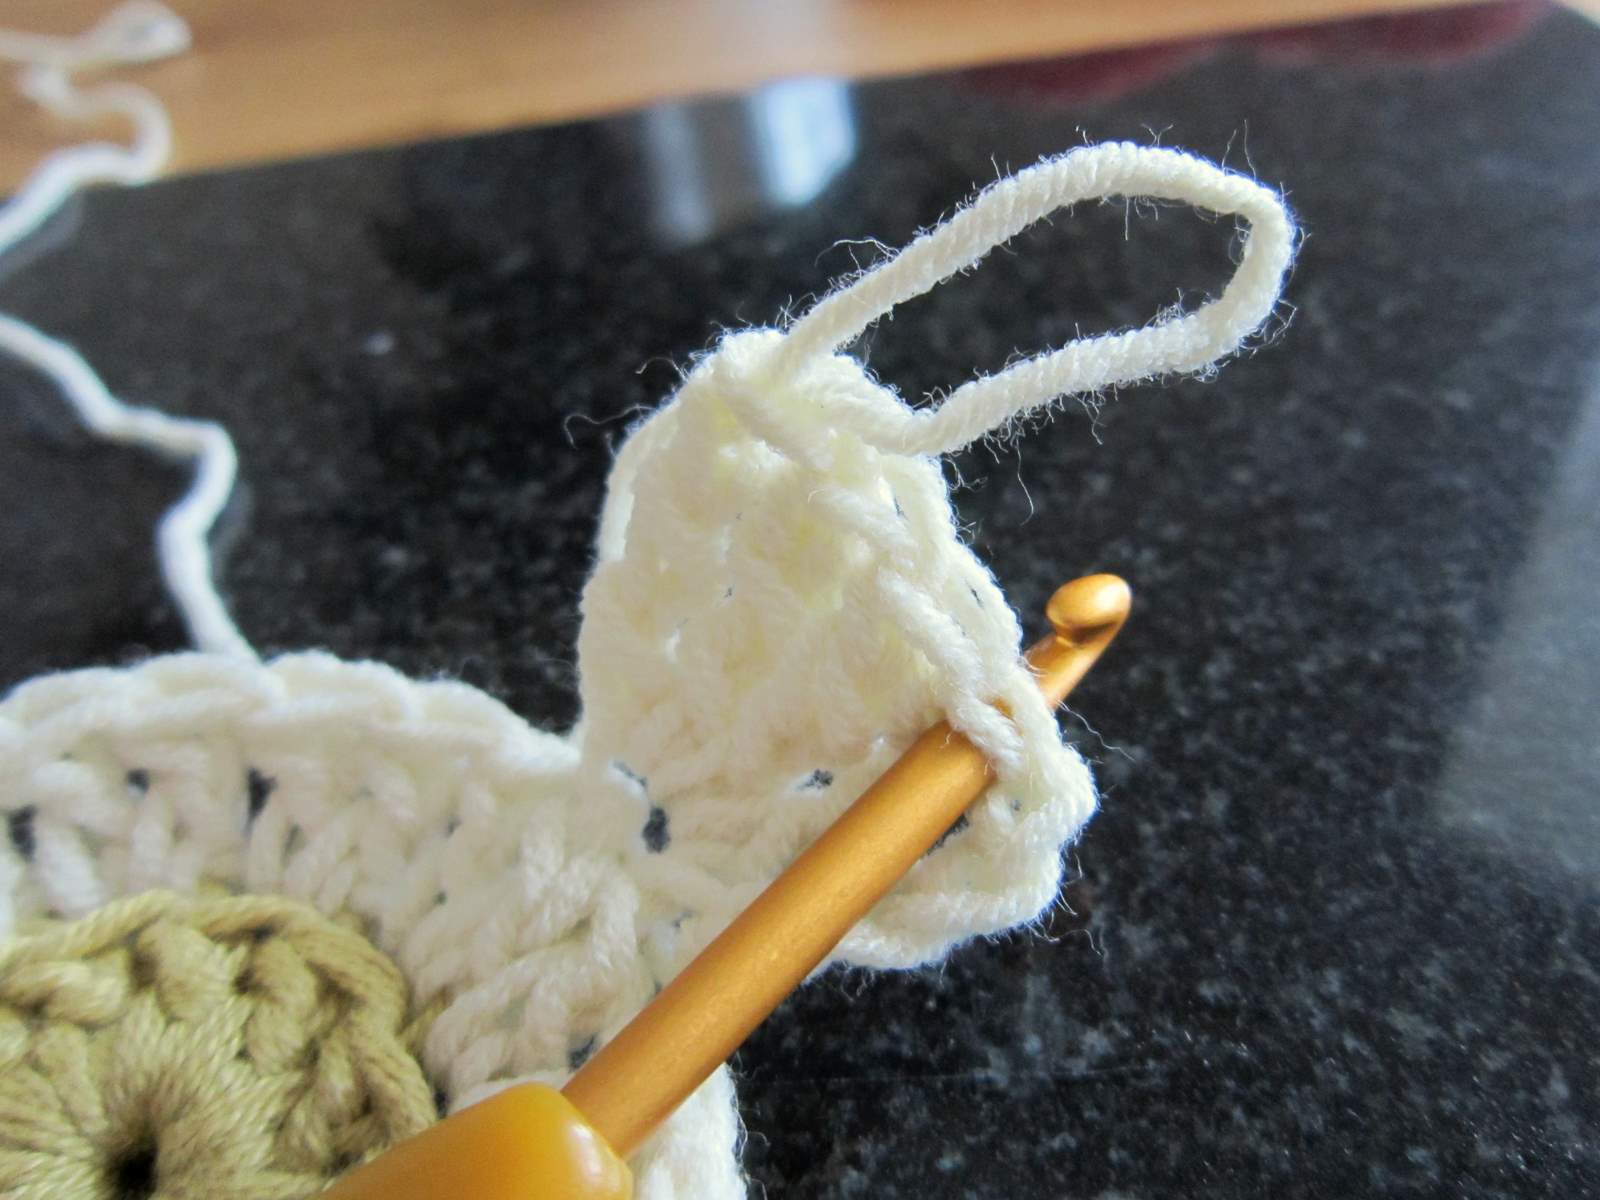
8. Ch. 4
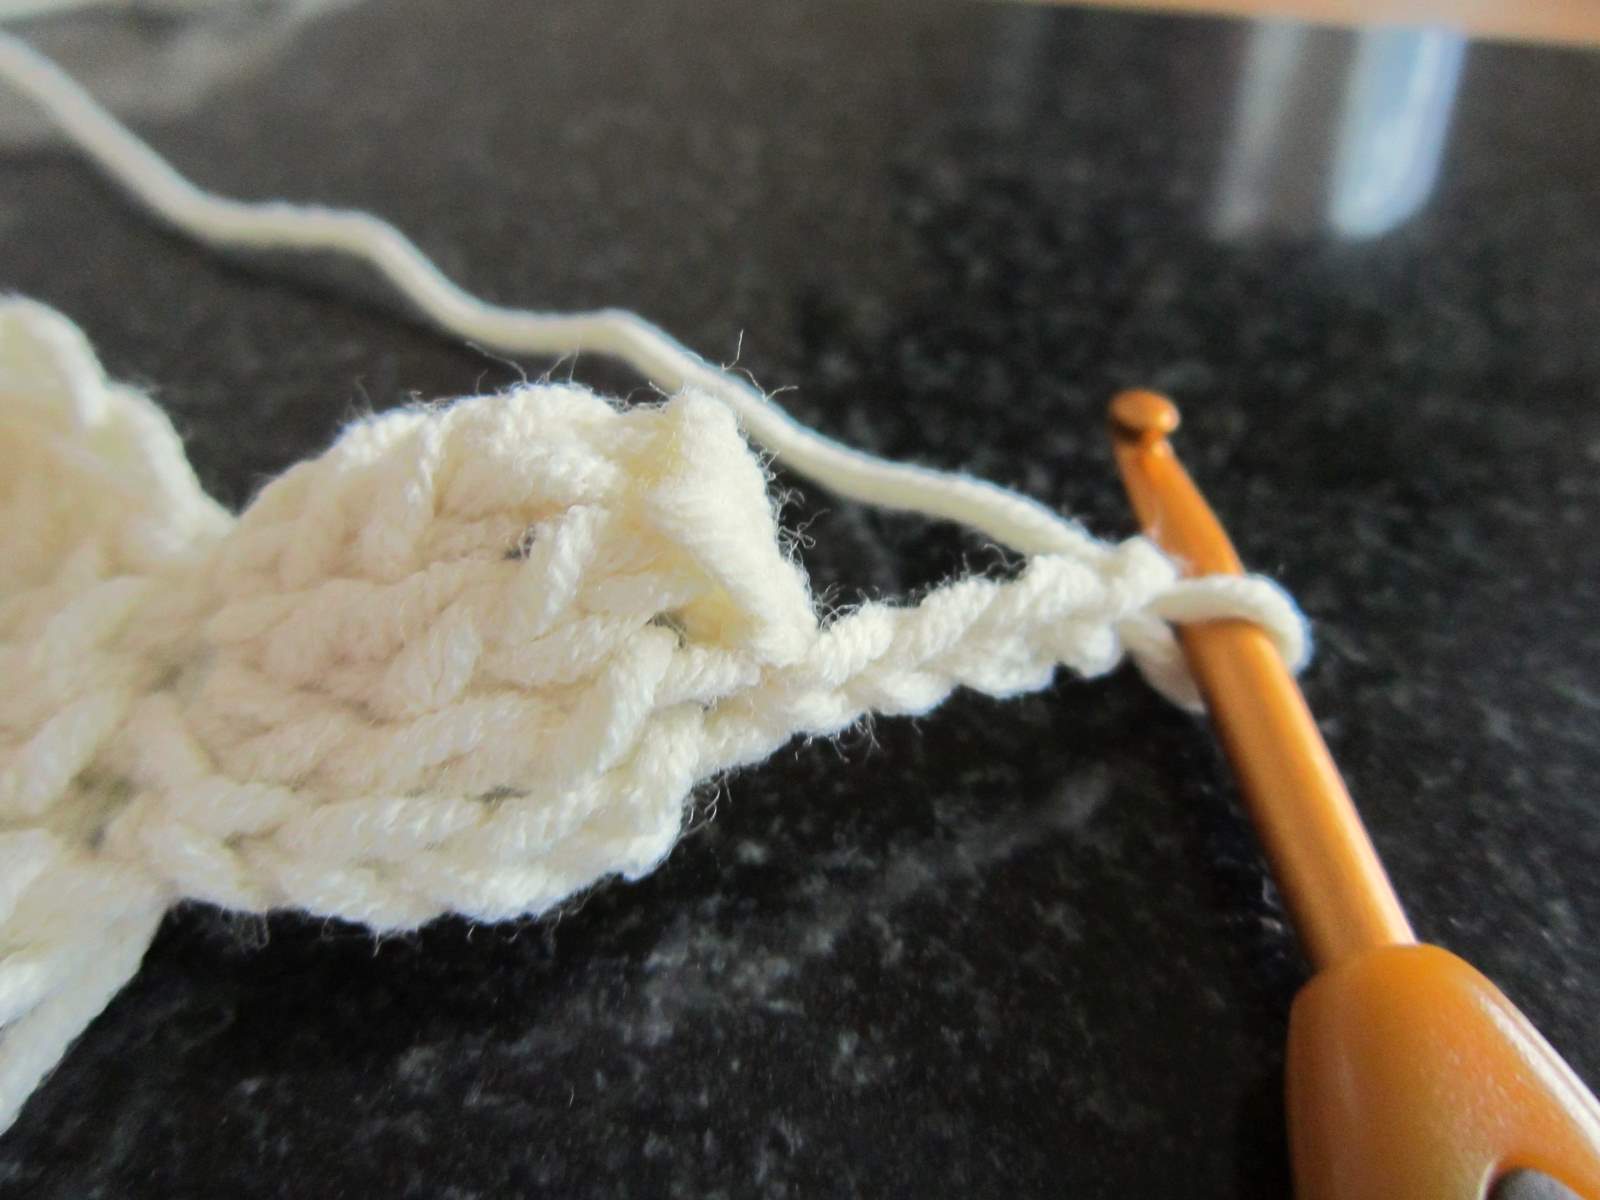
9. and join to the front loop of the next st with a sl st.
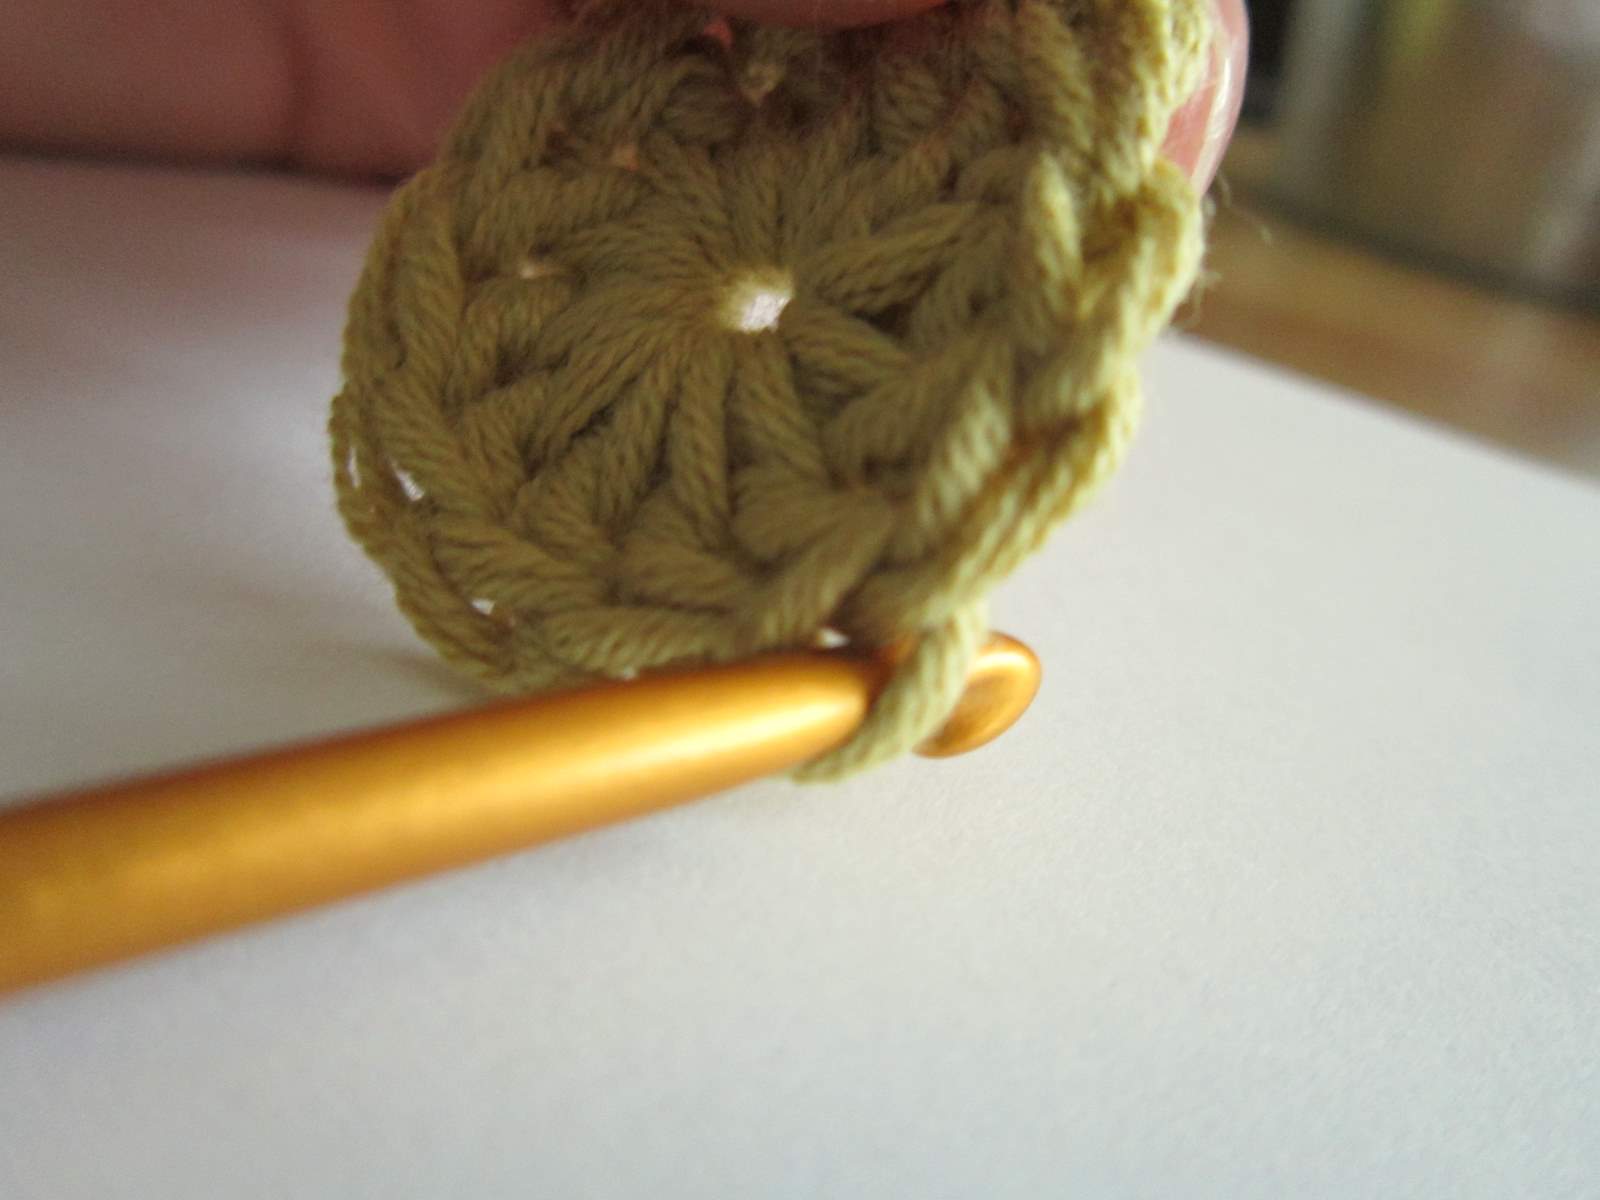
10. Ch 4; make next bobble in front loop of next stitch. Continue like this until 12 bobbles have been made, finishing with ch 4 and sl st into bottom of first ch 4. Fasten off.
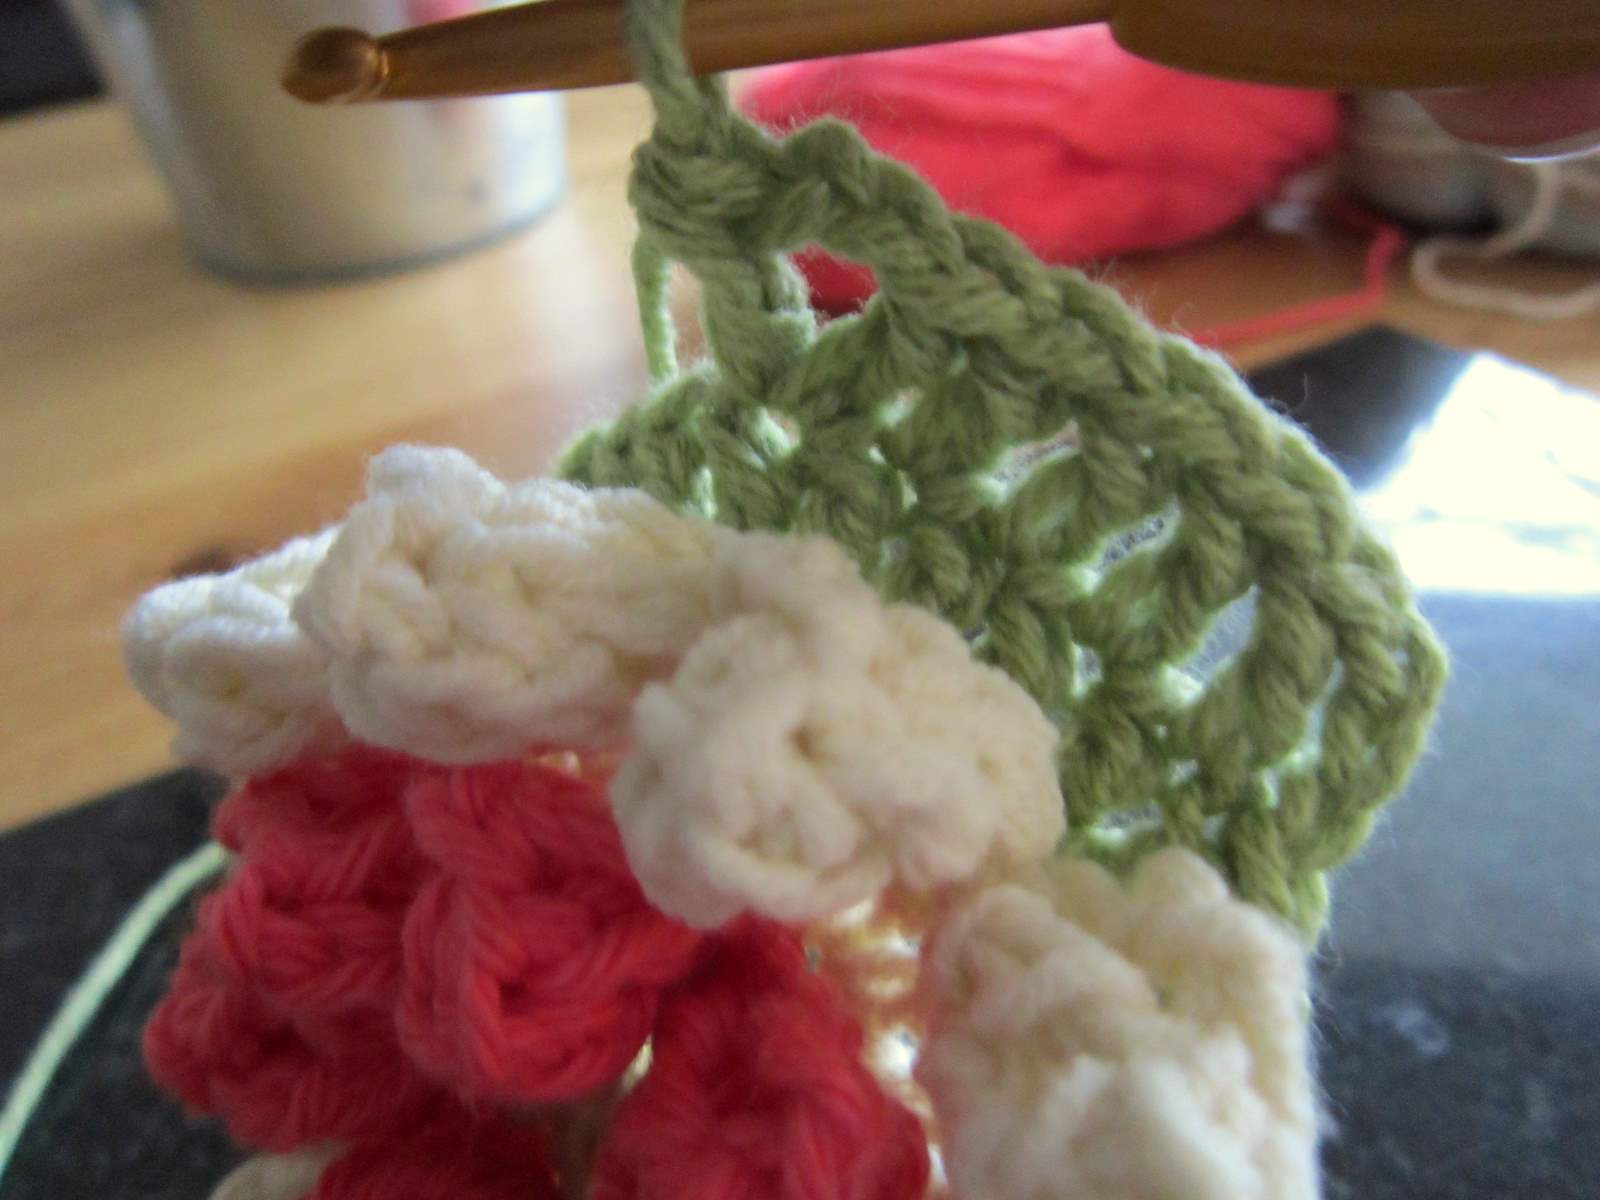
Note that as we worked into only the back stitches of the first round we still have the front stitches to work in – we’ll be doing that next. Below is the back view, and similarly the unworked back loops can clearly be seen at the base of the bobbles – we’ll come back to them.

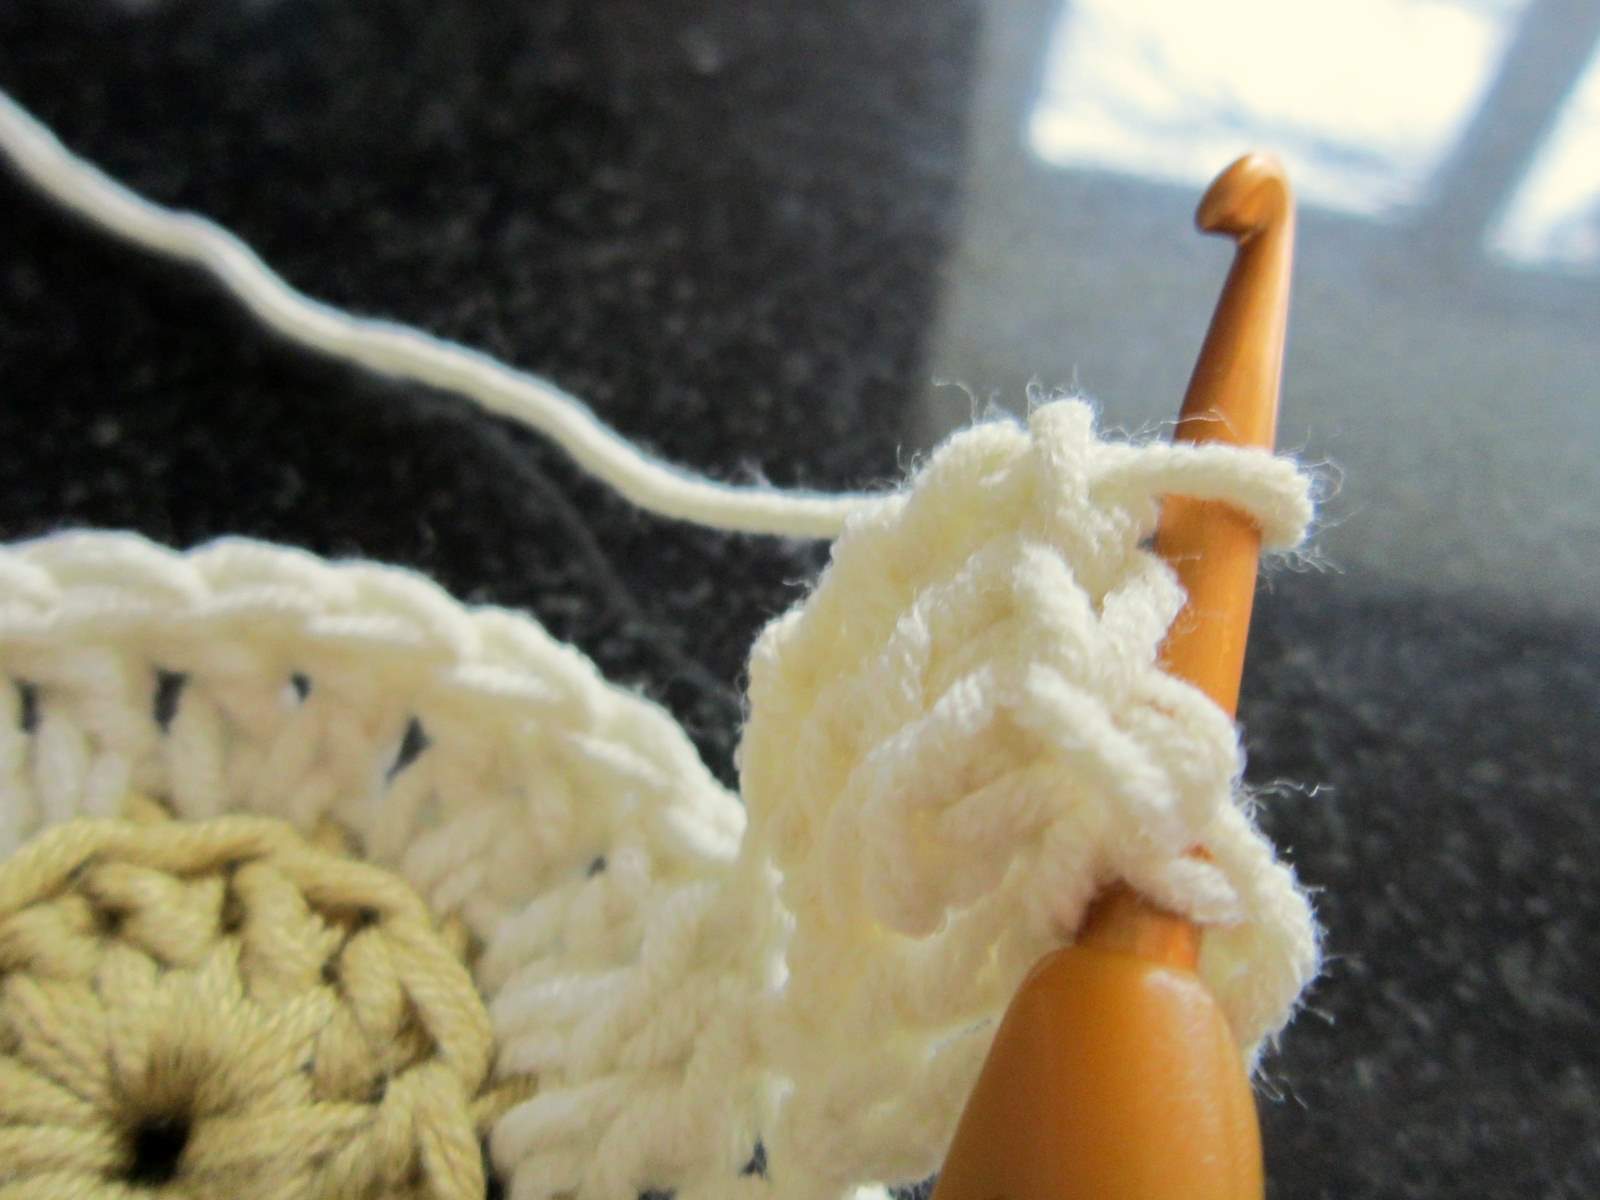
11. Ok, lets put the inner row of bobbles in. Insert your hook into one of the front loops of round 1, and join your chosen colour with a sl st.
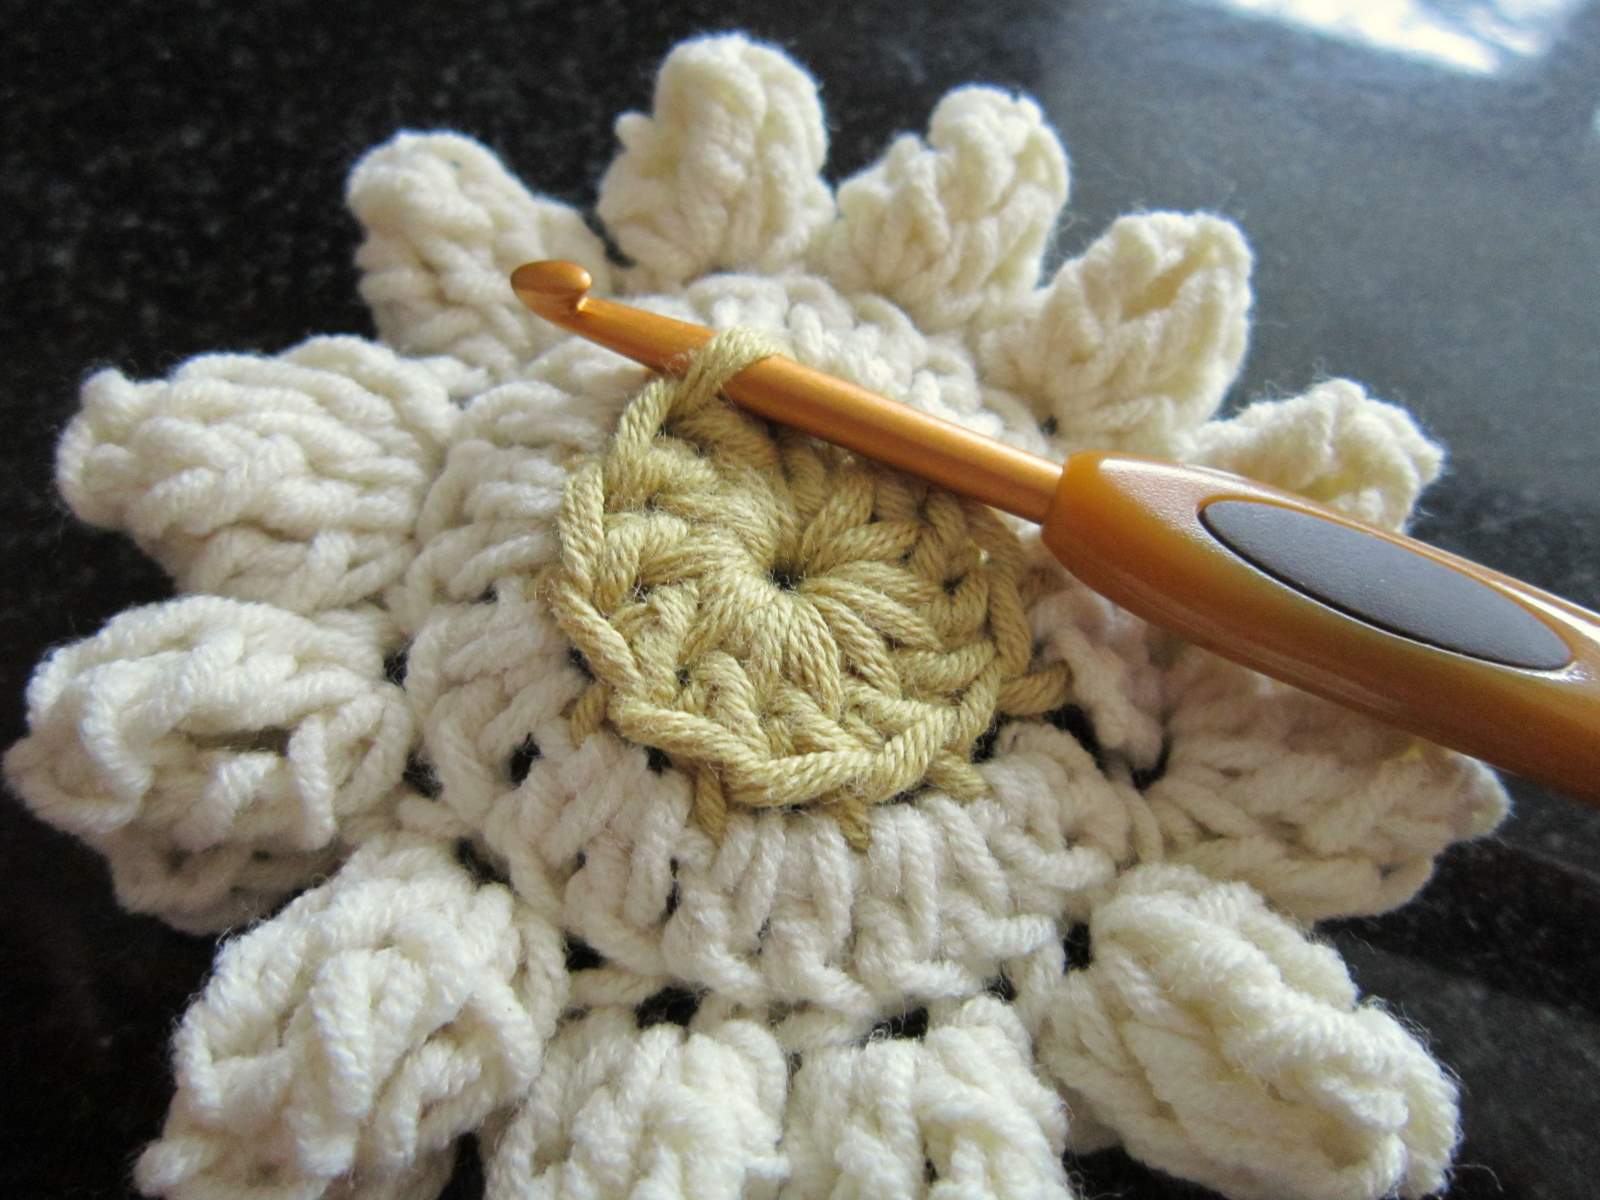
*Ch 4, 4 tr in next st, drop loop, insert hook into top of 1st tr, catch dropped loop and pull through to form bobble, ch 4, join with sl st to next st; rep from * 5 more times. (this is all a repeat of what we did on the previous row, only you’re making 6 bobbles this time not 12). Fasten off.

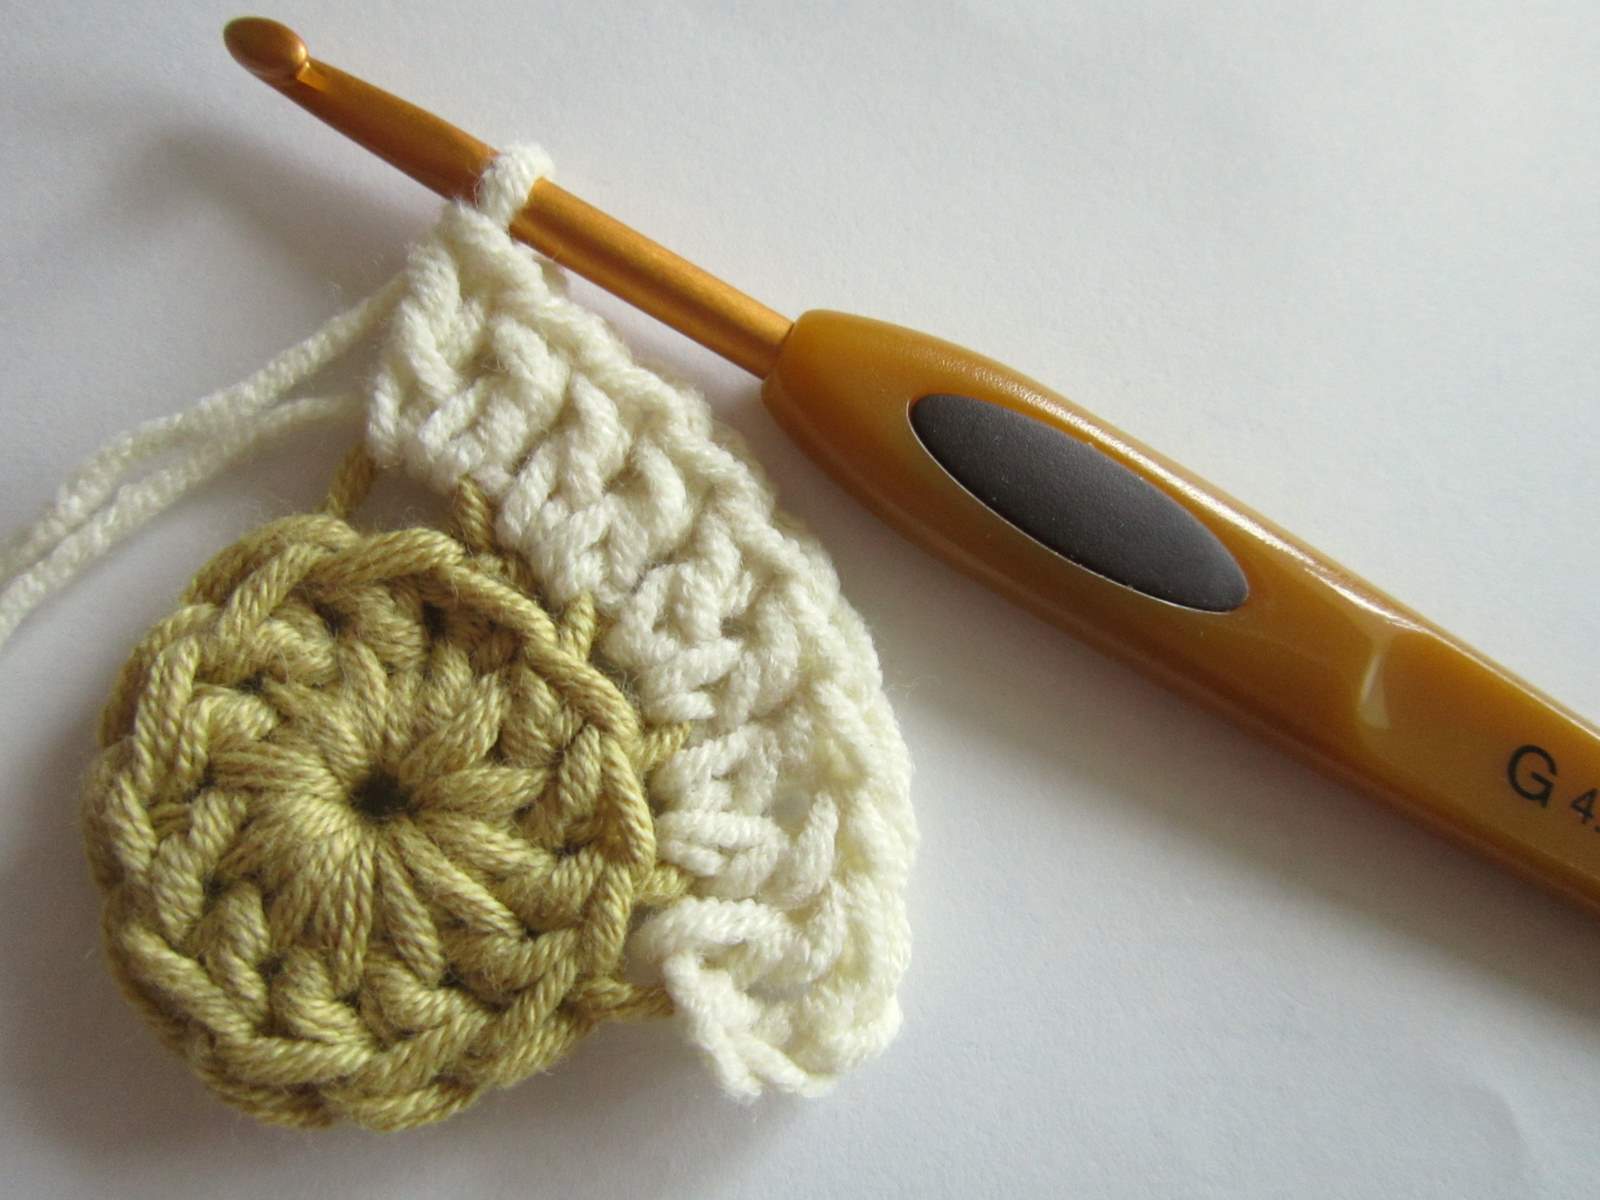
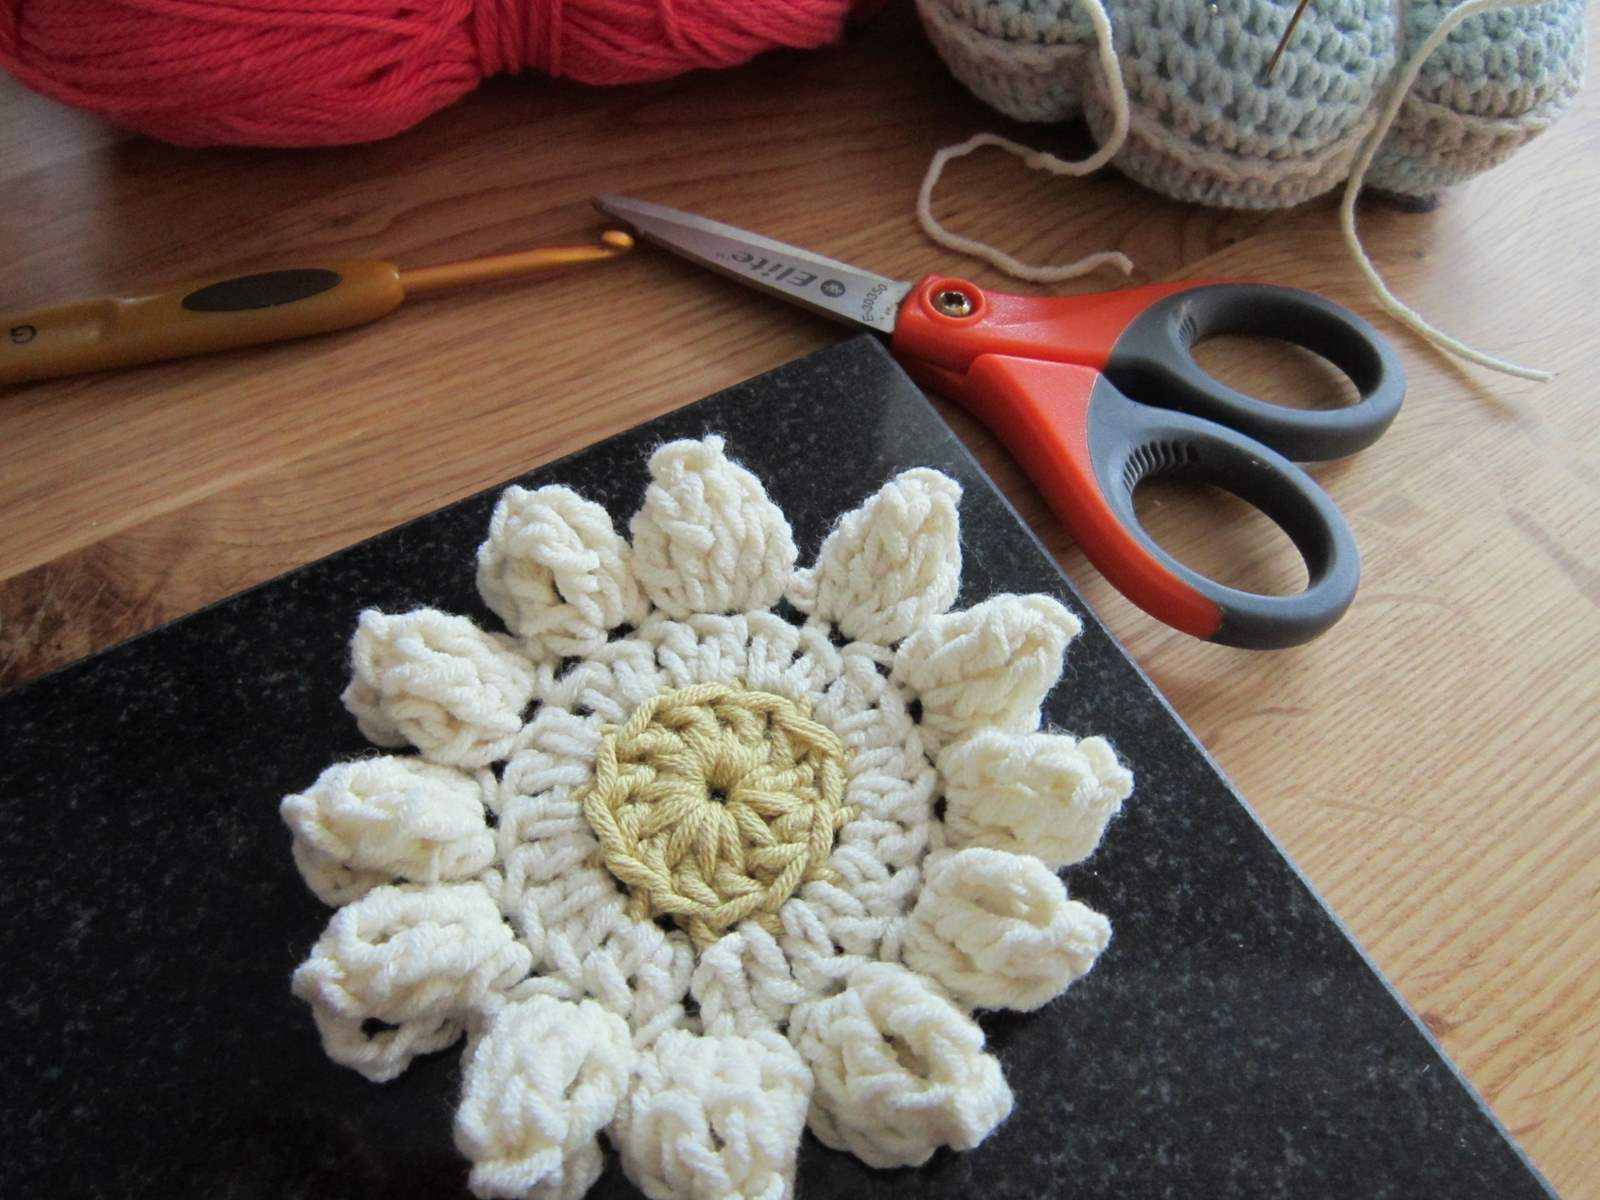
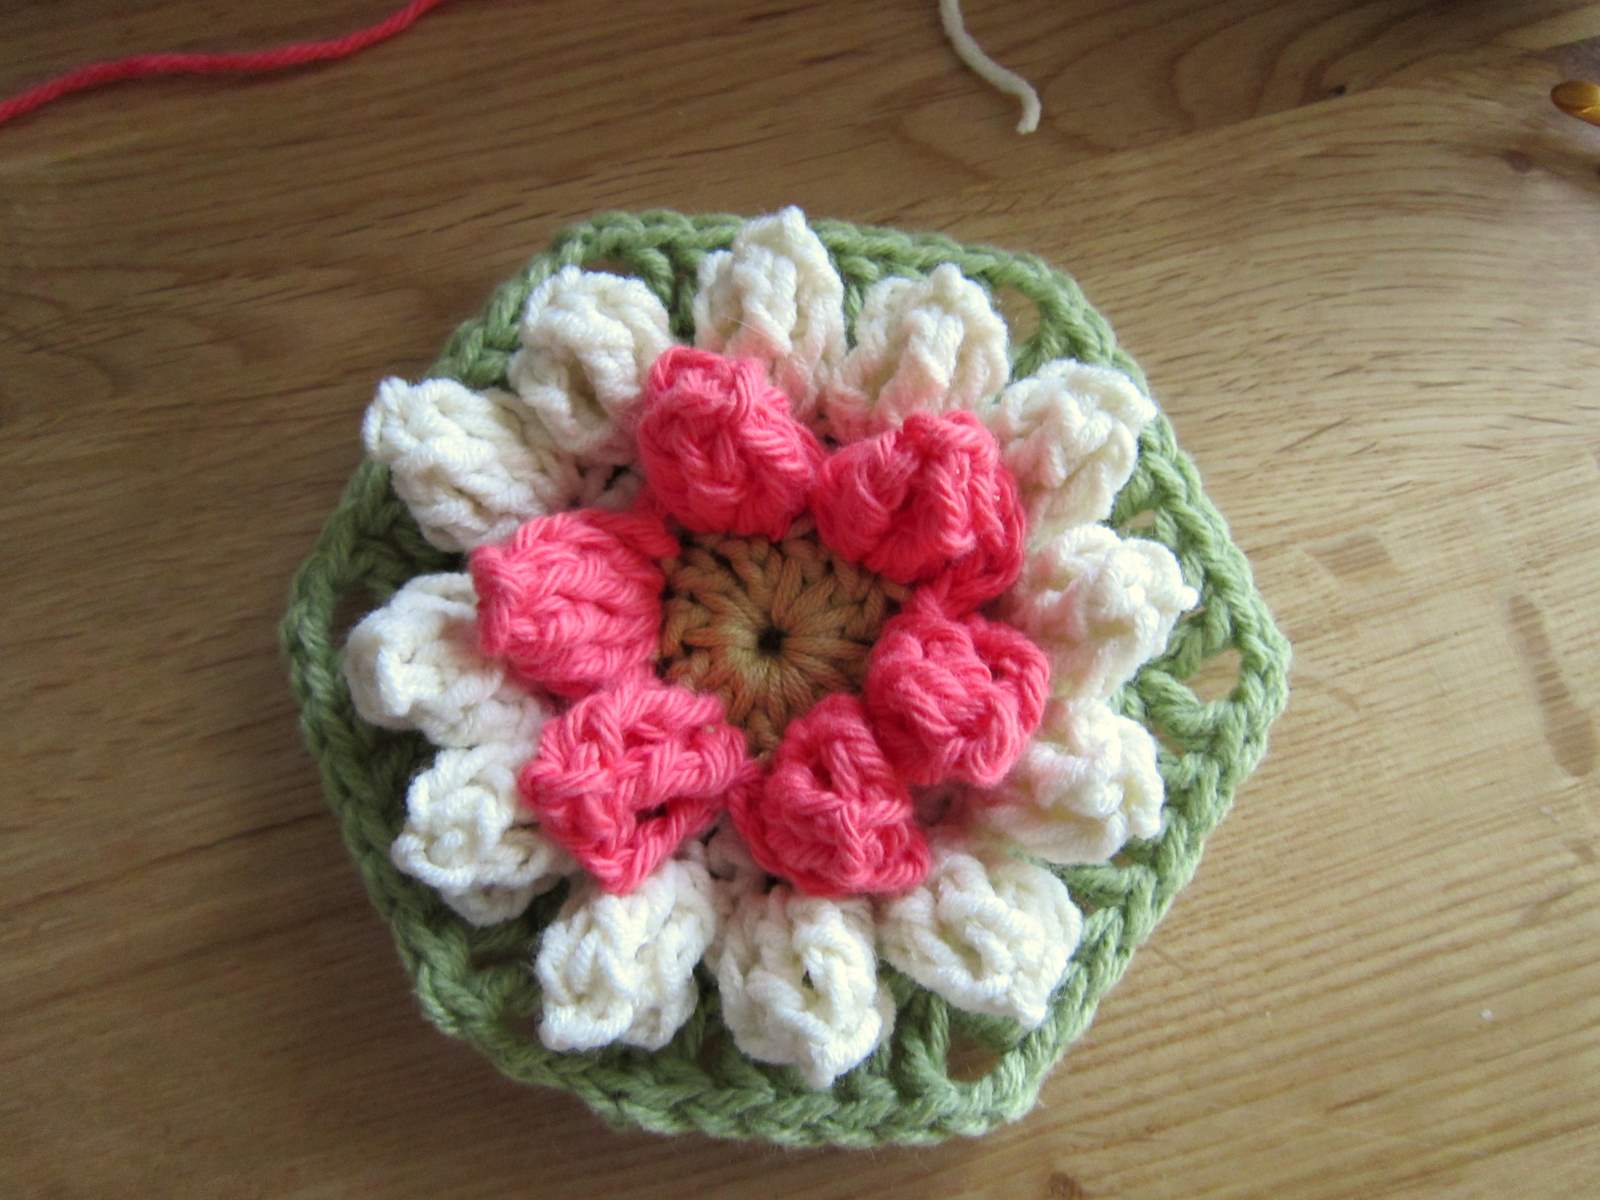
Now this could be your tadaaa! moment if you wish, pop a pin on the back and make a brooch, or sew to embellish a bag or cushion.
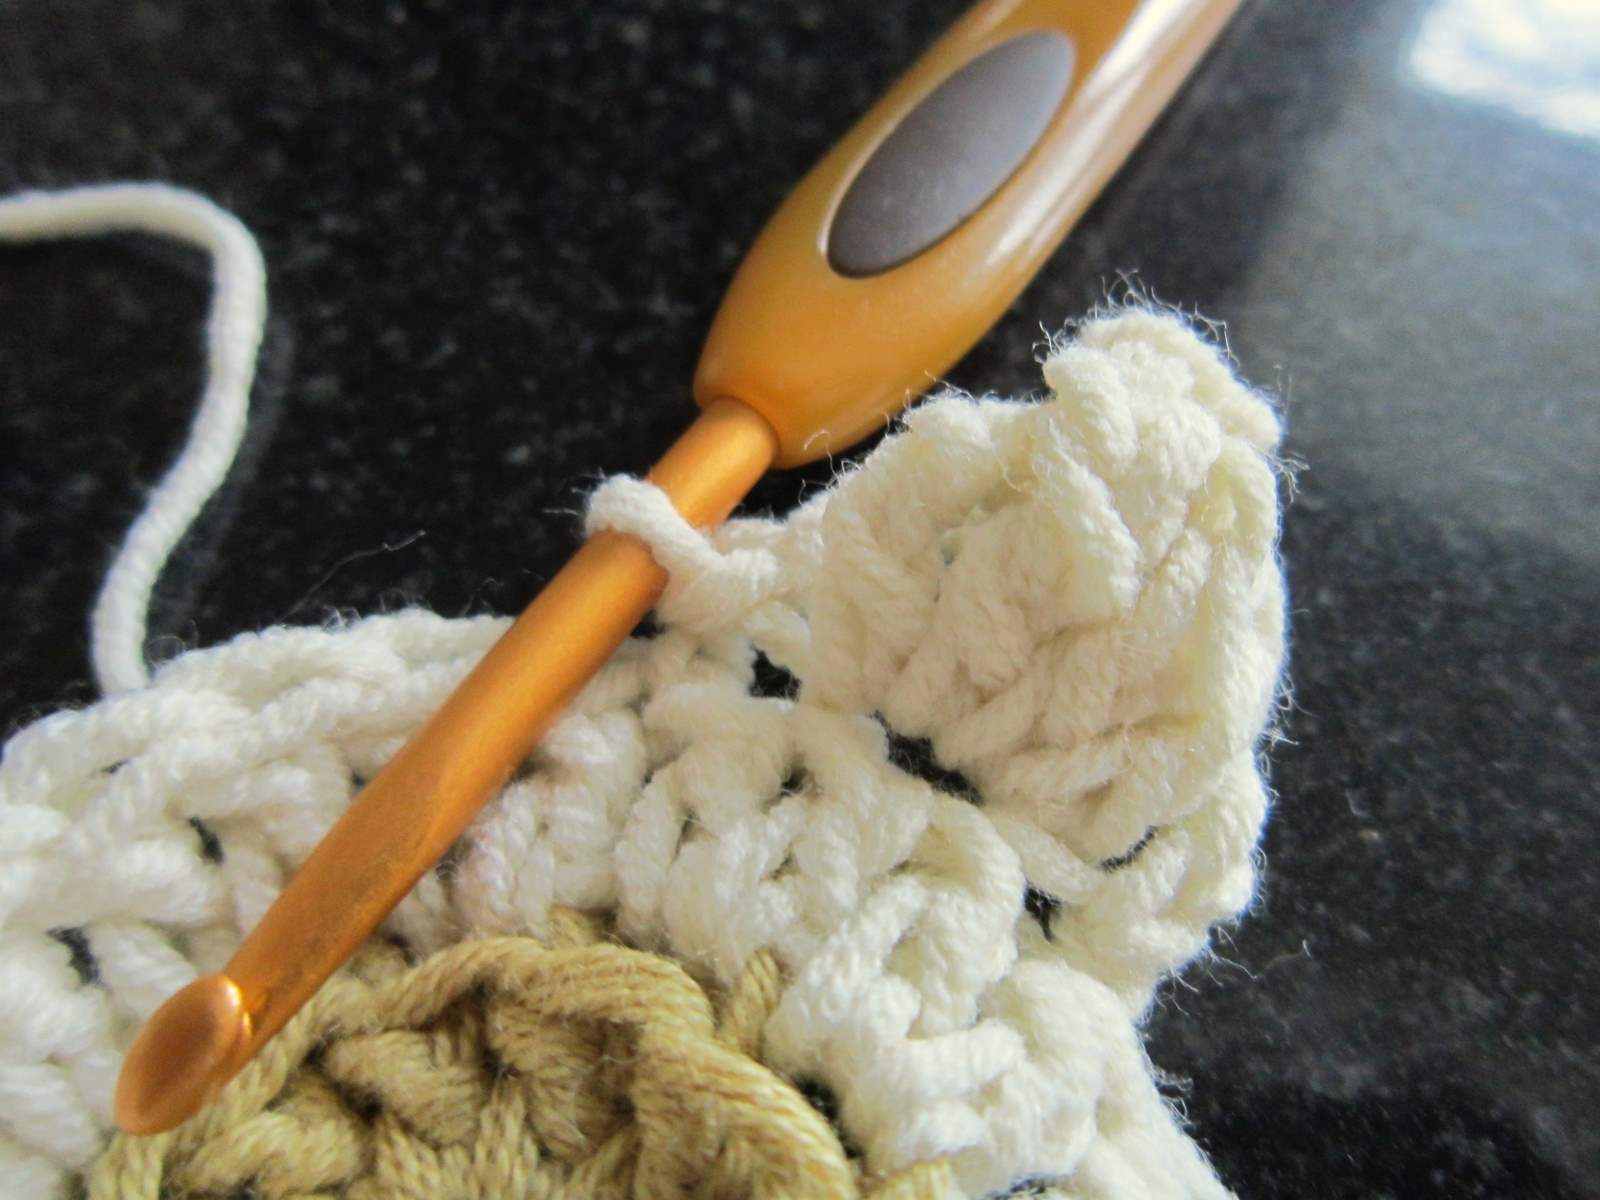
12. But to make into a hexagon; join yarn into one of the back loops at the back of work, under the bobbles. (remember I said we would come back to them)
Ch 3, dc in same st, dc in next st, *2dc in next st, 1 dc; rep from * 10 times more. Join with a sl st into top of ch 3. (36 dc)
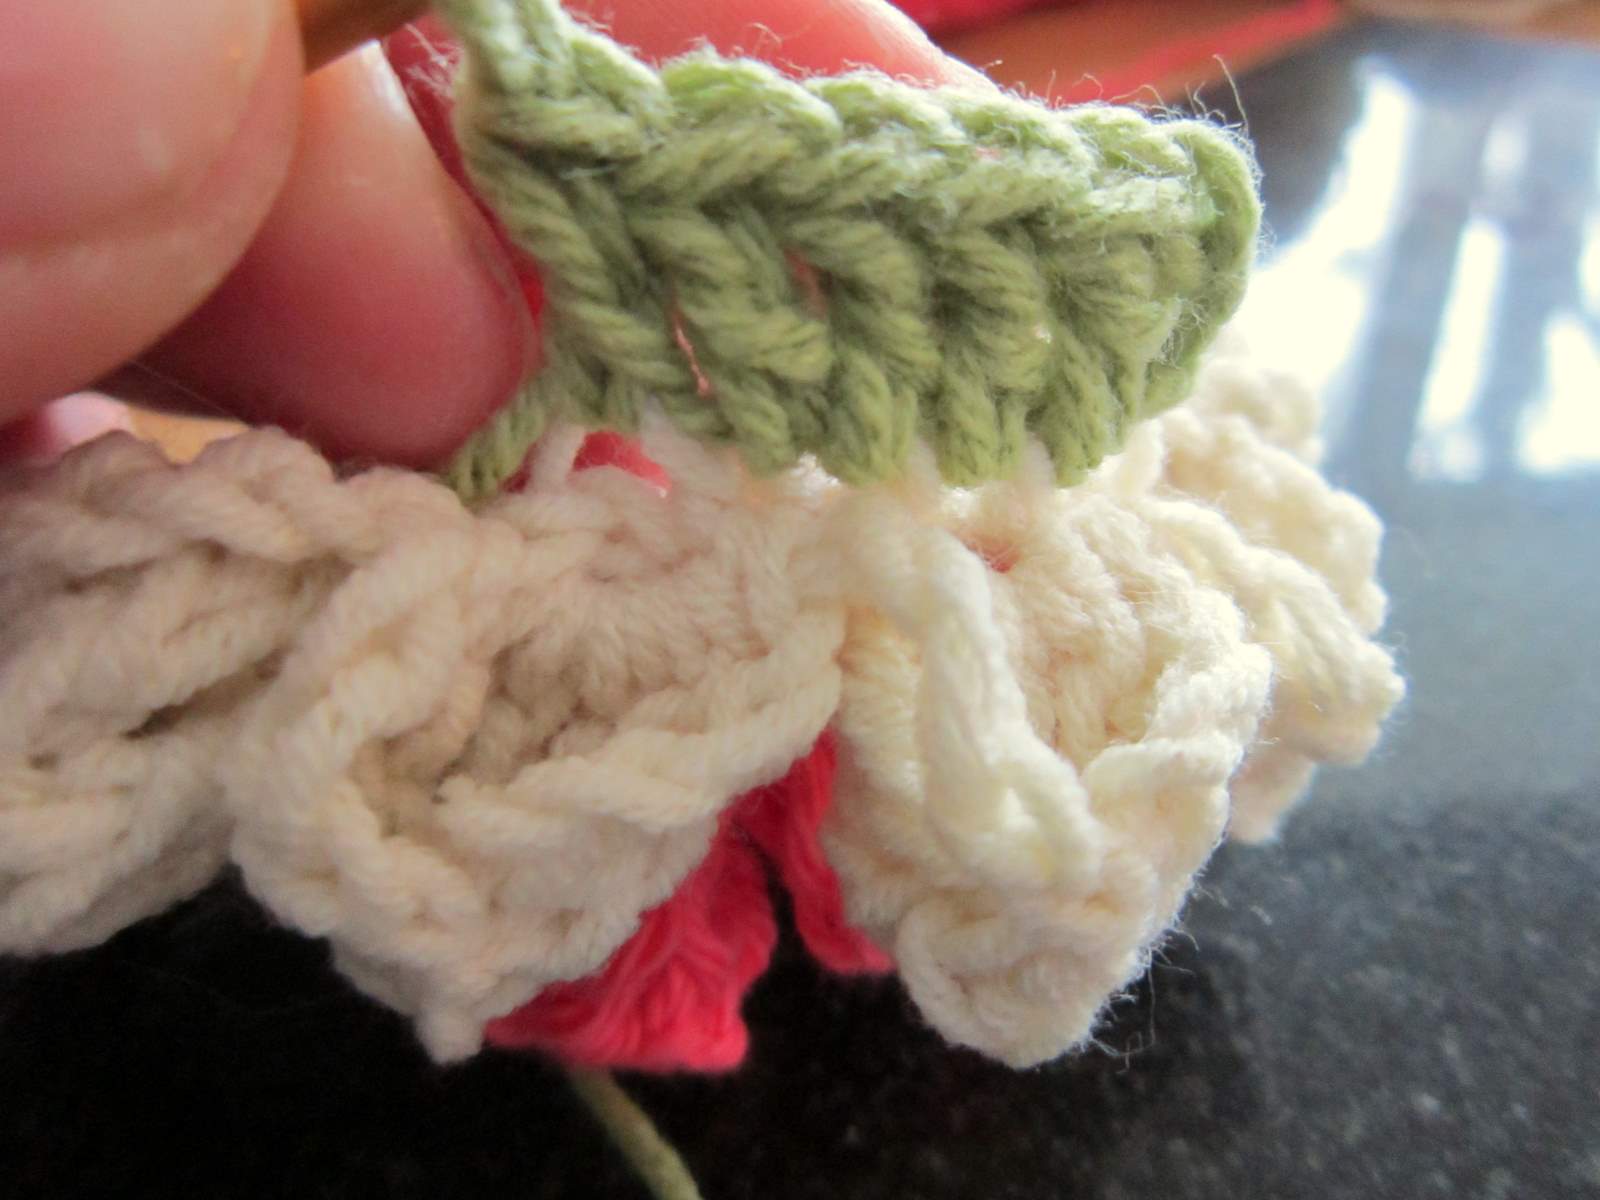
13. Plain sailing now, we are back to working under both loops. Ch 3, dc 4, *[dc1, ch 2, dc 1] into next stitch, dc 5; rep. from * 4 times, [dc1, ch 2, dc 1] into next stitch. Join with a sl st into top of ch 3, fasten off and weave in ends.
And there you go, Lily Pad Hexagon…
А вот видео, поясняющее принцип вязания такого цветка. Он, кстати, называется "попкорн" )))
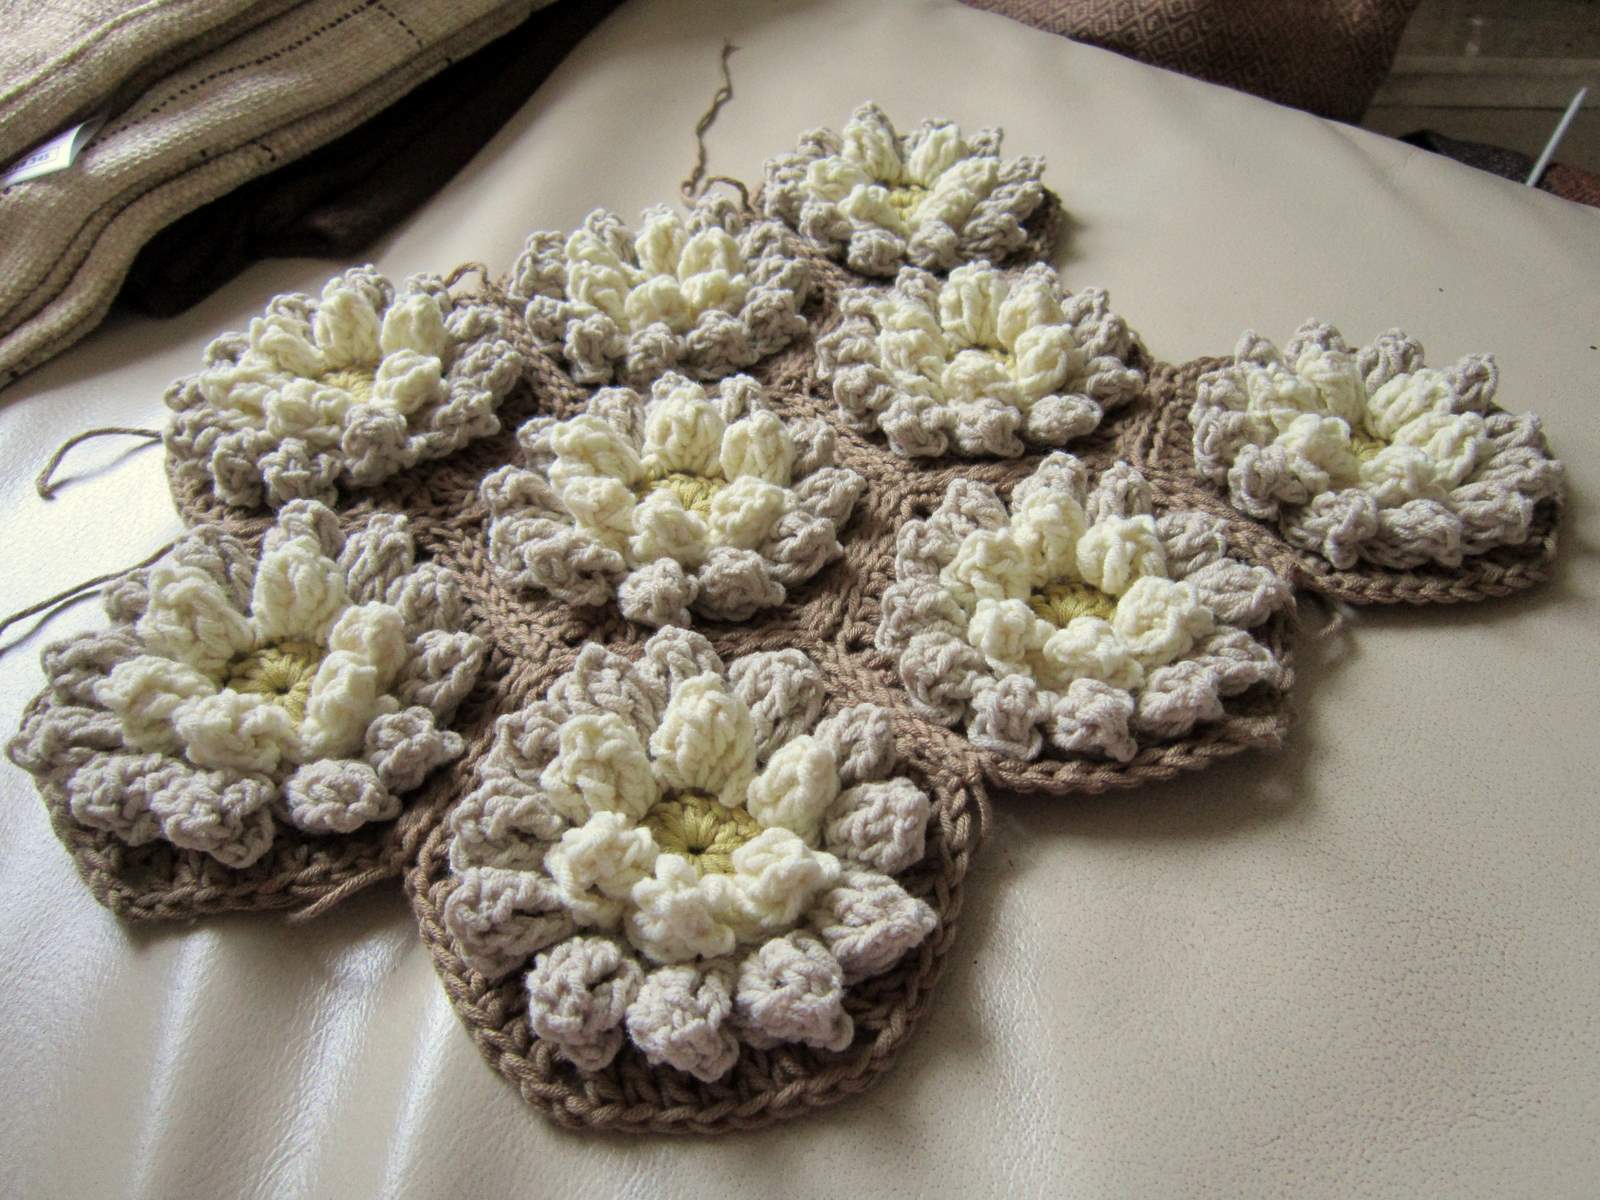
Правда соединены мотивы, надо отдать должное, на редкость аккуратно.
Кстати, такими же мотивами, автор предлагает связать сумочку:
 [показать] И выкладывает на своём сайте весьма подробный МК по ней.
А вот вариант вязания зелёного чашелистника для цветка, как у Colorncream
Авторское вязание такого цветка-чашелистника от Annette Petavy здесь (а она указывает, что автором дизайна этого цветка является Suzann Thompson):
The flower here is crocheted in DMC Senso, a fingering weight cotton or cotton blend yarn (depending on the type of Senso used), with a 2.5 mm (US B-1 or C-2) hook.
This flower is also the occasion to learn a new stitch: the half treble (htr). It is worked as follows:
Yo twice, put hook through work, yo and pull through - there are four loops on the hook. Yo and pull through two loops - there are three loops on the hook. Yo and pull through all three loops.
This stitch is right between the double crochet and the treble in height, and makes a beautiful transition between those stitches.
It is not a common stitch (I had not seen it before I read Suzann's book), and as far as I know, there is no standard symbol for charting it. I asked my charting designer friends for ideas and opinions, and Angela Best came up with this symbol:
[показать]
So, now you've learned the half treble stitch.
You also need to know that a picot in this flower is worked as follows: Ch 3, 1 sc in first ch.
I suggest this symbol for the sc picot:
[показать]
Using a sc in the picot contributes to creating a small eyelet on top of every petal - a detail I quite like.
Now, shall we see how to use these stitches in the brooch flower?
Flower 1:
This is the first flower to make; it sits on top of the finished brooch.
Ch 5, join to a ring with a sl st in the first ch.
Round 1: Ch 6 (count as 1 dc + 3 ch). *2 dc in ring, 3 ch*. Repeat from * to * 3 more times. 1 dc in ring, sl st in 3rd ch at beg of row. There are five 3-ch arches separated by 2 dc.
Round 2: (1 sc, 1 hdc, 1 dc, 1 htr, 1 tr, picot, 1 tr, 1 htr, 1 dc, 1 hdc, 1 sc) in each of the five ch arches. Join the round with a sl st in the first sc.
Fasten off.
Ещё я нашла пошаговый фото МК по вязанию такого же цветка у Tutéate Team здесь:
Ещё немножко о цвете. Вот, например, приятная (моему глазу) цветовая схема: (отсюда)
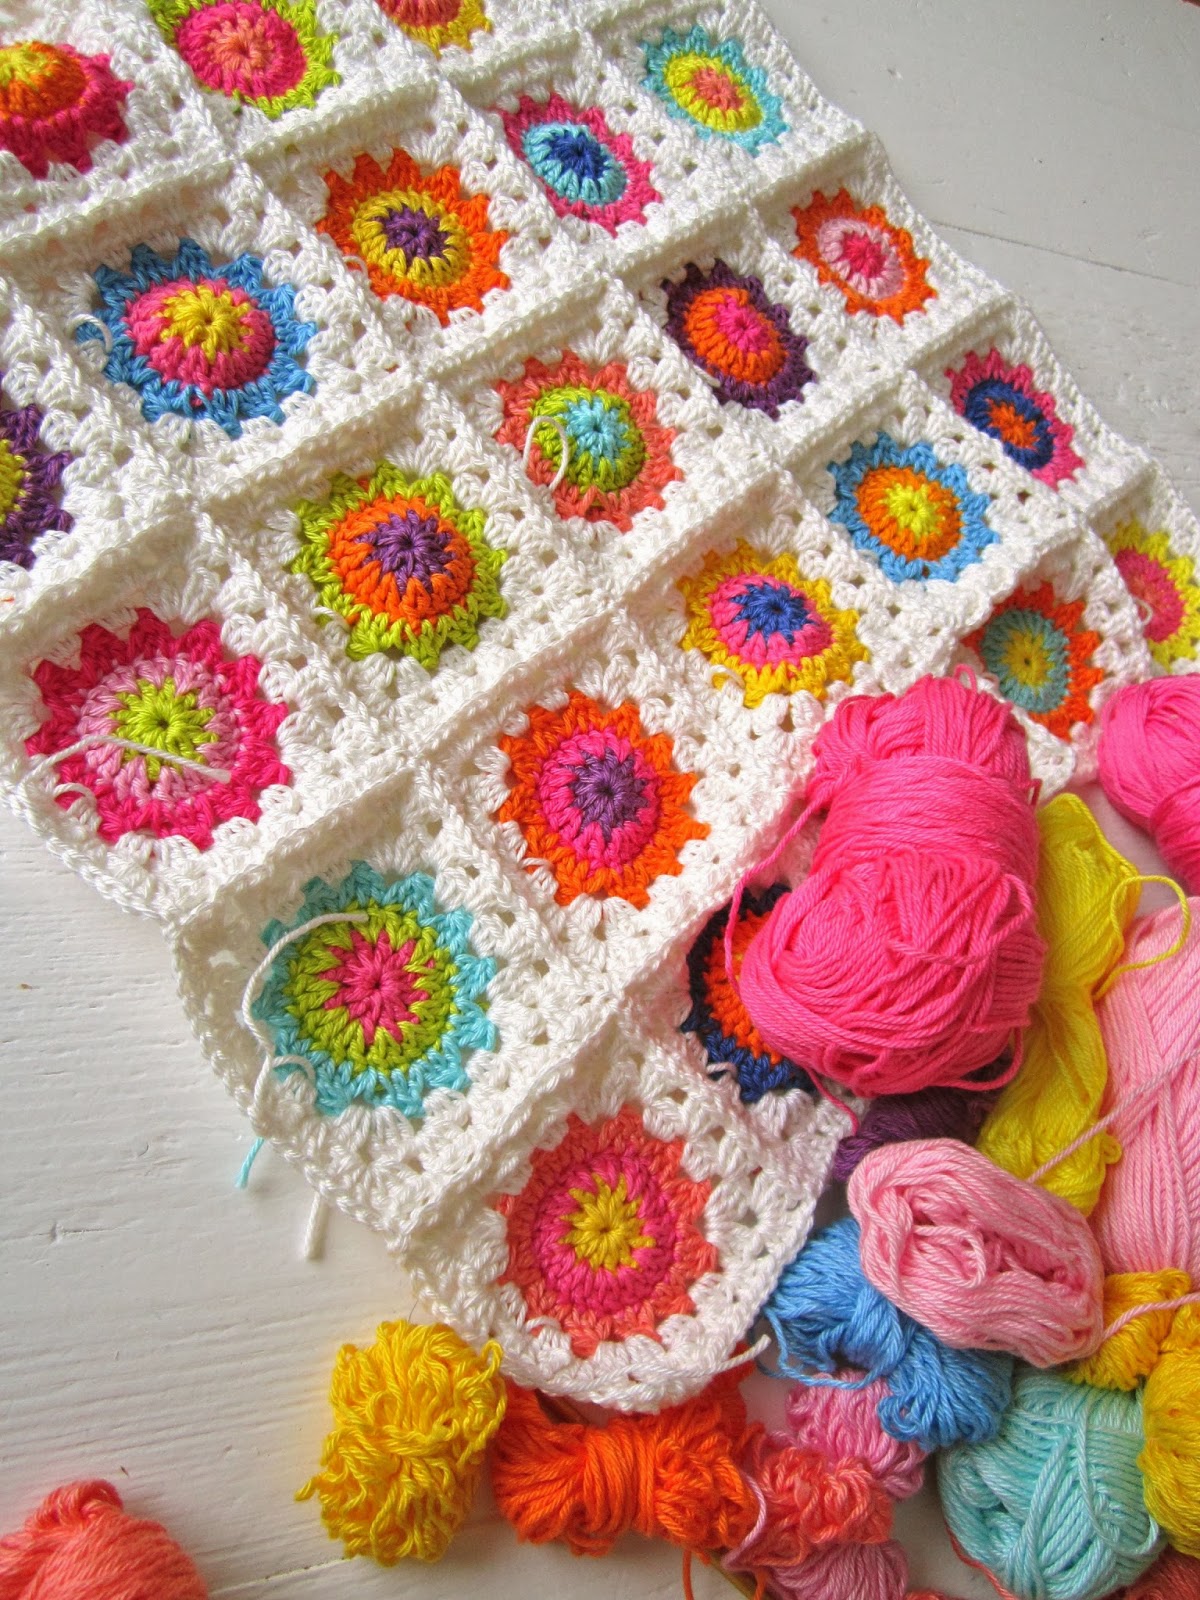
И вот тут мне тоже очень нравится сочетание цветов:
И вот это сочетание цветов нравится: