Это цитата сообщения Ince Оригинальное сообщение
Как сделать крэш. Мастер-класс.
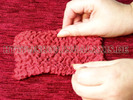
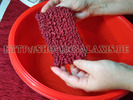
Для изготовления деталей с использованием крэш-технологии необходимо учитывать расход ткани в 1,5 - 2 раза больше чем будет деталь в готовом виде
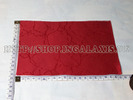

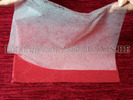
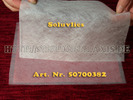
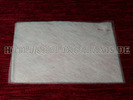
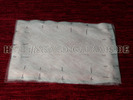
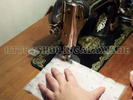
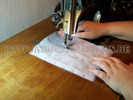
От ширины и направления строчек зависит размер жатки.
Строчки можно выполнять не только строго по прямой, но и в произвольном направлении.
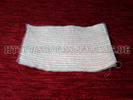
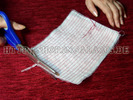

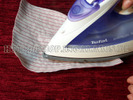
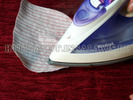
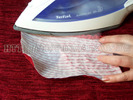
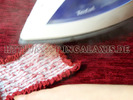
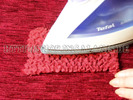
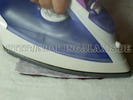
Обрабатываем подготовленную таким образом деталь паровым утюгом с паром на расстоянии 1,5-2см не касаясь ткани.

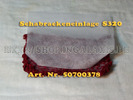

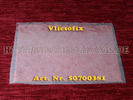
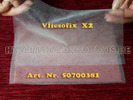
Все используемые в Мастер-классе клеевые материалы можно приобрести вот здесь.
Артикул-номера указаны на фото.
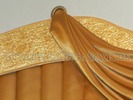
Таким образом можно сделать массу интересностей. Не только шторы, но и всевозможные коробочки, открытки, сумочки, галстуки и многое другое. Это зависит
Это цитата сообщения Dushka_li Оригинальное сообщение
Шьем сарафан от Chloe!
 [показать]
Этот сарафан от Chloe – настоящая находка для лета! Сарафан выполнен из хлопчпатобумажного сатина, длиной в пол, со множеством оборок – такой сарафан будет приятно охлаждать даже в самую сильную жару.
Выкройка сарафана моделируется по Выкройке – основе платья. Но смоделировать выкройку сарафана и сшить сарафан по выкройке очень просто даже для начинающих шить.
Это цитата сообщения Рождена_Весной Оригинальное сообщение
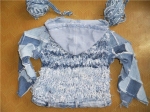
ИЗ СТАРЫХ ДЖИНСОВ. ИДЕИ.
МОЖЕТЕ ПОСМОТРЕТЬ САЙТ ЧТО И КАК МОЖНО СДЕЛАТЬ ИЗ СТАРЫХ ДЖИНСОВ http://www.jeans-optom.ru.
ЗДЕСЬ СОБРАНЫ ТОЛЬКО ИДЕИ С ПРОСТОРОВ ИНТЕРНЕТА.
Это цитата сообщения Тати_Бо Оригинальное сообщение
Розовый комплект(шапочка , варежки , шарф)
Источник : клуб Осинка, автор:Матаня72
[показать] 
Это цитата сообщения Oksana_Hilles Оригинальное сообщение
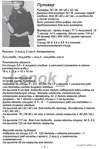
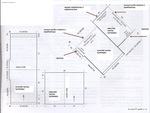
Супер-пуловер из вытянутых петель
 [500x500]
 [показать]
 [показать]
Это цитата сообщения marisha54 Оригинальное сообщение
Для любимой крохи. Восьмиклинка.
Из Блог Анжелики о вязании крючком
Урожайный на идеи выдался денек сегодня!
Не могу удержаться, что бы не поделиться!
[показать] [показать]ПМ Восьмиклинка.
На основе вот такой восьмиклинки можно связать и платье и кофту с короткими или длинными рукавами.
[472x450]Это цитата сообщения Иримед Оригинальное сообщение
ВЕК ВЯЖИ-ВЕК УЧИСЬ! УДЛИНЕННЫЕ ПЕТЛИ И СКЛАДКИ СПИЦАМИ. МАСТЕР-КЛАСС
http://magiya.com.ua/master_class/mk_spokes/172.html
АВТОР: КУЛЯ
Удлиненные петли иногда в журналах встречала название вытянутые петли
(хотя это совсем другие петли).
И как можно сделать складки на трикотажном изделии.
Краевую петлю снимаете не провязывая.
Делаете накид.
Следующую петлю провязываете как обычно.
Опять делаете накид.
Провязываете следующую петлю.
И так вяжете до конца ряда.
Накидов может быть разное количество.
Чем больше накидов, тем вытянутее будет петля.
[показать]
В следующем ряду провязываете петли, сбрасывая накиды.
Провязав ряд, полотно оттяните.
Получится ряд с длинными петлями.
Это цитата сообщения Тати_Бо Оригинальное сообщение
Пальто
 [485x286] [показать]
Девочки вязали в Осинкахhttp://club.osinka.ru/topic-92757?&start=30
Это цитата сообщения MamaVarvarki Оригинальное сообщение
Утепляемся. Шьём, шарфы, шапки, варежки и т.п.
Делюсь найденным на просторах инета [показать] Надеюсь кому-нибудь будет интересно.
1. Как сшить скуди. [показать]
2. МК по созданию митенок. cozyhomemaking.blogspot.com/2009/01/keepingwarm.html
3. Делаем шарф из футболок. www.rufflesandstuff.com/2010/02/easy-ruffled-t-shirt-scarf.html

Keeping.Warm
[показать]Waving at you, Deb, with a shameful look, for such a delay in making this ...
Yes, at long last, the wristwarmers tutorial is coming. Sorry it didn't came earlier, but truly there are not enough hours in a day for me. LOL (but always too much time spent doing housework, so how's that possible ?!)
Here we go. (please ladies, be tolerant, this is my first tutorial ever, and I'm probably not using the proper/correct words for what I did, but I hope the photos will speak by themselves)
* FLEECE WRISTWARMERS TUTORIAL *
You will need : [показать]- two 28x26cm / 11.02"x10.23" rectangles of fleece (I used fleece from a plaid I had bought at the supermarket) I have to add that I have rather small hands (though not that skinny, ahem ...) so if you think you have bigger hands, don't forget to add a little more ...
- a sewing machine + thread + pins + scissors
- embroidery needle + embroidery thread if you mean to add a little embroidery on them
{1} on the long sides of the rectangle, sew a hem (1 cm / 0.40" approx.) with a stretch sticth, as these will be around your fingers, and around your forearm, so they need to be *a bit* stretchy ... [показать]
{2} this is the moment for embroidering a little something if you want to. I embroidered a simple daisy on these. Simple, and it cheers a bit this hot pink fleece ! [показать]
{3} sew a normal (not stretch) hem on the two other (and shorter) sides of the rectangle [показать]
{4} & {5} now your rectangle should look like this ... (showing you the back & front) [показать] [показать]
{6} now put your rectangle like on the last photo, showing the good side of the embroidery, and fold it in half, this way : [показать]
{7} then, keep pins at your other hand's reach, put one of your hand (the one you'll be sewing this first wristwarmer for !) on the folded rectangle, exactly where your hand should be once inserted in it. This is for you to mark where you'll be sewing (and not sewing) & where / how much room you have to leave for your thumb to go through. [показать]
{8} put your pins in place, and if you wish add some more at the top, next to your fingers, if you don't want the aperture to be too loose around your fingers. If you don't cut a bit of fleece at this place, the aperture will be a little loose around your fingers. Some people prefer this, so anyway, you can do this later, after trying the wristwarmers on, and judging yourself if it's too loose or not. (uh, clear ?!) So the pins on the left top corner are to remove a little triangle of fleece & narrow the aperture a bit. [показать]
{9} so it should look like this, minus my hand ... [показать]
{10} sew with a normal stitch (not stretch) where you marked, along the hem stitch you had previously done, and stop where you
Это цитата сообщения Таня_Одесса Оригинальное сообщение
Трикотажная пуговица.МК
Понравилась эта идея изготовления пуговицы, отличный МК понятно все без лишних слов, автор этой красоты и еще много чего другого SilverRain [показать]
http://club.osinka.ru/topic-51603?&start=60
Это цитата сообщения Karol-Li Оригинальное сообщение
Старинные вещи 1950-х годов XX века, ч. 6/1.
Женское платье из тюлевой ткани, украшенное цветной печатью, 1950-е года.
[показать] [показать] [показать] [показать] [показать] [показать] [показать]Это цитата сообщения галина5819 Оригинальное сообщение
Прочна ли нить?

У вас в руках катушка ниток. Чтобы определить, можно ли этими нитками шить на швейной машине, нужно отмотать 1 м нити и сложить ее вдвое. Если она, скручиваясь, сделает два-три оборота, можете спокойно ее использовать ее для строчки.
Если нить сделает 8-10 витков, то такая нить не пригодна для шитья на машине - она будет путаться и рваться.
Это цитата сообщения Даниэль_Бехельман Оригинальное сообщение
Что такое Жабо и как его шить.
[показать] Слово "жабо" пришло к нам из французского языка (jabot - птичий зоб) и имеет несколько значений. Изначально – в XVII-XVIII веке – так называли очень модные кружевные или кисейные оборки вокруг ворота или на груди мужской сорочки. Такого вида жабо вошли в европейский костюм как непременная деталь белоснежной мужской рубашки, которая красноречиво говорила окружающим о достатке и франтовстве её владельца. Жабо могло быть коротким или достигать талии, шилось из пышных кружев или кроилось из гладкого материала, спадало крупными волнами или топорщилось мелкими складками. Почти сразу это мужское новшество было заимствовано женщинами. Так, российские придворные дамы времен Екатерины II одевались в камзол, изящным дополнением которого была сорочка с жабо.
В XIX веке жабо приняло совсем странную форму – стоячего воротника, закрывающего щёки и как бы поддерживающего шею. Такой достаточно жёсткий аксессуар, наверняка, имел какое-либо утилитарное назначение. Возможно, он защищал дорогой наряд от крошек, капель и кусков пищи, которые могли его запачкать? Это, конечно, шутка, но то, что выглядит такое жабо мало сказать нелепо – истинная правда. Не знаю как вы, но я не понимаю некоторых современных дизайнеров, пытающихся вернуть такое жабо в моду. Хотя эксперименты в этой области (Живанши, например) довольно интересны, но не для обычной жизни. Это уж точно.
Но мы отвлеклись от истории на самом интересном месте. XIX век – время денди, внимательных к малейшим деталям костюма. Жабо в гардеробе истинных денди – это и классическое, хотя более строгое жабо, и оборка мужской рубашки из ткани или кружев, и сходный крой воротника или галстука. Именно в это время жабо занимает прочное место и в женском гардеробе. И если мужчины использовали многоуровневые жабо, чтобы скрыть застёжку на сорочке, то женщины надевали красивые жабо исключительно «для красоты» (вплоть до начала ХХ века женские блузки и платья застёгивались только сзади).
Современное жабо представляет собой «отделку из кружев или лёгкой ткани в сборку или складку на груди, обычно у женской блузки или платья» (Современный словарь иностранных слов. – СПб., 1994. - С. 219). Действительно, мужчин, наряд которых украшает жабо, в обычной жизни встретить не так-то просто, однако на модных подиумах такое случается. Сегодняшнее женское жабо – это неограниченный полёт фантазии всемирно известных и доморощенных дизайнеров и аксессуар, который вне моды. Особенно эффектно жабо смотрится на белых блузках и в сочетании белое + чёрное, как в коллекциях Шанель и Марка Якобса. Существует множество вариаций на тему "белая блузка с жабо". Но это уже отдельная тема.
Как сшить жабо.[B][SIZE=4]
Думаю я вам расскажу как шить самый простой вариант жабо, а именно английское 1907 года. Как вы знаете жабо бывает очень разным его носят как мужчины так и женщины.
Его можно шить из разных кружев или очень красивой тонкой, ажурной ткани.
Для подкладки (у воротника) можно взять обычную хлопковую ткань.
[показать] [показать] Постройте выкройку на миллиметровой бумаге, соответственно указанных
мерок. Кладя готовую выкройку на ткань, обратите особое внимание на
стороны, отмеченные как "сгиб". Припуски на швы: воротник и
центральная часть - 1,5 см, сборка - 2 см.
Ворот и подкладку сложить лицевыми сторонами и сшить по периметру оставив 6,4 см для центральной части. Обрезать уголки и вывернуть.
К воротнику пришиваются маленькие бельевые крючки.
Пришить сборки к центральной части, а центральную часть вставить и пришить.
Сборку к центральной части лучше пришить вручную, чтобы на лицевой
стороне не было видно лишнего шва.
Это цитата сообщения danuta_Zajac Оригинальное сообщение
вязаная кофточка пончо
[показать] [показать] [показать] [показать]
Это цитата сообщения mushkaC78 Оригинальное сообщение
Украшаем летнюю майку
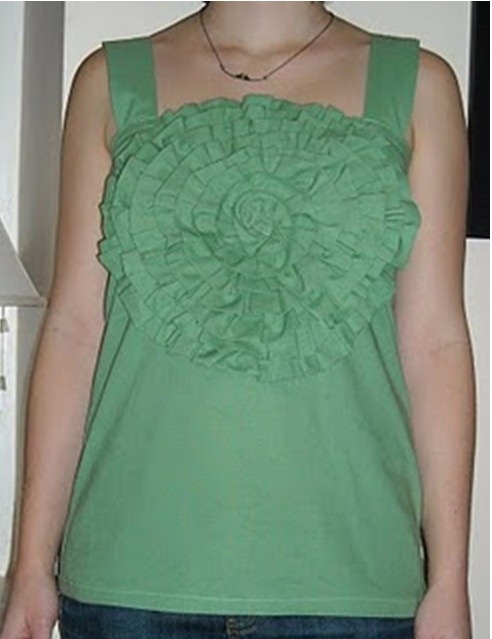
Мы уже постепенно начинаем готовиться к летним месяцам, к отпускам, к жарким дням. А что из одежды чаще всего летом носится – конечно же майки. Вот и мы решили не отставать от модных тенденций – шьем майку с рюшами.
Это цитата сообщения Helam Оригинальное сообщение
Болеро с рельефным узором из Vogue Knitting!
 [335x374]
Болеро с рельефным узором из Vogue Knitting!
Публикую картинки из журнала, официальный сайт Vogue Knitting!
http://www.vogueknitting.com/
Болеро с рельефным узором - дизайнер Нора Гоган (Norah Gaughan)!
Это болеро состоит из отдельных пятиугольников!
Это цитата сообщения ElenaPro Оригинальное сообщение
Пуловер кимоно на спицах
 [481x699]
Узоры для вязания пуловера.
Резинка 1х1, резинка 3х3.
Основной узор (четное кол-во петель):
1 ряд - все изн.
2 ряд - *1 лиц., 1 изн.*, повторять от* до*.
3 ряд - повторять раппорт с 1-го ряда.
Двойная резинка: нитью контр. цвета набрать половину требуемых петель.
1 ряд (вязать рабочей нитью) - *1 лиц., 1 накид*, повторять от* до*.
2 ряд - *провязать накид лиц., снять 1 п. как изн. не провязывая, нить перед работой*, повторять от* до*.
3 ряд и послед. ряды: *1 лиц., снять 1 п. как изн., нить перед работой*, повторять от* до*. В готовой детали контр. нить распустить.
Коса налево (шир. 9 п.): 1-й, 3-й, 5-й ряды: 6 лиц., 1 изн., 1 лиц., 1 изн. 2-й и все четные р.: вязать по рисунку.
7 ряд - 6 п. перекрестить налево (оставить 3 п. на вспом. спице перед работой, 3 лиц., и провязать п. со вспом. спицы лиц.), 1 изн., 1 лиц., 1 изн.
9 ряд - повторять раппорт с 3-го ряда.
Двойная коса (шир. 18 п.): 1-й, 3-й и 5-й р.: 1 изн., 1 лиц., 1 изн., 12 лиц., 1 изн., 1 лиц., 1 изн.
2 ряд и все четные - вязать по рисунку.
7 ряд - 1 изн., 1 лиц., 1 изн., 6 п. перекрестить направо (оставить 3 п. на вспом. спице за работой, 3 лиц. и провязать п. со вспом. спицы лиц.), 6 п. перекрестить налево, 1 изн., 1 лиц., 1 изн.
9 ряд - повторять раппорт с 3-го ряда.
Вязание пуловера.
Спинка вяжется единым полотном, начиная с левого рукава. На спицы №5 набрать 37 п. и связать 4 р. двойной резинкой и 10 р. резинкой 3х3. Затем перейти на спицы №6 и вязать: 3 лиц., 1 изн., 1 лиц., 1 изн., 31 п. основным узором, при этом прибавлять справа в каждом 4-м ряду 12х1 п., слева в каждом 6-м ряду 13х1 п. В 16-м ряду от резинки выполнить первое перекрещ. косы налево на первых 6 лиц., след. за 1 изн.
В 47-м ряду от резинки выполнить первое перекрещ. направо на след. за ними 6 п. для формирования двойной косы (см. схему). Через 55 р. набрать заново в начале р. 1х40 п. и вязать: 3 п. двойной резинкой, 22 п. резинкой 1х1, 1 изн., 1 лиц., 1 изн., 12 лиц. (в послед. их перекрещивая для двойной косы), 1 изн., 1 лиц., 1 изн., 12 лиц. (в послед. их перекрещивая для двойной косы), 1 изн., 1 лиц., 1 изн., и далее до конца ряда основным узором. Начиная со 121-го р. убавлять слева в каждом 6-м ряду 13х1 п. Через 67 см от резинки закрыть первые 40 п. и далее убавлять справа в каждом 4-м р. 12х1 п. Через 94 см от резинки перейти на спицы №5, связать 10 рядов резинкой 3х3 и 4 ряда двойной резинкой и закрыть петли трикотажным швом.
Перед пуловера вязать как заднюю деталь, начиная от правого рукава, но с 77 ряда для выреза горловины убавлять слева в каждом 2-м р. 6х1 п., и начиная со 111-го ряда прибавлять слева в каждом 2-м ряду 6х1 п.
Сборка. Соединить заднюю и переднюю детали пуловера, выполнив швы на рукавах и боковые швы. Для воротника на спицы №5 набрать 39 п. и вязать 3 п. двойной резинкой и 36 п. резинкой 1х1. Через 44 см все петли закрыть. Пришить закрытые петли к петлям наборного ряда, сшивая воротник в кольцо, и пришить ворот к горловине так, чтобы петли двойной резинки оказались снаружи.
Выкройка и схема вязания пуловера
 [699x467]
Серия сообщений "модели спицами":
Часть 1 - болеро
Часть 2 - Жакет
...
Часть 98 - Двойка
Часть 99 - ПУЛОВЕР
Часть 100 - Ажурный жакетик