Это цитата сообщения галина5819 Оригинальное сообщение
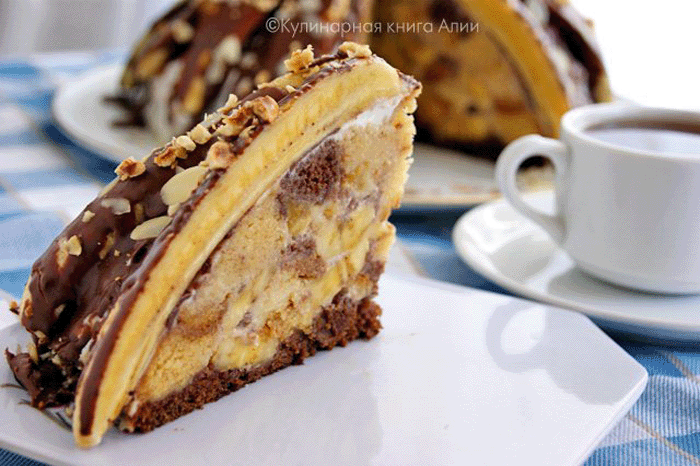
Торт "Панчо" супер-банановый - очень вкусный, ароматный, красивый с виду и в разрезе
Торт "Панчо" сегодня откровенно моден. Те, кто знает рецепт торта "Панчо", способны стать центром внимания любой беседы, если среди собравшихся поболтать есть хотя бы несколько сладкоежек.
Это торт для настоящих гурманов. Он очень вкусный, очень гармоничный, очень стильный... В него невозможно не влюбиться!
 [700x466]
Банановая выпечка у нас всегда актуальна и востребована... т.к. есть бооооольшие любители бананов... И чтобы порадовать "этого бооольшого любителя бананов" я решила попробовать приготовить банановый прибанановый "Панчо".
Сметанный крем решила заменить банановым йогуртом... В процессе пришла идея сверху тоже украсить бананами...
 В общем, получилось, действительно, суууупер банано...
 Это цитата сообщения галина5819 Оригинальное сообщение
Вода Сасси (революционное изобретение!) — похудеть не напрягаясь
 [300x221]
Вода Сасси была создана как дополнение к диете «Плоский живот». В слове «Сасси» ударение обычно делается на первый слог, потому что она так названа по имени Синтии Сасс, которая и изобрела этот полезный напиток. Хотя многие произносят это слово как им привычно. Не правда ли, забавно?
Почему так много сегодня в интернете обсуждают пользу применения этого напитка? Да потому что он действительно помогает пищеварительной системе работать правильно, а значит и снижать вес за счет расщепления жиров.
 Вода Сасси: пей и худей!
Это цитата сообщения Likma Оригинальное сообщение
Кувшинчик.
В продолжении темы изготовления миниатюр, сегодня хочу рассказать о том, как сделать кувшинчик из папье-маше, который по моей задумке должен быть просто необходимой деталью для следующей работы. Но это планы , еще только планы  Сделав кувшинчик, и чтобы предоставить его вашему взору во всей красе, решила оформить фото поинтересней. И неожиданно для себя, получила в итоге небольшой сувенир, который может вполне быть отдельной поделкой.
Как все это было, смотрим здесь

Это цитата сообщения Санька Солнечная Оригинальное сообщение
Вязание на... пальцах!!!
Это цитата сообщения Mages_Queen Оригинальное сообщение
Избавляемся от SMS-спама
Многих, наверное, раздражают рекламные СМС-сообщения от сотовых операторов. Подключите услугу, гороскоп, мобильный телевизор и прочее... Избавиться от назойливых сообщений очень просто. Для этого нужно сделать следующее:

Это цитата сообщения lj_voilok_ru Оригинальное сообщение
Картина из шерсти "Верность"
Привет всем! Я к вам с очередной картиной. Как всегда- смешанная техника. основа сваляна по-мокрому, рисунок частично выложен, частично набит иглой по-сухому. Размер 40 х 40 см. Оказалась подарком на 11 лет совместной жизни))) Советы и критика приветствуются
.
 [300x275]Читать далее
Это цитата сообщения elka082 Оригинальное сообщение
Пудель Маргошка и Маргошки.Описание.

Ну чем не муза, чем не муза
Щенячье розовое пузо?
А нос, щенячий чуткий нос –
Он влажен, как охапка роз,
Покрытая росой, а ухо
Сигналит нам: “Полундра, муха!”
А хвост… О эта речь хвоста!
Кто скажет, что она проста?
В ней и поэзия и проза,
И грусть, и нежность, и угроза.

***
Это цитата сообщения галина5819 Оригинальное сообщение
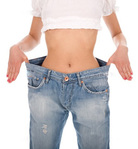
сенсационная диета "Трешка"! Жиры просто тают с каждой минутой!
 [300x324]
Эта диета называется так вовсе не потому, что рассчитана на три дня. На самом деле она включает целых 5 трехдневных этапов. И все 15 дней диеты ваше меню будет очень скудным. Необходимо обладать незаурядной силой воли, чтобы выдержать 15 дней очень низкокалорийной монодиеты. Чтобы было легче, ежедневно выпивайте как можно больше негазированной минеральной воды (минимум 1,5-2 литра). Не рекомендуется использовать диету тем, у кого есть проблемы со здоровьем.
Диета подойдет только полностью здоровым людям.
 Меню по дням:
Это цитата сообщения подружка5 Оригинальное сообщение
МК по мишкам Тедди и их друзьям
 [250x315]
Пройдя ниже по ссылке вы сможете научиться, как сделать мишке" качающееся крепление головы ","объемные лапки", " как вставить скелет мишке" и еще много полезных вещей, которые пригодятся при изготовлении вашей любимой игрушки.
http://allenyshkasdowerchest.blogspot.ru/2013/02/blog-post_28.html
Это цитата сообщения Байкалочка_10 Оригинальное сообщение
Очень подробный МК по кукольной ножке!
Стащила отсюда http://members.home.nl/asrai/cursus-en.htm
|
The foot in this tutorial is from heel to big toe about 1.8 inch long. Always use the head as a comparison for the size of the feet. The length of the feet is equal to the size of the head. |
|
[250x163] |
[250x163] |
|
In this tutorial I will only make the right foot. Try to work simultaneously on both feet because it is hard to make an equal looking foot afterwards. You start off by making a 2.5 inch long cylinder shaped roll of clay, about 0.8 inch thick (pict. 1). Bend the roll of clay in an angle like in pict. 2. The top will become a part leg and the other part the foot. |
|
|
[250x163] |
[250x163] |
| Flatten the clay by pressing it together between thumb and point finger towards the 'toes'. Be careful not to make it too flat. (pict. 3 + 4). | |
|
[250x163] |
[250x163] |
|
Now it is time to form the heel. Push/smear some clay from under the foot backwards (towards the heel) and push/smear some clay from the lower leg down (towards the heel) (pict. 5). This way you'll get more clay on the heel and a better shape at the sole of the foot. Press the clay with your thumb on the inside of the foot to make it more hollow (pict. 6). |
|
|
[250x163] |
[250x163] |
|
Before you can make incisions for the toes, the front of the foot needs to be reshaped a bit. Cut off a piece of clay slantwise starting at the 'big toe' (pict. 7). After this smooth the edge with your fingers (pict. 8). |
|
|
[250x163] |
[250x163] |
|
Look at the foot to see if it's not too thick, if it is you can make it thinner by smearing the clay from the instep to the leg. You can also smear clay upwards just above the heel towards the leg, this way the foot will become slimmer (pict. 9). Sculpt as smooth as possible, use a damp finger to rub the clay for a smooth finish. Now you can make incisions for the toes with the help of a sharp tool. Don't forget the big toe needs to be bigger than the other toes (pict. 10). |
|
|
[250x163] |
[250x163] |

Это цитата сообщения галина5819 Оригинальное сообщение
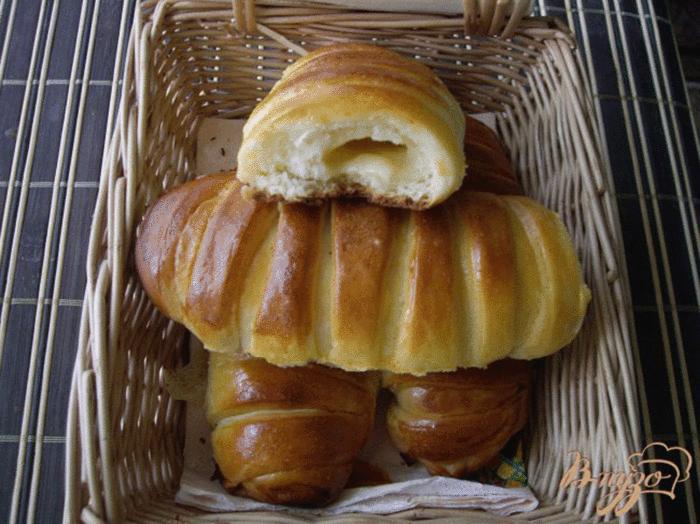
сказочно вкусные и нежные булочки - настоящие "Парижанки"
Я увидела эти булочки и влюбилась. Сразу поняла, что буду их делать. Потому что они мягкие, сдобные, вкусные, с божественным заварным кремом внутри. Это очень-очень вкусно и красиво. Великолепные булочки,тесто как пух,очень нежное и воздушное.
 [700x524]
 Попробуйте приготовить- не пожалеете. Кстати крем не слишком жирный.
Это цитата сообщения Tenderrainy Оригинальное сообщение
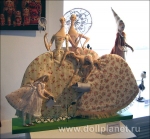
Куклы Татьяны Овчинниковой + интервью с автором.
 [показать]
 Татьяна Овчинникова окончила Абрамцевское художественно-промышленное училище. Член Творческого Союза художников России. Участвует в проектах Галереи Вахтановъ.
Живет и работает в Перми. Куклой, или вернее, скульптурой в технике текстиля, Татьяна увлечена с 1977, до этого работала с камнем, занималась графикой. Ткань привлекает Татьяну невероятными пластическими возможностями, богатством цвета и фактуры. Это такой уютный, милый сердцу материал!
Сюжеты для своих композиций Татьяна выбирает такие, какие интересны ей самой. Это может быть библейская история или история любви между мужчиной и женщиной. Поэтому ее куклы — далеко не детские. Образно выражаясь, Татьяна работает на одном вдохе, на выдохе получая законченную вещь.

Это цитата сообщения Алейникова_Александра Оригинальное сообщение
МК по валянию мордочки.

Это цитата сообщения verbava Оригинальное сообщение
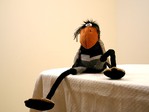
Веселый текстиль
 [700x525]