Это цитата сообщения Panter_Woman Оригинальное сообщение
Авторские миниатюрные манекены ручной работы | серия : Русский шик

 [показать] [показать] [показать] [показать]
Это цитата сообщения lu-e Оригинальное сообщение
Лепка «японской» куклы на шарнирах
тут
публикуем постадийную инструкцию лепки такой куклы на основе материалов сайта www.ne.jp/asahi/haru/doll/make/makeindex.htm, подготовленную для Вас Галиной Ишимикли.
Стадии лепки головы куклы
Это цитата сообщения Байкалочка_10 Оригинальное сообщение
Очень подробный МК по кукольной ножке!
Стащила отсюда http://members.home.nl/asrai/cursus-en.htm
|
The foot in this tutorial is from heel to big toe about 1.8 inch long. Always use the head as a comparison for the size of the feet. The length of the feet is equal to the size of the head. |
|
[250x163] |
[250x163] |
|
In this tutorial I will only make the right foot. Try to work simultaneously on both feet because it is hard to make an equal looking foot afterwards. You start off by making a 2.5 inch long cylinder shaped roll of clay, about 0.8 inch thick (pict. 1). Bend the roll of clay in an angle like in pict. 2. The top will become a part leg and the other part the foot. |
|
|
[250x163] |
[250x163] |
| Flatten the clay by pressing it together between thumb and point finger towards the 'toes'. Be careful not to make it too flat. (pict. 3 + 4). | |
|
[250x163] |
[250x163] |
|
Now it is time to form the heel. Push/smear some clay from under the foot backwards (towards the heel) and push/smear some clay from the lower leg down (towards the heel) (pict. 5). This way you'll get more clay on the heel and a better shape at the sole of the foot. Press the clay with your thumb on the inside of the foot to make it more hollow (pict. 6). |
|
|
[250x163] |
[250x163] |
|
Before you can make incisions for the toes, the front of the foot needs to be reshaped a bit. Cut off a piece of clay slantwise starting at the 'big toe' (pict. 7). After this smooth the edge with your fingers (pict. 8). |
|
|
[250x163] |
[250x163] |
|
Look at the foot to see if it's not too thick, if it is you can make it thinner by smearing the clay from the instep to the leg. You can also smear clay upwards just above the heel towards the leg, this way the foot will become slimmer (pict. 9). Sculpt as smooth as possible, use a damp finger to rub the clay for a smooth finish. Now you can make incisions for the toes with the help of a sharp tool. Don't forget the big toe needs to be bigger than the other toes (pict. 10). |
|
|
[250x163] |
[250x163] |
Это цитата сообщения Ромашка_2012 Оригинальное сообщение
Куколка - шарнирка из папье-маше. МК
[показать]Это еще одно из моих увлечений. Делаю куклы давно, а изделия из папье-маше вообще со школьных времен. Вот и решила поделиться некоторыми наработками. Эту технику можно использовать не только для изготовления кукол, но и для разных декоративных изделий. Если кому пригодится буду очень рада.
Для начала нужна туалетная бумага. Самая-самая дешевая. Газеты я не использую по причине свинца. А вашими предметами могут пользоваться и дети. Потом клей ПВА и столярный, можно который замачивают. Я покупаю готовый. И грунтовку для придания гладкой поверхности.
 [показать]
Это цитата сообщения Margaret-Kubiyovich Оригинальное сообщение
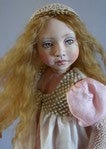
Текстильная кукла от Susie McMahon
 [370x520]
Это цитата сообщения svtusik555 Оригинальное сообщение
Designing the Doll.
Designing the Doll.
 [показать]
 [показать]
Это цитата сообщения Любовь_Григ Оригинальное сообщение
Как сделать шарнирную куклу из папье-маше и самозатвердевающей глины
Автор МК Минченко Татьяна Владимировна http://samlib.ru/m/minchenko_t_w/sharnirnaiakukla.shtml
[370x336]Это цитата сообщения svtusik555 Оригинальное сообщение
Designing the Doll.
Designing the Doll.
[показать] [показать]Это цитата сообщения Taklis Оригинальное сообщение
Книга "Куклы и игрушки. Шьем сами".
[показать]Это цитата сообщения Мелисса Оригинальное сообщение
Мастер-класс по ручному букету из конфет от Ирины Цыбун
Автор этого мастер-класса - Ирина Цыбун, полюбоваться ее замечательными работами вы можете здесь: http://ytenok.gallery.ru/


Это цитата сообщения Мелисса Оригинальное сообщение
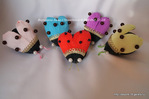
Божья коровка из киндер-сюрприза и гофрированной бумаги
Недавно я знакомила вас с мастер-классом по созданию забавных цыплят из киндер-сюрпризов и гофрированной бумаги. Сегодня хочу показать вам еще одну интересную идею - симпатичных божьих коровок из киндеров.

Это цитата сообщения Режевлянка Оригинальное сообщение
Мастер-класс по созданию прекрасной орхидеи с конфетами.
Это цитата сообщения Юлия_Ж Оригинальное сообщение
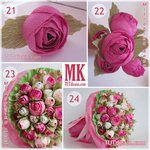
Книга по рукоделию - "Букеты из конфет".
Книга по рукоделию - "Букеты из конфет".
Что ценно в подарке - внимание! А теперь представьте как будут удивлены те, кому преподнесут такой шикарный сладкий букет из конфет. Выполнить их совсем не сложно, все материалы для изготовления букета найдутся в каждом доме - ну что, интересно? Тогда - поехалиииииии)))))))
1.

Это цитата сообщения Режевлянка Оригинальное сообщение
«Ирис из креповой бумаги»
Этот МК расскажет Вам о создании изящного Ириса своими руками!
Это цитата сообщения Галина-мечтательница Оригинальное сообщение
Веточка сосны
Часто при подготовке новогодних поделок нужна сосново-еловая зелень для оформления композиций, давайте посмотрим, как можно сделать самому еловую веточку из доступных средств. Техника очень простая и при работе можно активно задействовать деток.

Это цитата сообщения ksynai Оригинальное сообщение
Без заголовка
источник http://stranamasterov.ru/node/90083?tid=451
Из гофрированной бумаги
Это цитата сообщения принцеска_1 Оригинальное сообщение
новогоднее дефиле + мк
Доброго времени суток. Представляю вашему вниманию новую коллекцию модной одежды зима-новый год.
А также МК по просьбам.
1. Для работы нам понадобится: бумага гофрированная (металлизированная), клей, ну а модель можете выбрать на свой вкус.
<<