Это цитата сообщения Разумники Оригинальное сообщение
Шапочка для мальчика
Источник: http://bugalugshandmade.blogspot.com/2010/05/broom-broom-boys-beanie.html

This hat is crocheted to fit a head approx 20 inches in size. Roughly 4 years old!
Made with a 4.00mm crochet hook and 8 ply yarn.
Create a ring by either the magic circle method or by chaining 2 and slip stitch into 2nd chain from hook.
Round 1 (in Blue): 12 Double crochet (DC) in circle, slip stitch (SS) in the top of 1st DC - 12DC's
Round 2: Chain 2, DC in 1st DC, 2DC in each DC around, SS into top of 1st DC - 24 DC's
Round 3: Chain 2, DC in 1st DC, *1 DC in next DC, 2DC's in next DC* Continue from * to * to the end. SS into top of 1st DC - 36DC's
Round 4: Chain 2, DC in 1st DC, *1 DC in the next 2 DC's, 2 DC's in the next DC* Continue from * to * to the end. SS into top of 1st DC - 48DC's
Round 5: Chain 2, DC in 1st DC, *1 DC in the next 3 DC's, 2 DC's in the next DC* Continue from * to * to end. SS into top of 1st DC - 60DC's
Round 6: Chain 2, DC in 1st DC, *1 DC in the next 4 DC's, 2 DC's in the next DC* Continue from * to * to end. SS into top of 1st DC - 72DC's
Round 7: Chain 2, DC in 1st DC, DC in each dc to the end. SS into top of 1st DC - 72DC's
Round 8: Repeat round 7
Round 9:Repeat round 7
Round 10: Repeat round 7
Cut Blue yarn leaving a tail to sew in and secure and attach a new yarn in Black.
Round 11- 14: Repeat round 7
Cut Black yarn leaving a tail to sew in and secure and attach a new yarn in Green.
Round 15 - 19: Repeat round 7
Cut and fasten off.
Sew in all ends.
Now you can decorate it how you like. I used white yarn to make the lines of the road just stitching in the middle between rounds 12 and 13.
To make the sun I Created a ring by either the magic circle method or by chaining 2 and slip stitch into 2nd chain from hook.
Round 1 (in Yellow): 12 Double crochet (DC) in circle, slip stitch (SS) in the top of 1st DC - 12DC's. Just like how we started the beanie. Fasten off leaving a long tail and attach where you like it on the hat and stitch on some sun rays. I made some simple black birds too, all just stitching where you like the look of them.
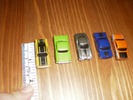
Here are the cars:
 [400x300]
They are called micro systemz. I got a pack of 5 for $5.00 at Big W.
They are approx. 1.5 inches long and .5 inches wide.
I also got some brooch backs from my local craft store they are small one's a little under an inch an I just ho glue gunned it to the under side of the car.
 [320x240]
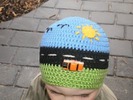
So now you can have 5 different cars that can be put on the beanie as your child wishes. It also makes for easy removal for washing - and we all like that ;-)
 [320x240]
Это цитата сообщения икви Оригинальное сообщение
ПЛАТЬЕ_мотивами
Это цитата сообщения
 danuta_Zajac
 [показать]
Это цитата сообщения милена70 Оригинальное сообщение
МАК ПОЛЕВОЙ от Лены–koluchka... мастер-класс с пошаговыми фотографиями...
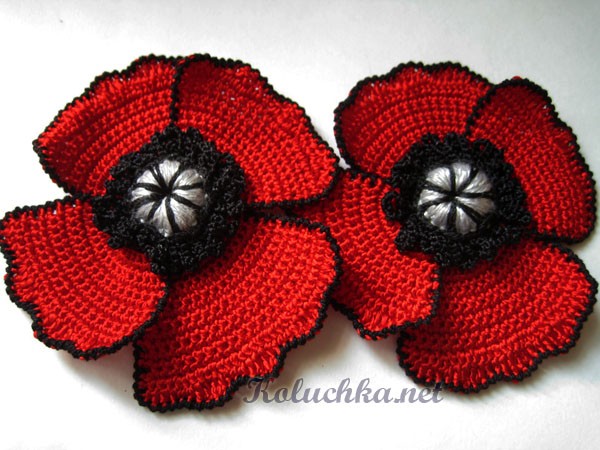
Мастер-класс по вязанию цветка
«Мак обычный, полевой»
от Лены - koluchka.
|
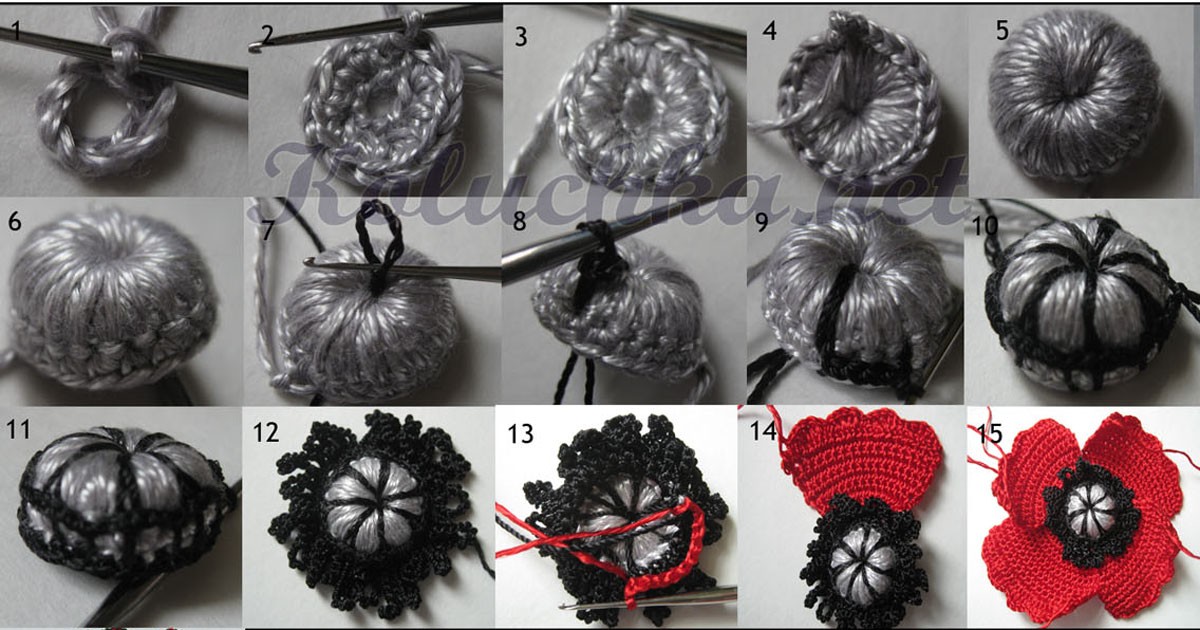
1. 8 ВП замкнуть в кольцо. (Пряжа «Нежность»)
2. В полупетли провязать 12 СБН.
3. В те же полупетли провязать третий ряд 16 СБН.
4. В четвертом ряду провязывается 21 СБН в центр «ягоды».
5,6. Перевернуть «ягоду» и провязать ряд из 21 СБН.
7. Взять более тонкую пряжу (»Тулип»), вытянуть петлю из центра «ягоды».
8. Вколоть крючок с петлей перед последним рядом СБН, вытянуть и провязать петлю из нити под «ягодой».
9. Провязать СБН за кромку «ягоды», 3 ВП, СБН за кромку «ягоды».
10. Аналогично выполнить остальные шесть перемычек, вытягивая петли из центра «ягоды»
11. Провязать ряд из 21 СБН.
12. На каждой петле предыдущего ряда выполнить «тычинку» : 16 ВП, СС (21 штука)
13,14. Для лепестка прикрепиться с изнанки соед. столбиком и провязать первый ряд 10 ВП, СС. Второй ряд: обвязать первый ряд 12 СБН. Третий и четвертый ряд: 14 СБН. Пятый и шестой ряд: 16 СБН. Седьмой, восьмой, девятый: 18СБН. В десятом ряду равномерно прибавить 10 петель (итого 28 петель). Одиннадцатый ряд: СБН ,ПС, ССН, СС2Н, ССН, ПС, СБН
(повторить три раза).
15. Аналогично связать второй верхний лепесток. Нижние лепестки сделать чуть больше, увеличив цепочку из ВП первого ряда на 2 -12 ВП. Соответственно увеличится на 2 кол-во столбиков в каждом ряду нижних лепестков.
16. В заключении обвязать лепестки мака рачьим шагом (пряжа «Канарис» 203 м -20гр).
Такой цветок можно использовать для украшения вязаного изделия или как мотив ирландского кружева. Как, например, в работе Лены-koluchka "Опиум":
Это цитата сообщения Clara_Ef Оригинальное сообщение
Юбка для девочки, связанная на спицах
Заметка была опубликована на сайте Darievna.ru - «Рукодельный рунет»
Юбка для девочки, связанная на спицах
 [показать] [показать] Вязаная детская юбка - красиво и удобно! Достаточно подобрать к ней подходящую блузку или кофточку и практичный наряд на каждый день готов. Однотонная или цветная? Выбор за вами! Нажимайте на картинки и переходите на страницы с описаниями. Внимание! Для доступа к некоторым описаниям необходима регистрация. Читайте ещё по теме: Вязаная юбка для девочки ... Читать полностью на Darievna.ru
Читать другие записи рубрики МОДЕЛИ крючком и спицами
Смотреть другие интересные статьи на сайте Darievna.ru - "Рукодельный рунет"


Это цитата сообщения галина5819 Оригинальное сообщение
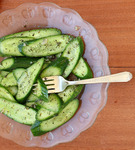
Гениальный салат!- просто шедевральный!!!
 [500x555]
Потому что простой до изумления, и вкусный до безобразия. Простой и лаконичный, даже примитивный.
Ничего в нем нет, кроме свежих, вкусных, сочных огурцов. И заправки. Но в ней вся суть!
Все дело в сухой мяте!

Это цитата сообщения ХОДУСЯТКИ Оригинальное сообщение
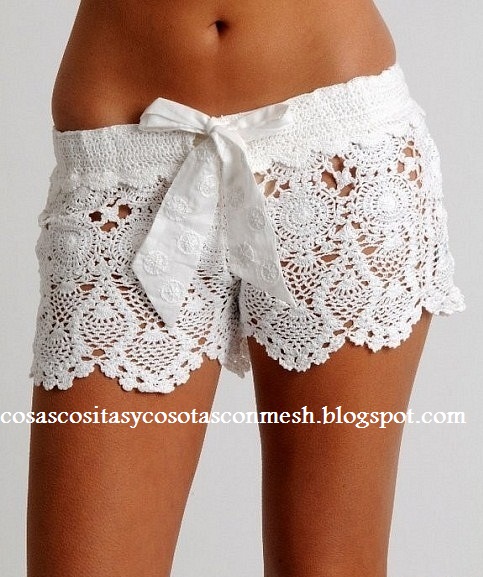
Вязаный лиф.
http://pontosdaana.blogspot.com/2012/03/busto-repaginado-com-pontos-abacaxi.html

Это цитата сообщения Тати_Бо Оригинальное сообщение
Цветок для шляпки
[показать] Источник http://www.stranamam.ru/post/3098357/
Цветок вязала так- Набираем 10в.п и соед. в кольцо и вяжем в середину кольца 10 ст. с нак.,поворачиваем работу и ещё 10 ст.с нак и ещё раз,потом нить обрезаем-делаем 3 лепестка.Когда заканчивала,то немного закругляла.Следующие 3 лепестка-15в.п,соед в кольцо,15 ст. с нак.,делаем 4 ряда.След.-20в.п-20 ст.с нак-5 рядов.След-25в.п-25 ст. с нак-6 рядов.Если Вам нужна больше роза,то увеличивайте кол-во столбиков и рядов,а так же кол-во лепестков.
Это цитата сообщения orhideya6868 Оригинальное сообщение
ПОТРЯСАЮЩЕ КРАСИВАЯ ТЕХНИКА ВЯЗАНИЯ.
1.
 [690x434]
 2.
Это цитата сообщения Мила-2010 Оригинальное сообщение
Работа Алии Сагындыковой-Обвязка компьютерного кресла крючком.
Работа Алии Сагындыковой.


Здравствуйте! Предлагаю Вашему вниманию веселый стульчик, связанный из мерсеризованного хлопка. Схема тот же «бабушкин квадрат«. Спинка собрана из мотивов, а низ цельный на подкладке. Теперь он стал не таким скучным и банальным.
Это цитата сообщения Рыжа_лисичка Оригинальное сообщение
42 совета стиля от Эвелины Хромченко
|
Это цитата сообщения милена70 Оригинальное сообщение
ОЧАРОВАТЕЛЬНАЯ ДЕТСКАЯ ШЛЯПКА с нежнейшим цветком...
Пряжа белая хлопок 100% (100гр/530м), розовая хлопок 100% (100гр/565м),
крючок №1.
Схема вязания шапочки:
 [240x240]
Схема вязания полей:
 [240x88]
Вязание цветка
Это цитата сообщения Сараева_Катющка Оригинальное сообщение
Вышитое панно и сумочка "Цветы"
[512x384]Это цитата сообщения милена70 Оригинальное сообщение
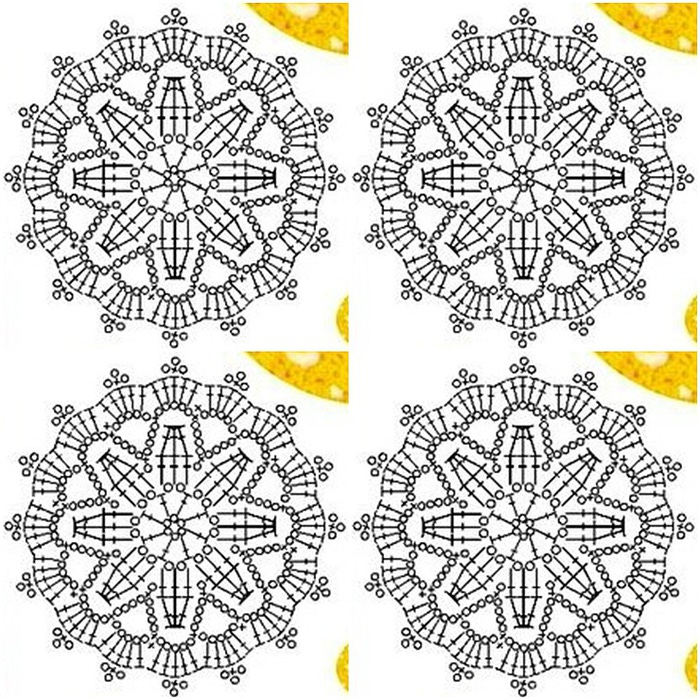
ДВЕ КЛАССНЫЕ КЕПКИ И ШАПКА-ШЛЯПКА С МАКАМИ... со схемами... с описанием вязания цветов...


Эти схемы для первых двух кепок - здесь важны точные прибавления. Третья вяжется очень просто.


Вот здесь можно посмотреть, как вяжутся маки
А здесь для первой шляпки ромашки




Это цитата сообщения Dama_Madama Оригинальное сообщение
Как связать стильную кофточку для маленькой собачки.
Просто невероятно осознавать то, что у вашей собачки могут быть вещички, которым позавидуют самые стильные модницы!
Это цитата сообщения Ирина_Кремкова Оригинальное сообщение
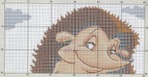
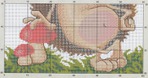
вышивка
 [699x478]
 [506x698]
 [699x484]
 [700x489]
Это цитата сообщения Ирина_Кремкова Оригинальное сообщение
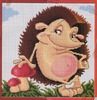
вышивка
 [584x600]
 [699x363]
 [700x366]
 [458x698]