Это цитата сообщения Belenaya Оригинальное сообщение
Как сделать незаметный шов с помощью двух спиц по открытым петлям.
|

Это цитата сообщения Belenaya Оригинальное сообщение
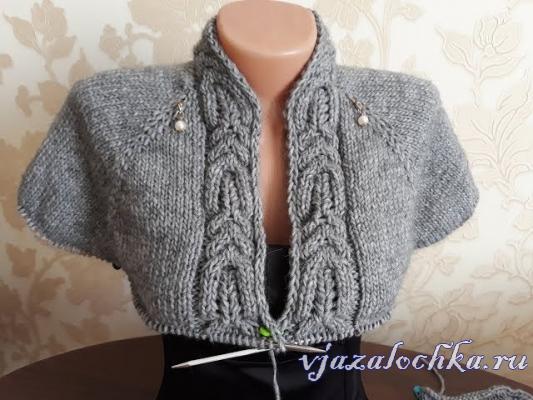
Кардиган реглан сверху
|

Beauti_Flash |
Это цитата сообщения Шальной_Ангел_13 Оригинальное сообщение
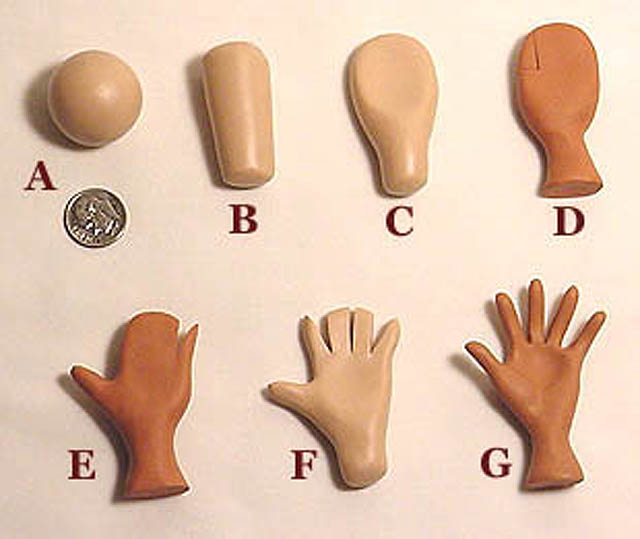
Руки из полимерной глины.
Руки из полимерной глины.
Это цитата сообщения zoih Оригинальное сообщение
Ручки для куклы
 [показать]
 http://www.cdhm.org/tutorials/learn-detailed-hand-sculpting.html
Это цитата сообщения Dezi-ya Оригинальное сообщение
Руки из термопластика в три полузапека.
Основа этой технологии заключается в том, что сначала лепим и запекаем на пониженной температуре пальцы без ногтей, затем делаем ногти и собираем пальцы в кисть. Закрепляем полузапеком нужное положение пальцев и долепливаем всю кисть, уточняя ее форму и не боясь искажений уже затвердевших деталей

Это цитата сообщения Байкалочка_10 Оригинальное сообщение
Очень подробный МК по кукольной ножке!
Стащила отсюда http://members.home.nl/asrai/cursus-en.htm
|
The foot in this tutorial is from heel to big toe about 1.8 inch long. Always use the head as a comparison for the size of the feet. The length of the feet is equal to the size of the head. |
|
[250x163] |
[250x163] |
|
In this tutorial I will only make the right foot. Try to work simultaneously on both feet because it is hard to make an equal looking foot afterwards. You start off by making a 2.5 inch long cylinder shaped roll of clay, about 0.8 inch thick (pict. 1). Bend the roll of clay in an angle like in pict. 2. The top will become a part leg and the other part the foot. |
|
|
[250x163] |
[250x163] |
| Flatten the clay by pressing it together between thumb and point finger towards the 'toes'. Be careful not to make it too flat. (pict. 3 + 4). | |
|
[250x163] |
[250x163] |
|
Now it is time to form the heel. Push/smear some clay from under the foot backwards (towards the heel) and push/smear some clay from the lower leg down (towards the heel) (pict. 5). This way you'll get more clay on the heel and a better shape at the sole of the foot. Press the clay with your thumb on the inside of the foot to make it more hollow (pict. 6). |
|
|
[250x163] |
[250x163] |
|
Before you can make incisions for the toes, the front of the foot needs to be reshaped a bit. Cut off a piece of clay slantwise starting at the 'big toe' (pict. 7). After this smooth the edge with your fingers (pict. 8). |
|
|
[250x163] |
[250x163] |
|
Look at the foot to see if it's not too thick, if it is you can make it thinner by smearing the clay from the instep to the leg. You can also smear clay upwards just above the heel towards the leg, this way the foot will become slimmer (pict. 9). Sculpt as smooth as possible, use a damp finger to rub the clay for a smooth finish. Now you can make incisions for the toes with the help of a sharp tool. Don't forget the big toe needs to be bigger than the other toes (pict. 10). |
|
|
[250x163] |
[250x163] |

Это цитата сообщения elenaslava Оригинальное сообщение
Простая, но эффектная шапочка с узором «перышко»
Простая, но эффектная шапочка с узором «перышко»


Это цитата сообщения RUSSA_N Оригинальное сообщение
Пуловер Tulip Tee by Amy Gunderson


Размеры
Extra Small (Small, Medium, Large, 1X, 2X, 3X, 4X)
Показано в размере Small со свободой облегания 3½”
Обхват груди (готовое изделие): 31¾ (35½, 39¼, 43, 46¾, 50¾, 54½, 58¼)”
Длина: 21¾ (22, 22½, 22¾, 23½, 23¾, 24½, 24½)”
Это цитата сообщения Olesia_Falatyuk Оригинальное сообщение
Как рисовать лицо кукле тыквоголовке.
Есть у меня на эту тему МК в "Стране мастеров" http://stranamasterov.ru/node/601841
Там хорошо расписана основа того, как рисуется само личико.
А вот этот МК будет без описания, думаю и так всё понятно после прочтения предыдущего.
Здесь видны некоторые изменения, которые появляются с опытом.

Это цитата сообщения -tata- Оригинальное сообщение
SIMPLEST SWEATER BY JULIET ROMEO JULIET.


Это цитата сообщения Vitolda Оригинальное сообщение
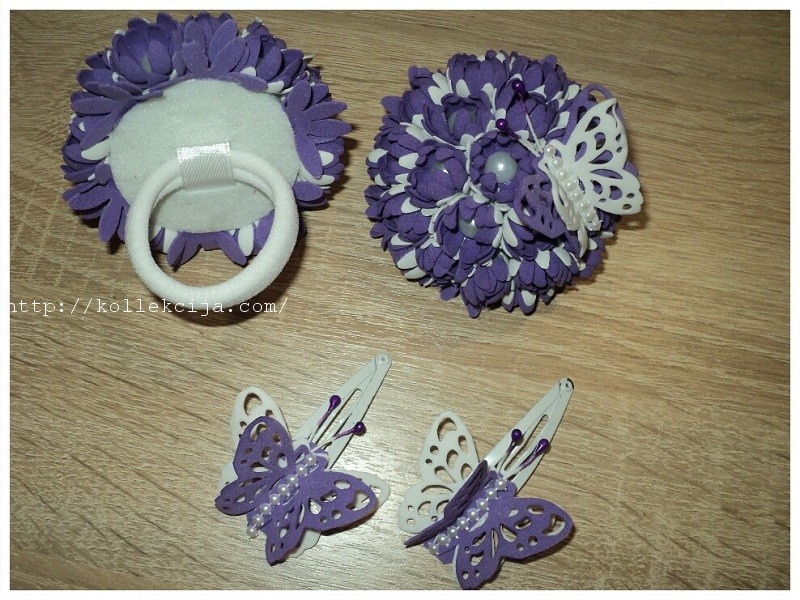
РЕЗИНКА ДЛЯ ВОЛОС ИЗ ФОАМИРАНА СВОИМИ РУКАМИ. МАСТЕР-КЛАСС ЕЛЕНЫ ФАРУКШИНОЙ
Резинка для волос из фоамирана своими руками. Мастер-класс Елены Фарукшиной
Это цитата сообщения Vitolda Оригинальное сообщение
Рассыпчатый плов от Светланы Позигун
Рассыпчатый плов от Светланы Позигун


