Mrs. Green Tea's DIY Thread LED Tealight Cover
posted 2 years ago in Lighting
I was messing around with different materials trying to dress up a little LED tealight, and this is one of the versions I ended up liking (plus it’s dirt cheap since it’s just thread!). I love me some textures. This may be useful for those with wedding venues that don’t allow real flames.
Finding these* at the dollar store is what started this mess…
1) Get your hands on some thin cardboard that you’ll be recycling anyway. I used the back of a pasta box.
2) Find some wrapping plastic (try to use something you’ll toss anyway!)
3. Cut cardboard to desired height. The width should be AT LEAST a little more than the circumference of the tealight (it can be bigger if you want).
4. Roll the cardboard and tape the edge.
5. Make sure your cardboard roll can at least fit the tealight inside.
ICE CREAM CUPCAKES ♥
 [показать]I tried to bake these cupcakes several times, and every time it ended with a face palm – except for the time before my birthday, that ended in tears. See, each of the four times – no matter what technique I used – the cones fell over in the oven. I guess the batter that rises affects the cupcake’s balance or some BS like that, and results in an inedible mess.
Without the creative and clever ideas of my (very blonde) friend Erna, this post would not have happened.
So here’s what you need:
-
 [показать]Cupcake or cake batter. Instant works fine, but you want to start from scratch here is a nice recipe.
 - Ice cream cones with a flat bottom
- Dark chocolate – One 200g bar dipped 8 cupcakes.
- Sprinkles
- White chocolate – One 200g bar was more than enough for 8 cupcakes
- Red sweets/gum balls for the cherry on top

Step 1: Fill the cones
 [показать]Do not fill the cones to the rim. The batter rises in the oven and makes a nice mess if it spills over.
Step 2: Bake the cupcakes
 [показать]Instead of placing the cones, standing, in a pan, place it in the oven grid. It fits perfectly, and (thank gawd!) doesn’t fall over.
Bake about 15 min on 180C.

Step 3: Decorate!
Wait for the cupcakes to cool before you attempt this step.
- Melt the chocolate. I melt the chocolate in a microwave. Many people say I am doing it wrong and condemn me to a life of undomesticationist, but it works fine for me. I microwave it for 30sec, stir, repeat until it is melted.

-
Dip cake in chocolate and sprinkle the sprinkles on before the chocolate dries [показать]
- This already looks nice, but a few extra touches makes it mouthwateringly nice!
- When the chocolate is dry, spoon (melted) white chocolate on to the top, and place the red sweet/gum ball.


Let is cool and dry and Voila! Much deliciousness!

DON’T THINK IT, INK IT!

- Supplies: stamp ink and a shirt
- Drop ink randomly on the shirt
- Let the droplets soak in
- Once you are happy with the look, wash it in cold water to set the
DIY: TRENDY MARKER PRINT

- Supplies: A marker and a shirt over a cutting board
- Draw lines on the shirt
- Continue drawing lines until your happy
http://madeinpretoria.wordpress.com/
The young man creates his own hands such creations!
[показать]
[показать] [447x230] [показать] [показать]
DIY NATURAL DYES with FREE PEOPLE

I have always wanted to experiment with natural dyes and on a gloomy day in September I decided that it was time. This is such a fun, environmentally friendly project that takes a little bit of time, but very little cash.
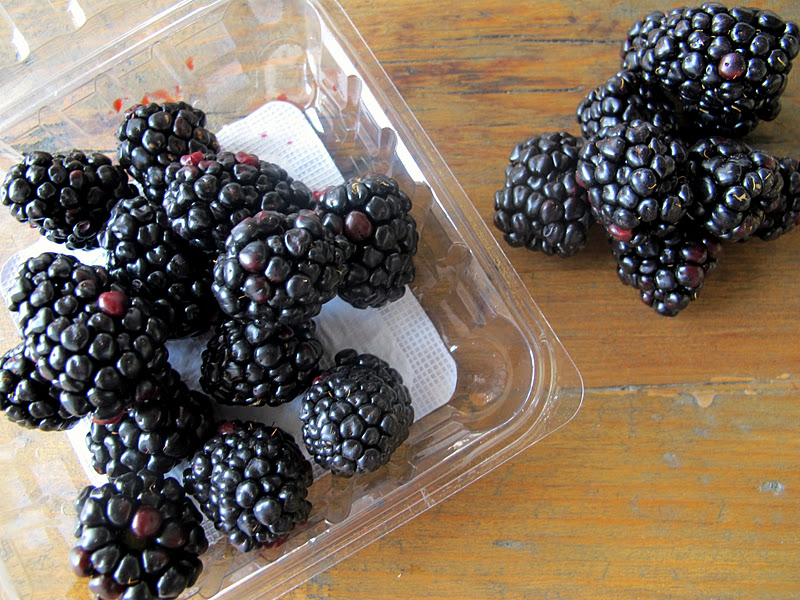
There are a number of plants that can be used to make natural dyes, but for my first go-round I chose to use fruits and vegetables that I picked up at a local market.

For pinkish/red dyes:


Это цитата сообщения Katra_I Оригинальное сообщение
Карамельные палочки или Петушки по новому
Мастер-класс с сайта http://hochu-ha.ru. Замечательная идея по изготовлению сахарных петушков по-новому!
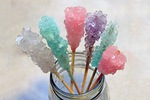
Итак, для приготовления карамели вам потребуется:
- 2 деревянных шампура-палочки
- 2 стеклянные банки
- 2 стакана воды
- 3,5 стакана сахара
- Пищевой краситель
Сначала нужно подготовить шампур, просто намочить его и покрыть его полностью сахаром. Дайте ему высохнуть. Это поможет образоваться кристаллам, как только вы поместите шампур в банку с раствором сахара.
| Umbrellas are different: blue, green, red ... And how sad it is when they break down. But do not throw them away, from your favorite umbrella can make a nice handbag, which will also become a favorite. |
|
The number of variations on the theme of umbrellas bags unlimited, since umbrellas are available various colors, sizes, and the tissue they are different. In such a bag can lay the folds to make the assembly or drapery. Folds can be either at the bottom and top of the bag. Sumochnaya accessories too will its diversity. I'll show you a fairly simple structure, which is the power of those who are just starting to sew bags. Well, craftswomen from experience will not be difficult to change the model from the bottom and then sew bag will be completely different. So, we begin! Elena Klimovskikh (Parasolka) Udmurt August 27, 2010 |
[показать] |
|
[показать] |
|
|
[показать] |
1. First, prepare an umbrella to work. Carefully rip off it from the frame, if necessary, erase and carefully ironed. The seam on the edge of the umbrella vpodgibku neatly cut off just below the seam. Cut from the center of a circle of radius umbrella of 8-10 cm, and the edge of the hood cut away a strip width of 7-8 cm from the circle can then be done for decorating bags. A strip (8 or 10 pieces, depending on the number of wedges umbrella) will be used to manipulate the top bag, zipper processing, of which it is possible to produce and handle. By the way, if preserved case of an umbrella, it too can be useful. |
|
[показать] |
2. Now count and mark up the fold. Folds may be unilateral, colliding, bantovymi. The same can be variety and quantity: 8-10 by the number of wedges or 2 times (two on each wedge). In my model will be 16 folds. Calculation of the width of the folds: 126 cm (length of the edge of the umbrella, folded twice) minus 28 cm (width bags ready for use) and divide by 8 (number of folds in half of the umbrella), we get a little more than 12 cm The picture is shaded half the width of the folds. The length of the folds of 8 cm Folds baste or pin together, we check the width of the bag. At this stage, the width of the bag on top can be adjusted by varying the depth of wrinkles. |
|
[показать] |
3. Folds grind, press out to one side ... |
|
[показать] |
4. ... and we fix their machine-stitch along the edge of the bag. |
|
[показать] |
5. skive bottom of the bag, rounding the corners. Excess tissue in the corners cut off. |
|
[показать] |
6. sew handles that can be drawn from the finishing |
[400x264]In this article I want to share with you the simple genius idea to found the blog of Olga Koksahrovoy known attentive readers as the author of the master-class on the card with keksikami to March 8 .
On our site already have an idea of how to use needlework unwanted CD's, for example:
- make a mosaic of the disks ,
- used in the decoration of vases disk
- or use as part of the decor cards...
But all these ideas served a decorative function drive and be seen. In our case, the drive will only be used as the basis for ...beautiful roses made of cloth!
Make a rose out of tissue is not easy, but very simply, but judge for yourself ...
/www.vsehobby.ru/img/h2.gif" target="_blank">http://www.vsehobby.ru/img/h2.gif); background-attachment: initial; background-origin: initial; background-clip: initial; background-color: initial; height: 34px; line-height: 34px; margin-top: 0px; margin-right: 0px; margin-bottom: 0px; margin-left: 0px; text-transform: uppercase; font-weight: bold; font-size: 11px; font-family: Verdana, sans-serif; color: rgb(0, 0, 0); text-align: center; background-position: initial initial; background-repeat: repeat no-repeat; "> HOW TO MAKE A ROSE OUT OF TISSUEFor the manufacture of roses I needed:
- waste a CD,
- piece, \ b fabric 12 cm wide the entire length of fabric (150 cm).
More than anything special, except for the free 15 minutes!
The first thing I tore a
Это цитата сообщения Ernata Оригинальное сообщение
Прекрасное украшение новогоднего стола.Скоро Новый Год. Предлагаю вам вариант необычного оформления бутылок со спиртным (водкой). Такая оригинальная п
Скоро Новый Год. Предлагаю вам вариант необычного оформления бутылок со спиртным (водкой). Такая оригинальная подача охлаждённого напитка порадует и удивит ваших гостей, а также станет отличным украшением новогоднего стола!

Это цитата сообщения белка28 Оригинальное сообщение
Аngela
Аngela
Сайт
Автор живёт в Дубае.
Будучи членом искусств и ремёсел, она перепробовала много стилей, которые привели её к нынешней страсти- к французскому романтическому стилю.
[показать]
Quote Post Katra_I
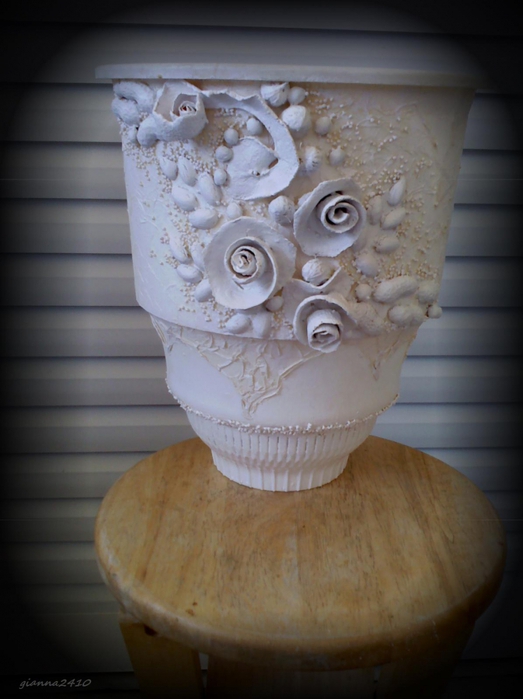
Floor vase
Floor vase from Kudesnitsy !

See and read carefully! This beauty is made of absolute garbage. And the result?
Materials:
old burst gorshek plastic, plastic 'bowl' food, a little plastic gorshechek, ceramic bowl from the yogurt, plastic tray from tsv.gorshka,
rice or tissue-paper,
orange roses, pistachio nuts, peanuts, cherry pits, switchgrass,
PVA , velatura, lacquer.

Это цитата сообщения Katra_I Оригинальное сообщение
Ювелирно-пластиковое
Украшения из пластиковых бутылок


Это цитата сообщения Марриэтта Оригинальное сообщение
"Деревянные розочки". Осенний венок
"Деревянные розочки" и как я их использовала. 1 часть - Осенний венок
Это крупным планом "деревянные розочки". Увидела их в интернете http://marrietta.ru/post173717111/ и влюбилась с первого раза... Естественно не претендую на МК, но решила выложить фото и комментарии к ним.
[520x390]
Это цитата сообщения Katra_I Оригинальное сообщение
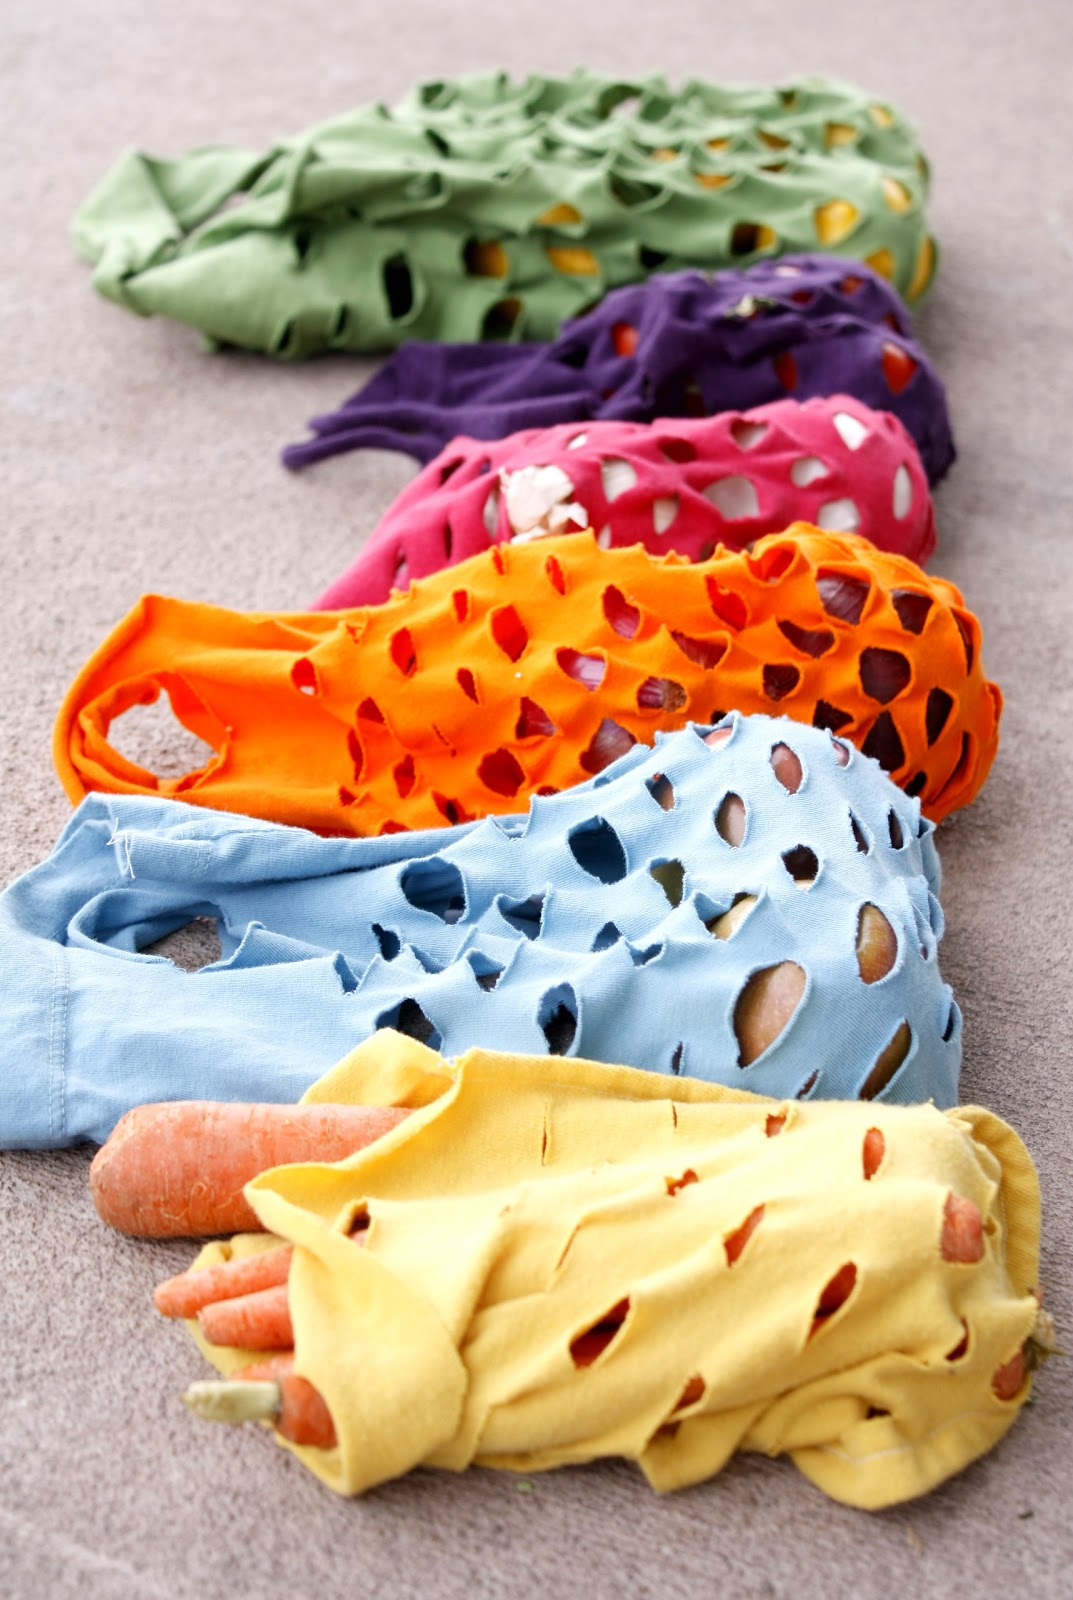
Авоськи, перезагрузка
Каждый может внести свой вклад в защиту окружающие среды. Хотя бы частичным отказом от задушивших планету пластиковых пакетов.
Вспомним бабушкины авоськи

И переделаем их на современный лад!
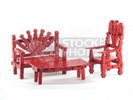
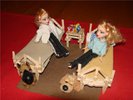
Это цитата сообщения Nadjunja Оригинальное сообщение
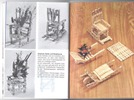
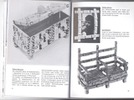
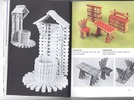
мебель для кукол из прищепок
Нашла форум, где делают мебель для кукол из прищепок - очень много идей
http://www.forum.dollplanet.ru/viewtopic.php?f=4&t=6261
 [416x555]
 [показать]
 [500x375]
мастер классы стульчиков:
http://www.santaspostbag.co.uk/peg-art-rockingchair.shtml
http://www.thriftyfun.com/tf711919.tip.html
разное: http://www.kikisweb.de/crafting/clothespegs/clothespins.htm
примеры

идеи: http://picasaweb.google.com/Kasjo.xxx.Bastelmix/ToppBastelnMitWScheklammern#
 [показать]
 [показать]
 [показать]
Это цитата сообщения Naniika Оригинальное сообщение
бабочки (мк)
Еще один мастер-класс по бабочкам из пластиковой бутылки, бабочки получаются очень интересные
 [600x450]
Это цитата сообщения МедвеженокМ Оригинальное сообщение
Креатив из шин
Обычно шины выбрасывают, но есть на белом свете умельцы, которые приспосабливают ненужные шины в нечто нужное, полезное или просто любопытно-интересное...
Это цитата сообщения Иримед Оригинальное сообщение
ОРИГИНАЛЬНЫЕ РОЗЕТКИ СВОИМИ РУКАМИ (ФРАНЦИЯ)
