Это цитата сообщения Ольга_Сан Оригинальное сообщение
КНИГА Степная Е.-Плетение по технике Анкарс.
Это цитата сообщения Байкалочка_10 Оригинальное сообщение
Очень подробный МК по кукольной ручке!!
Опять с заграничного сайта! Ну очень подробно!!!!!!!! Стащила отсюда! Классный сайт по куклам! http://members.home.nl/asrai/cursus-en.htm
|
The hand I made for this lesson is from the palm of the hand to the finger tips about 1.80 inch. It is a bit bigger than I usually make, smaller gave some photographic problems 'cause I don't have a macro lens. |
 [250x163] [250x163] |
[250x163] |
|
The size of the hands depend on the size of the head. The length of a hand is equal to the length from chin to halfway the forehead. A face is usually about 2 hands wide. This can always vary a bit depending on the kind of doll. You start off by making 2 cylinder shaped rolls of fimo, in this lesson they are about 2.6 inch long and 0.60 inch thick (pict. 1). Sculpt one end in a kind of spoon shape by pressing the clay with your thumb. Sculpt the hand thinner to the "finger tips' by pushing it more flat (pict. 2). |
|
|
[250x163] |
[250x163] |
|
For this lesson I'll continue with the making of the right hand. Try to work simultaneously on both hands because it is hard to make an equal looking hand afterwards. To make a wrist, roll the clay between thumb and point finger like pict. 3 You now have a roughly shaped hand with a part arm. Make the arm thinner if necessary. Smooth the hand nice and round. The hollow part is the inside/hand palm of the hand (pict. 4). |
|
|
[250x163] |
[250x163] |
|
At pict. 5 you see the back of the hand. You will now make 3 incisions with a knife for separating the fingers. The thumb will be added later. Because this will be a right hand, the incision for the little finger is cut a little further than the other incisions, take your own hand as example. Bend the 2 outer fingers gently side wards so you have more space (pict. 6). Hold the fingers between your point finger and thumb. While warming the clay by the warmth of your hands, very gently roll the fingers slightly back and forth, so the inside of the fingers will also become round. You can use a sculpting tool for the areas that are difficult to reach. |
|
|
[250x163] |
[250x163] |
|
When the two outer fingers are smoothed, you start with the middle two. Bend them slightly apart and again roll them gently back and forth to round off the edges on the inside of the fingers (pict. 7). Do this very slowly, it is important that while you are doing this, the clay will be warmed by your fingers so they don't rip at the beginning. Use a sculpting tool to smooth the areas that are hard to reach (pict. 8). |
|
|
| |
Это цитата сообщения Байкалочка_10 Оригинальное сообщение
Очень подробный МК по кукольной ножке!
Стащила отсюда http://members.home.nl/asrai/cursus-en.htm
|
The foot in this tutorial is from heel to big toe about 1.8 inch long. Always use the head as a comparison for the size of the feet. The length of the feet is equal to the size of the head. |
|
[250x163] |
[250x163] |
|
In this tutorial I will only make the right foot. Try to work simultaneously on both feet because it is hard to make an equal looking foot afterwards. You start off by making a 2.5 inch long cylinder shaped roll of clay, about 0.8 inch thick (pict. 1). Bend the roll of clay in an angle like in pict. 2. The top will become a part leg and the other part the foot. |
|
|
[250x163] |
[250x163] |
| Flatten the clay by pressing it together between thumb and point finger towards the 'toes'. Be careful not to make it too flat. (pict. 3 + 4). | |
|
[250x163] |
[250x163] |
|
Now it is time to form the heel. Push/smear some clay from under the foot backwards (towards the heel) and push/smear some clay from the lower leg down (towards the heel) (pict. 5). This way you'll get more clay on the heel and a better shape at the sole of the foot. Press the clay with your thumb on the inside of the foot to make it more hollow (pict. 6). |
|
|
[250x163] |
[250x163] |
|
Before you can make incisions for the toes, the front of the foot needs to be reshaped a bit. Cut off a piece of clay slantwise starting at the 'big toe' (pict. 7). After this smooth the edge with your fingers (pict. 8). |
|
|
[250x163] |
[250x163] |
|
Look at the foot to see if it's not too thick, if it is you can make it thinner by smearing the clay from the instep to the leg. You can also smear clay upwards just above the heel towards the leg, this way the foot will become slimmer (pict. 9). Sculpt as smooth as possible, use a damp finger to rub the clay for a smooth finish. Now you can make incisions for the toes with the help of a sharp tool. Don't forget the big toe needs to be bigger than the other toes (pict. 10). |
|
|
[250x163] |
[250x163] |
Это цитата сообщения Zarrya Оригинальное сообщение
Канзаши (кандзаси) Мастер-классы.
Давайте рассмотрим всё подробнее. Поскольку информации довольно много, пожалуй разделим её на разные мастерклассы:
Это цитата сообщения tamaraff Оригинальное сообщение
ДАМЫ В ФАРФОРЕ
|
Это цитата сообщения Volody24_gl Оригинальное сообщение
Рецепт фруктово-ягодного торта
Это цитата сообщения Мила_Милославская Оригинальное сообщение
Валяная кукла "Карамельная тайна" Юлиана Таранова
Валяная кукла "Карамельная тайна" Юлиана Таранова
Этот мастер-класс взят из журнала "Кукольный мастер".


Это цитата сообщения Юлия_Абрамян Оригинальное сообщение
Потрясающий МК от Розанчик
МК "Майечка №3"
 [показать]
  [показать]
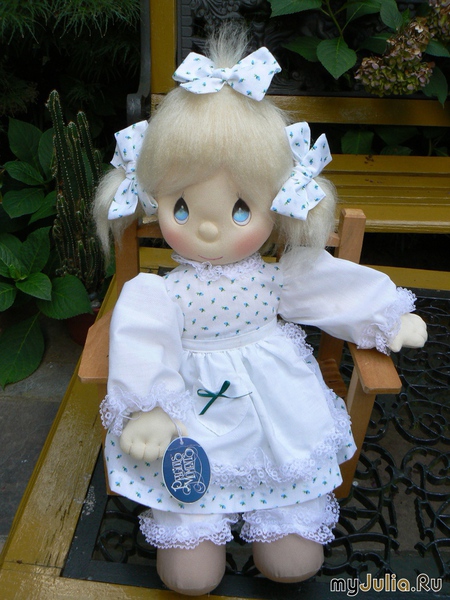
Мой МК начну с небольшой пред-истории, потому, что она связана с куклой, что я хочу показать вам как шить. Эта кукла была создана очень популярной здесь компанией "Precious Moments" (Драгоценные Моменты). Наряду с куклами, они производят статуэтки - на все случаи жизни
[показать]. В основном они изображают детей с формой глаз, как капля воды. А придуманы такие детишки были талантливым художником Sam Butcher более 30 лет назад. Вот его рисунки (вы, наверное, встречали такие в интернете): [показать]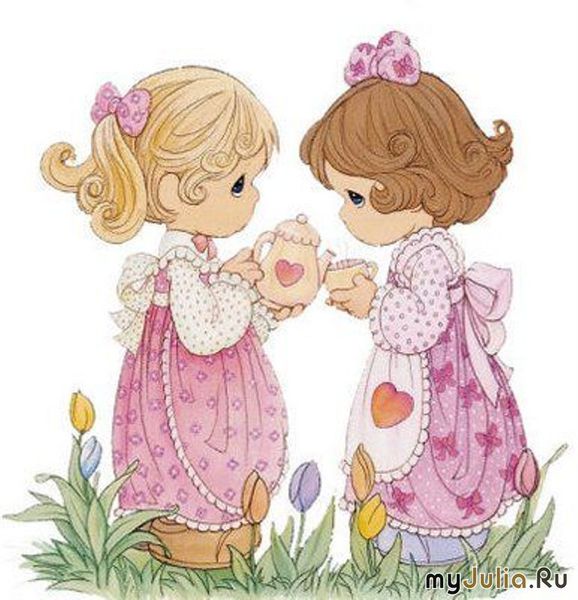 [показать] [показать]
Впоследствии, он стал основателем компании. Тогда же начали делать и куклы с такими же глазами... Поначалу они были текстильные. Сейчас они делают такие куклы, что я, как увидела случайно одну, влюбилась в них, и собрала небольшую коллекцию (я бы и ещё собирала, но выставлять их просто негде!
[показать] ) И куклы, возможно, встречались вам: [показать] [показать] [показать]Помимо готовых кукол, купила и набор, что был выпущен в 1985 году. Вот такая куколка сшилась из этого набора:
 [показать]
Выкройку из этого набора я и использовала, когда шила своих Майечек
[показать] А если точнее, то в наборе выкроек не было, а всё было нарисовано на материалах - вырезай и сшивай. Копировала с материала, чтобы иметь выкройку на будующее. Вот с них то и начнём!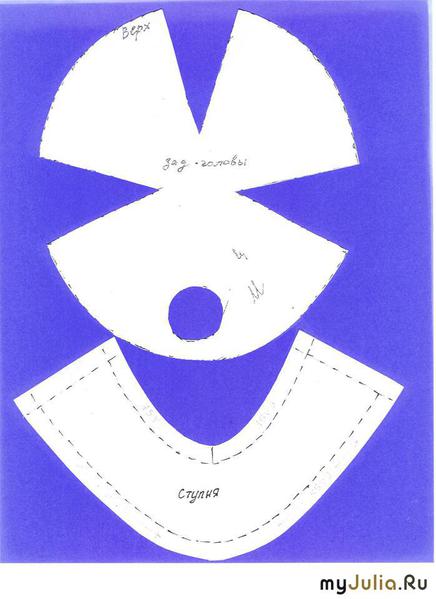 [показать]
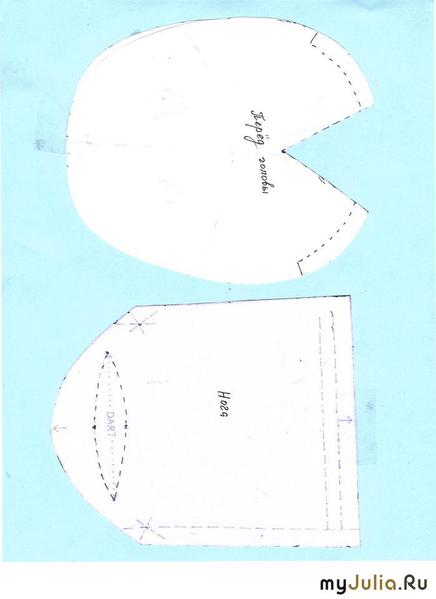 [показать]
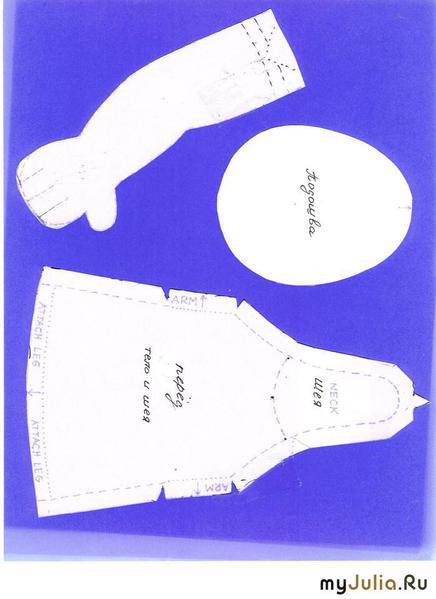 [показать]
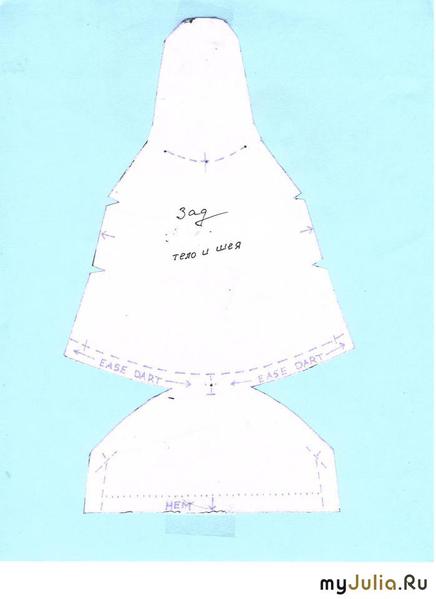 [показать]
Важно знать - все выкройки (кроме ручек) даны с припуском на швы. Ручки строчатся по сложенному вдвое материалу, а потом вырезаются. Остальные части выкраиваются; где надо, зашиваются выточки...
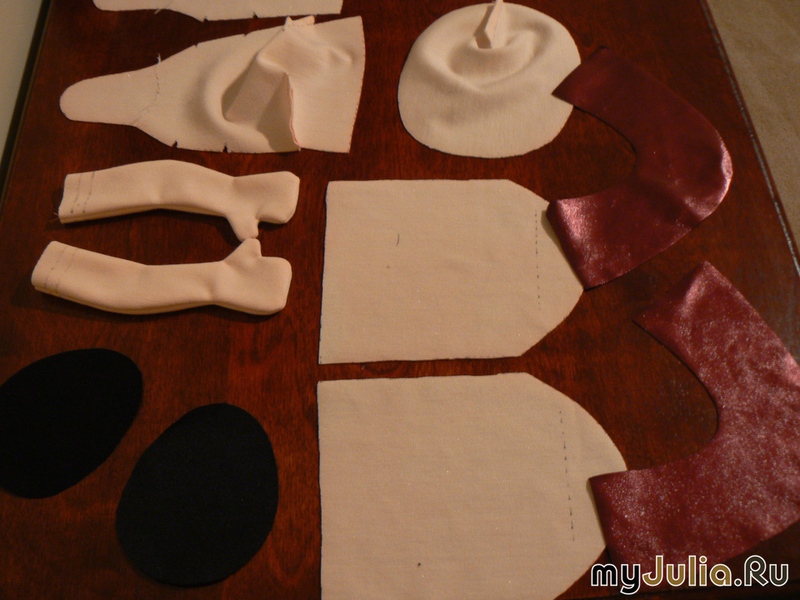 [показать]
и начинают сшиваться между собой...
[показать] Все в группе шить умеют, так что в мельчайшие подробности посвящать не буду. Для большей наглядности прилагаю картинки. По-моему, всё понятно. Если нет, не отчаивайтесь, попробуем вместе добраться до сути дела...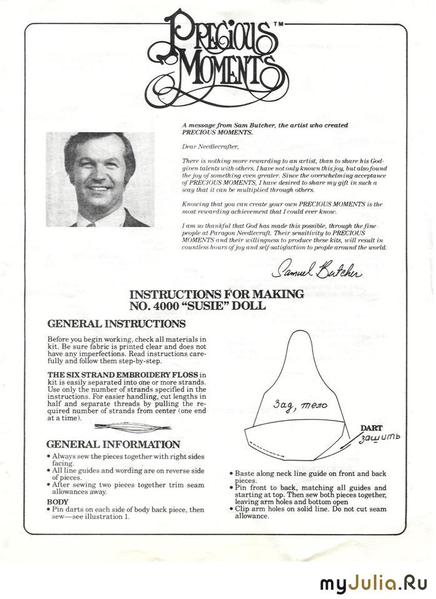 [показать]
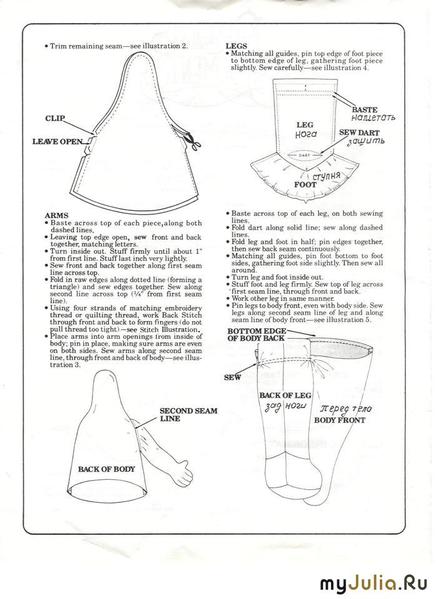 [показать]
Это цитата сообщения Mia-Antidote Оригинальное сообщение
Без заголовка
|
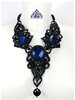
Для вышивки кулона нам понадобятся три стеклянных кабошона с фантазийным рисунком, бисер разных оттенков зеленого и желтого размером 10/0, рубка бледно-зеленая карамель, салатовый бисер размером 9/0, трикотажный флизелин, жемчужная краска для ткани бананового цвета, клей момент, упаковка игл для БИСЕРОПЛЕТЕНИЯ № 12, лавсановые нити подходящего цвета – желтый и зеленый, лоскут кожи или качественного кожзаменителя для обратной стороны. Рисуем эскиз будущего кулона в форме кленового листа, обозначаем на нем расположение кабошонов
Флизелин складываем в 8-9 слоев и пропариваем утюгом, чтобы он проклеился насквозь. Получившуюся заготовку покрываем несколькими слоями краски для ткани. Это нужно во первых |
Это цитата сообщения очумелец Оригинальное сообщение
позитив
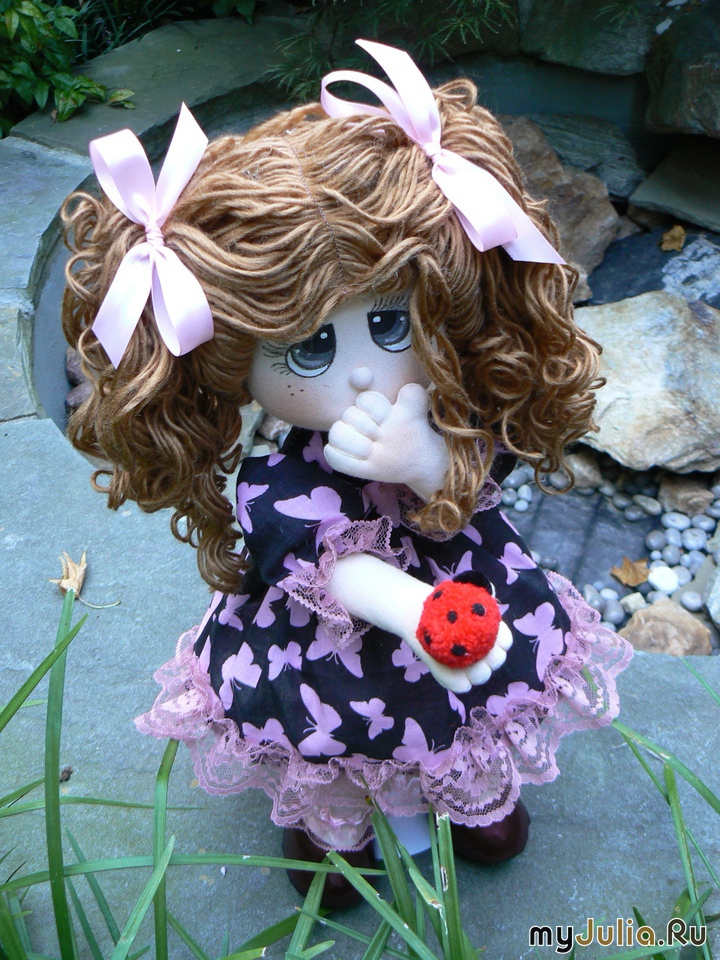
нашла у китайцев,сразу захотелось вязать и вязать для таких красавиц

Это цитата сообщения besta-aks Оригинальное сообщение
ДОМАШКИ
ДОМАШКИ-ЭТО КУКЛЫ ДЛЯ ХРАНЕНИЯ ПОЛИЭТИЛЕНОВЫХ ПАКЕТОВ
ВЫКЛАДЫВАЮ НЕСКОЛЬКО ИДЕЙ
А ВЫБИРАТЬ РУКОДЕЛЬНИЦЫ ВАМ!
[495x640] [492x640] [494x640] [494x640] [492x640] [492x640] [492x640] [494x640] [176x264] [450x600] [335x512] [225x500] [494x640] [334x512] [492x640] [489x640] [341x640] [241x500]ВЫКРОЙКИ ТОЛЬКО ДЛЯ ПЕРВЫХ ДВУХ ПОЛУЧИЛОСЬ ВПЕРЕМЕШКУ-ИЗВИНЯЙТЕ!
Это цитата сообщения Dushka_li Оригинальное сообщение
Шьем роскошное платье для золушки!
[показать] Каждая девочка мечтает быть сказочной принцессой. И каждая мама воплощает свои детские мечты в нарядах для дочки.
Технология пошива платья для маленькой принцессы от поЛено , поможет превратить мечты в реальность. Глядя на девочку в платье с огромным количеством воланов, в первую очередь возникает вопрос, а как это сделано? Вот и начнём с самого интересного, с изюминки этого платья - с юбки.
Это цитата сообщения Байкалочка_10 Оригинальное сообщение
Оплетение кабошона восьмеркой (Мастер-класс)

Это цитата сообщения Nudeloper Оригинальное сообщение
"Воздушка" - объемное колье на леске
[400x300]
[показать]Для работы потребуется леска диаметром 0.16…0.20, примерно 35-40 метров (леска потоньше или мононить делают изделие более мягким, леска потолще наоборот - упругим); крючок, для удобства берем потолще, где-то 3 мм; два штифта с кольцом; две розетки для бус или два колпачка; замок «винт»:
[400x250]
А так же бисер нескольких цветов, всего 30-40 грамм - здесь можно использовать бисер любых размеров, рубку, некрупные бусины, сколы камней (или каменную крошку):
[400x347]
Так же в процессе работы потребуются: ткань или большая подушка, портновские булавки, чтобы разложить воздушку перед сборкой, и круглогубцы для работы со штифтами.
Начинаем набирать бисер в любом порядке. Так воздушка получится равномерно разноцветная:
[400x220]
Набираем до тех пор, пока длина низки не будет 4…4,5 метра:
[400x298]
Важно не отрезать нитку! Чтобы набрать нужное количество бисера, просто передвигаем уже набранный бисер дальше по леске, освобождая место для нового:
[400x300]
Когда набрали 4…4,5 метра бисера, нитку не отрезаем – мы на этой нитке будем вязать! Отступаем от самого начала лески 5 см и завязываем узелок с петелькой:
[400x300]
Продеваем в эту петельку крючок, подтягиваем, придвигаем ближе к узелку немного бисера и начинаем вязать воздушные петельки:
[400x300]
Для тех, кто не умеет вязать - захватываем крючком леску после бисеринки и получаем такие «колечки»:
[400x300]
Чтобы воздушка получилась воздушной, в петельки вплетаем по 2-3 бисеринки и обязательно делаем пустые, без бисерин, петельки, а сами «колечки» делаем покрупнее. Я обычно вяжу так – придвигаю к крючку некоторое количество бисера, провязываю его (например, две бисеринки в петельке, затем три и снова две, и т.д.) и делаю пустую петельку:
Это цитата сообщения orhideya6868 Оригинальное сообщение
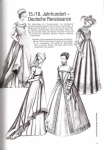
ИСТОРИЧЕСКИЕ ПЛАТЬЯ ДЛЯ КУКОЛ С ВЫКРОЙКАМИ. Часть 2.
 [554x700]
 Это цитата сообщения labris1985 Оригинальное сообщение
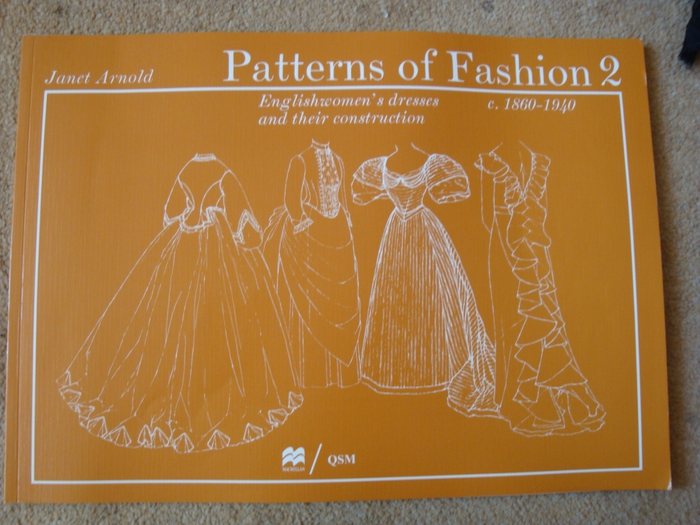
Моделирование- бальные,исторические платья
Не знаю как называется сия очень полезная книга,но благодаря ей я не первый год шью своей внучке красивые платья на праздники.