Вышивка
07-09-2016 18:01
к комментариям - к полной версии
- понравилось!


![Pretty stitches: branches & flowers. <a href=]() /vechernie-posidelki.blogspot.co.uk/2012/08/pumpkin.html:" target="_blank">http://vechernie-posidelki.blogspot.co.uk/2012/08/pumpkin.html: " src="https://s-media-cache-ak0.pinimg.com/564x/f9/46/7d/f9467dc0eb99c0daaa9889d3a484611e.jpg" />
/vechernie-posidelki.blogspot.co.uk/2012/08/pumpkin.html:" target="_blank">http://vechernie-posidelki.blogspot.co.uk/2012/08/pumpkin.html: " src="https://s-media-cache-ak0.pinimg.com/564x/f9/46/7d/f9467dc0eb99c0daaa9889d3a484611e.jpg" />


![#Embroidery_Tutorial "Pekinese Stitch. This is a really simple embroidery stitch that starts with a row of simple back stitches. With a blunt needle, the yarn is then looped through the stitches. This can be done on fabric, of course, but is also Beautiful on Knitted or Crocheted pieces." ༺✿ƬⱤღ <a href=]() /www.pinterest.com/teretegui/✿༻:" target="_blank">https://www.pinterest.com/teretegui/✿༻: " src="https://s-media-cache-ak0.pinimg.com/564x/ab/34/3d/ab343dcc35b2b52931175ebd2c05d1c4.jpg" />
/www.pinterest.com/teretegui/✿༻:" target="_blank">https://www.pinterest.com/teretegui/✿༻: " src="https://s-media-cache-ak0.pinimg.com/564x/ab/34/3d/ab343dcc35b2b52931175ebd2c05d1c4.jpg" />
вверх^
к полной версии
понравилось!
в evernote

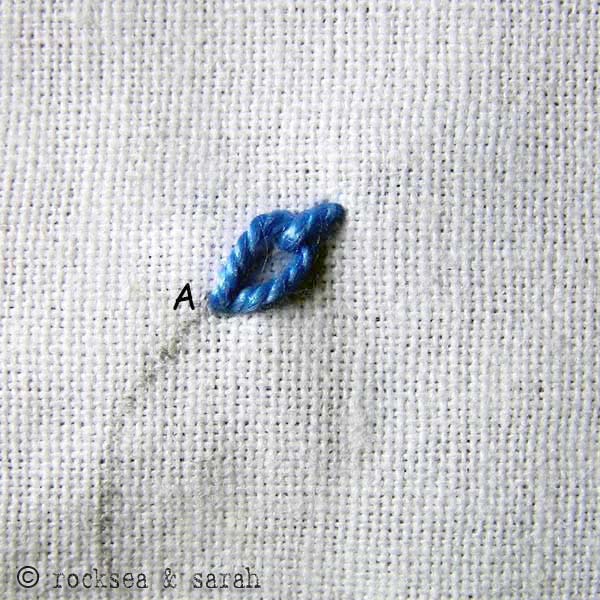
To work this stitch, you should be aware of at least the lazy daisy stitch. Knowledge of the reverse chain stitch and heavy chain stitch will only be more helpful. I will be working over a curved stitch line.
 [250x250] [250x250] |
 [250x250] [250x250] |
|
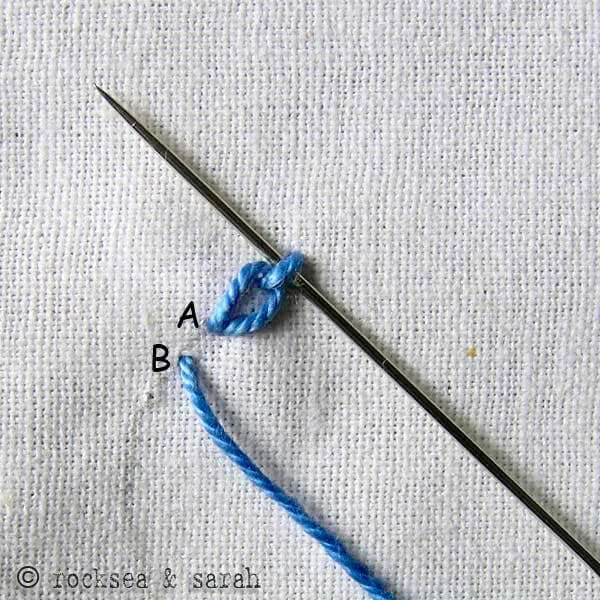
| Fig 1: Lay the foundation by doing a lazy daisy stitch with a slightly longer tail, and the base as point A. | Fig 2: Bring the needle out through B and take it under the tail of the lazy daisy without plucking the fabric. | |
 [250x] [250x] |
 [250x250] [250x250] |
|
|
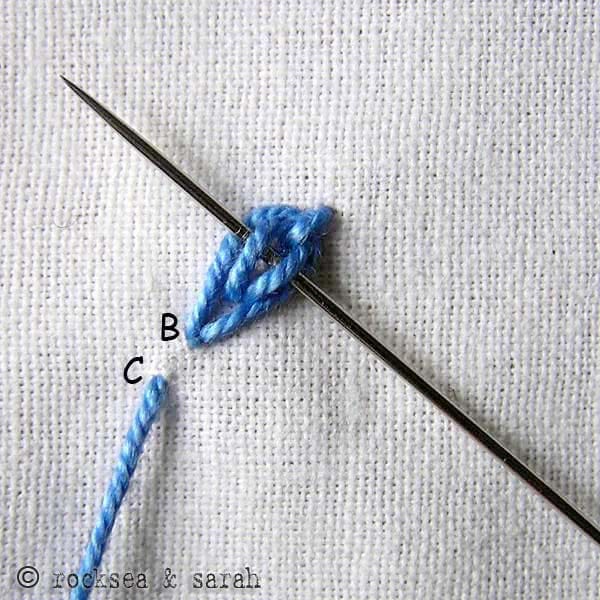
Fig 3: Put the needle back in B to get another loop, layering the lazy daisy from outside. Bring the needle out through C. Take it over the outside loop and under the inside loop as illustrated. |
Fig 4: Put the needle back in C to finish that loop. Now Bring the needle back again through D and continue with the same procedure. |
|
 [250x250] [250x250] |
 [250x250] [250x250] |
|
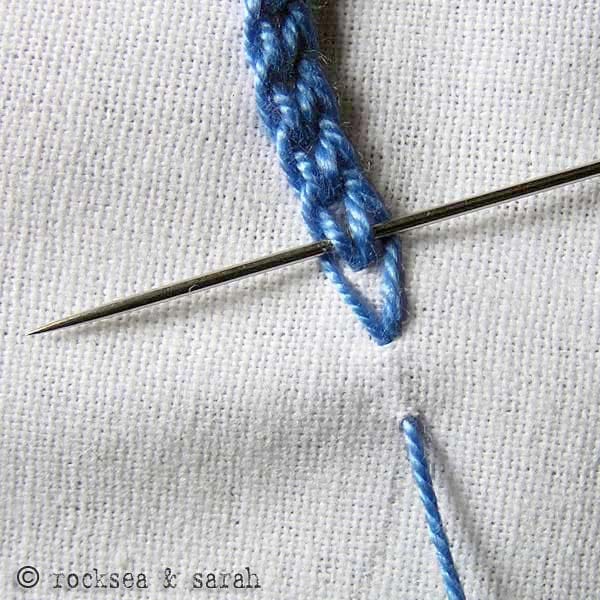
| Fig 5: To make the taking of needle over and under the loops easier, here is a tip. Before tightening the ‘outer’ loop completely, you can take the needle under the ‘inner’ loop. | Fig 6: You can then tighten the ‘outer’ loop by pulling the thread with your fingers and continue with the procedure. | |
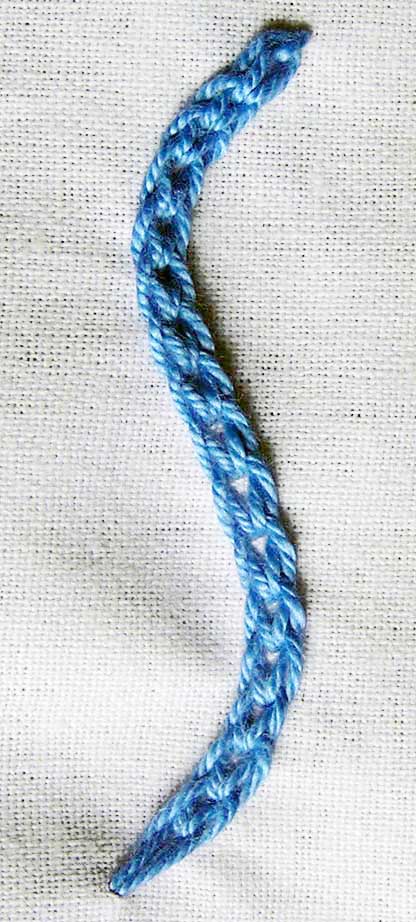 [180x400] [180x400] |
Fig 7: A finished braided chain stitch will look like this. It has a slightly embossed fini  |
Вы сейчас не можете прокомментировать это сообщение.
Дневник Вышивка | Лидия49 - Дневник Лидия49 |
Лента друзей Лидия49
/ Полная версия
Добавить в друзья
Страницы:
раньше»