Это цитата сообщения Мадам_Ирина Оригинальное сообщение
Как сделать японский веер
Как сделать японский веер
Наступило долгожданное лето!Солнце,тепло,отсутствие лишней одежды-всё это не может не радовать.Но...как писал классик:
"Ох, лето красное! любил бы я тебя,
Когда б не зной, да пыль, да комары, да мухи.
Ты, все душевные способности губя,
Нас мучишь; как поля, мы страждем от засухи;
Лишь как бы напоить, да освежить себя!.."
Вот чтобы освежить себя,предлагаю сделать милую безделушку-японский веер!Много места он не займёт,а польза очевидна.Опять же,очень красиво и оригинально.Это вам не газеткой обмахиваться!... ))
 [685x457] [640x480] [645x396]
Слов много,да ещё все на англицком...))Это не должно нас смущать,потому как из картинок,я надеюсь,всё понятно.Если будут сомнения можно воспользоваться переводчиком
http://www.translate.ru/

Jonathan Fong
Japanese fans are typically made with bamboo, but flat bamboo sticks are difficult to find. As a substitute, basswood strips work just as well. Basswood is similar to balsa wood, except it's more durable. You can find basswood sticks in craft stores and hobby shops. The fan in this project uses 11-inch long sticks that were 1/2-inch wide and 1/16-inch thick. If your local store only sells basswood sheets that are larger than you need, they can easily be cut to size with a hobby knife. You will need 10 wood sticks to make the fan.

Jonathan Fong
Measure 1 inch from the end of each wood stick and puncture a hole at the midpoint with a push pin. Place a cutting mat underneath the wood so the pin can go all the way through.

Jonathan Fong
After piercing a hole in all 10 wood sticks, stack them up and thread a 2-inch head pin through the holes.

Jonathan Fong
Using needle-nose pliers, twist the other end of the head pin to keep the pin from sliding out. The pin should keep the wood sticks tight, but still allow for pivoting. Don't worry if the twisted head pin is not that attractive—you will cover it with a button later.

Jonathan Fong
This fan features two types of paper—decorative paper in front and plain white paper in the back that serves as a lining. The white paper gives more heft to the fan and helps to cover the wood sticks. Thin rice paper was used in this project but you can use any plain paper. Cut the paper to about 15 inches by 18 inches. Use a compass set at a 4-inch radius to draw an arc at the edge of the paper and cut out the half circle.

Jonathan Fong
Position the wood sticks on the white paper with the pivot point at the bottom center where the half circle was removed. This way, about 4 inches of the wood will be exposed, with the rest covered by the white paper. Arrange the sticks so they are evenly spaced.

Jonathan Fong
Once the sticks are positioned exactly where you want them, trace around them with a pencil. You will remove the sticks in the next step, so tracing them will help you keep track of their correct position.

Jonathan Fong
Apply glue to the back of the sticks with a paint brush. Using a brush will give you a more even coat of glue on the wood.

Jonathan Fong
Place the wood sticks on the paper glue side down, using the pencil marks you traced earlier to return the sticks in the correct position. Press on the sticks with your fingers to make sure the glue makes contact with the paper.
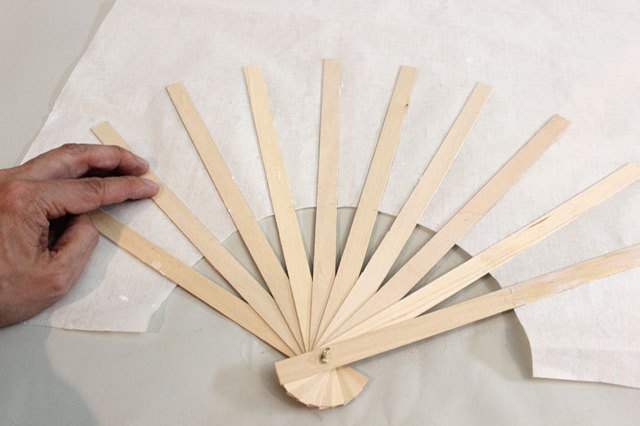
Jonathan Fong
So the fan is easier to work with, use a pair of scissors to trim about 1 inch all around the wood fan sticks. You can approximate at this point, as this is not the final shape of the fan.
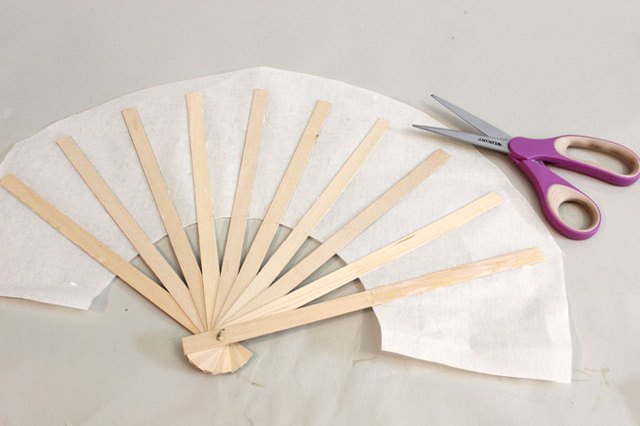
Jonathan Fong
Choose a decorative paper that folds easily, like wrapping paper or origami paper. Just as you used the compass to measure an arc in the white paper, do so with the decorative paper and cut out the half circle. You want this arc to be slightly smaller than the one on the white paper, so set the compass to about 3 3/4 inches.

Jonathan Fong
Use a brush and apply glue to the front of the wood sticks, only where they make contact with the paper. It's also a good idea to dab a little glue on the paper in between the sticks so that the decorative paper will adhere to the white lining.

Jonathan Fong
Turn the fan over, glue side down, and adhere it to the "wrong" side of the decorative paper. Make sure the two half circles at the bottom line up, with the decorative paper extending past the white lining by about 1/4 inch. Run your fingers across the paper to smooth it out.
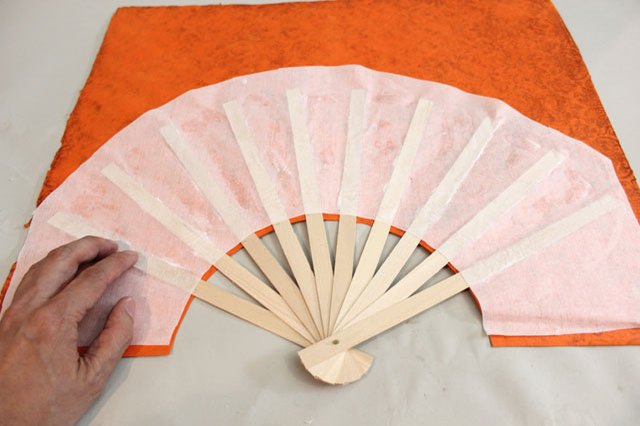
Jonathan Fong
Use the tops of the fan sticks as a guide and cut all around the top of the fan. Leave about a 1/2 inch of paper on the left and right edges of the fan.

Jonathan Fong
On the wood sticks at the very left and right edge, apply some glue and fold the decorative paper onto it. This way, you will have finished edges when the fan is folded.

Jonathan Fong
Fold the fan, lining up the wood sticks. The paper will fold up along with the sticks. Give the paper a strong crease so that the pleats will show when the fan is unfolded.

Jonathan Fong
Hook a tassel onto the twisted knot of the head pin. Give it a tug to make sure it won't slip off.

Jonathan Fong
Glue a decorative button on top of the twisted part of the head pin. The button hides the twisted metal and locks the tassel into place. It helps if the button is concave in the back, so the head pin can sit in the cavity.

Есть варианты


