Это цитата сообщения igolohka Оригинальное сообщение
Одеяло. МК на английском языке
Each full circle is a whopping 22″ square. But you can make whatever size square you desire.
To begin our improv version, cut the desired quarter-of-a-circle shape out of a 11″ SQUARE piece of paper. Mine is not quite a true circle, The ‘corners are pushed out a little, making it a square-ish circle. We will use these 3 pieces as a template, simply adding 1/2″ around all edges to allow for seam allowance. You will see better as we go along. I promise.
A little note… The pictures below show a few pillows I made to practice before making the entire quilt. That is why the fabrics look entirely different.

We will begin by making our first quarter circle piece:

And trim, leaving 1/2″ for seam allowance:

Here is how:
First, set your stitch length to be rather tiny. This helps our cut seams to not come undone when we trim them later.
To make this curved piece, begin by arranging scraps in the order you would like:

Join the first 2 fabrics, making sure they are plenty wide:

Open up and press flat with your fingers.
Lay the template over and see where the next shape should go:

Add on the next piece. Notice how I angle them to get them in the shape of the template:

Continue attaching random widths at angles:

When your curved strip is wide enough, go to the ironing board, and press it:

Pin on the template:
Cut curved strip, leaving 1/2″ seam allowance all around:
Now pin your other 2 templates to your solid fabric.
I was a little indecisive, so you will see both white and grey solids in this tutorial. I landed on grey for the pillows and off-white for the quilt.
Cut, leaving 1/2″ for seam allowances:

Here are the 3 pieces so far:

Next I folded my pieces, marking the 1/2 way point on both edges of the curve, and on each of the curved lines of the white fabric:

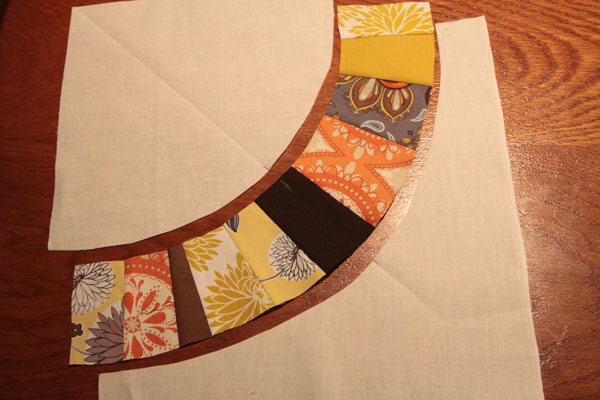
You can see my markings at the fold a little better here:
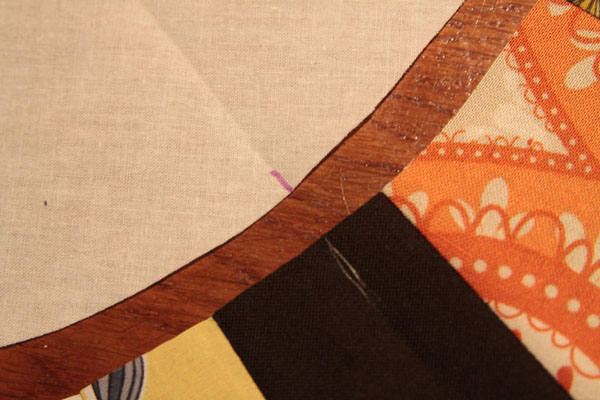
Pin together at the center point and the 2 edges:

Now, go pin-crazy if you like, easing the curve as you go.
Stitch 1/2″ from edge, easing the fabric as you go along.
Open up and admire your improv goodness:
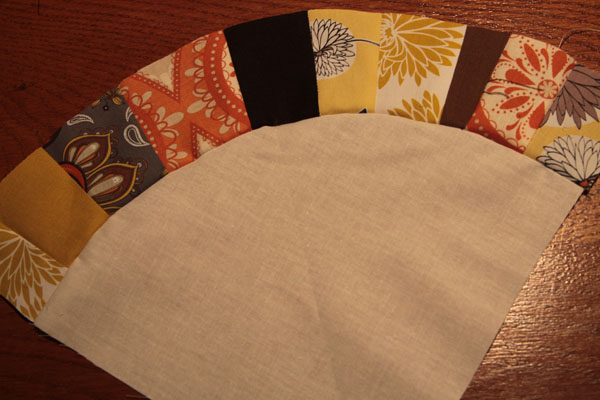
Now we will sew on the remaining shape.
Match the center points and the edges as we did previously:
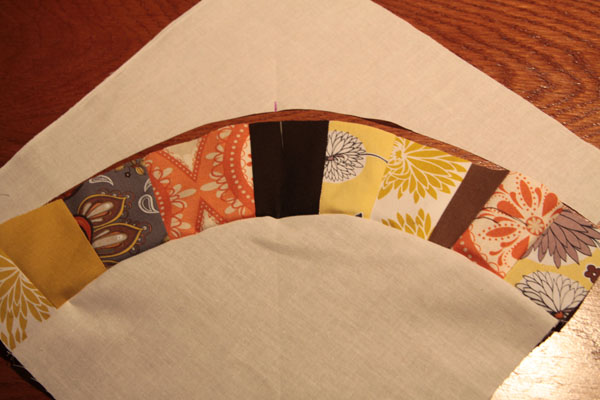

Press, then you can begin joining them together as they are completed:

Here you can see that I did each step, four at a time. I don’t know why. But that is what I did. You can do them one at a time if you like.

Finally, join all four quarter circles, right sides together.
You can see here how I pressed the seams in opposite directions so the center point is not too bulky.


Here you can see the 4 quarters joined together:

After a bit of colorful hand-stitching,
this practice square became a simple pillow for folks resting on our couch,
…or little ones rolling on the floor…
or, most likely, pillow fights when mom is not in the homey room.
*********
Now that I have worked out my pattern, here is square one for my Lazy Girl Quilt. Done.
I love how ginormous it is:
Neighborhood dog and square one.
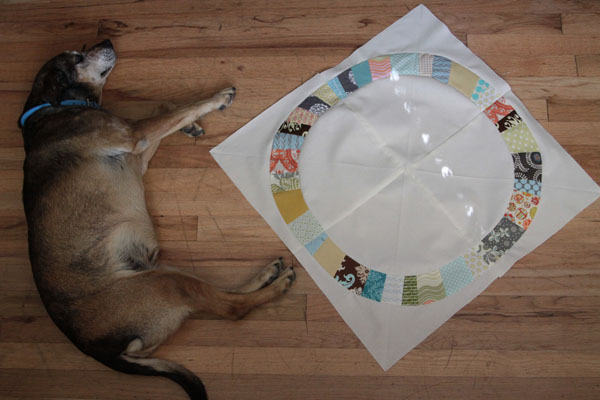

When all 9 of my circly-squares were complete, they were first sewn in strips of three, then three strips formed into one quilt front.
For the back of my quilt, I used a Kona Mustard. I love yellowish mustard. I shaped one circle out of my favorite scrap which happens to be from the Denise Schmidt Hope Valley line. The last of its goodness. I used the same template as the front squares, then pieced the completed square with large strips making it the size needed. Upon sewing it all together, I noticed the dye lots of my 2 mustard strips were quite different. This is why it is a good idea to buy plenty of fabric to begin with, especially when it can take months to get the whole thing ready for completion, if you are a busy mom, wife, and ocean-dweller like me. Snap! What to do?
Since this girl is the thrifty, imperfectionist that she is, a row of scraps between the two not matchy-matchy mustards solved the problem.
Next, I taped down the back of the quilt to my kitchen floor using painters tape. Middles and corners first, then fill in around the quilt. Notice that the right side is down and the wrong side is up.
Do the same for the batting.
Now, tape on the top with the happy-side up. We want this side up because it will be the side that is seen while quilting.
Now, go turn on a good movie and pin away! I like Pride and Prejudice because I have seen it soooo many times that I know exactly what is happening without really watching it. And, yes, I like the long one, but don’t worry, it doesn’t take an enormous amount of time to pin down the quilt-sandwich.
Voila! Now we are ready to free-motion quilt.
Next trim the edge up a bit with a straight edge.
Cut several 3″x45″ strips with your cutter. Sew them together to make one long strip.
 [показать]
Fold the long strip in half lengthwise.
Beginning a ways from a corner, sew down folded strip along the edge of the quilt using 1/2″ seam.
Corners. Stop with needle down 1/2 ” from corner.
[показать]
Lift pressure foot.
Leaving needle down, turn quilt like so.
Put pressur foot back down
Now sew BACKWARDS off the quilt edge.
Here you can see my stitches heading off the quilt.
Now fold the strip back of the quilt as so.
Then down like such.
You can see it better here. Do you see that dot? I made that to show where my sewing will begin.
Here we begin sewing from that purple dot FORWARD.
[показать]
Continue sewing binding on all around the quilt.
[показать]
When about a foot or so from the starting point, stop. Remove from machine.
Line up the two ends, simply marking with a fabric marker, where the two shall meet.
Here you can see my mark.
Now, unfold the strips, folding the right sides together where the lines meet. You can’t see the lines in this picture because they are touching on the inside.
Sew.
Check to make sure you got it right, then trim.
Here it is.
Now flip and do the hand sewing. Turn on a good movie, or two, of course.
z [показать]
Then throw it in the washer and dryer and take it out on a family adventure…