Material:
1. Thick Cardboard or paperboard, non-corrugated (around 1/6″ thick).
2. Felt for bottom and base.
3. Weaving material, example: yarn, twine, fabric strips, ribbons etc….Tools:
1. Sharp scissors (able to cut thick cardboard)
2. Hole puncher
3. Tapestry needle (#13)
4. Clothes pin
5. Craft / Tacky Glue
6. Pen or pencil
7. Ruler
 [300x300]Download the basket weaving template (consist of triangle, round and square) in pdf format.
{It will either open in new tab or open a small window asking you to save it as file. If you can’t find the saved file in your computer, the default folder usually is in “/downloads”}
{If you can’t download the pdf pattern, probably you don’t have acrobat reader, download the latest version for free, here.}
Print it and enlarge 200% to get the size I made.
Trace it on the thick cardboard.
 [300x300]After tracing the template on the thick cardboard, use a pair of strong and sharp scissors to cut the template out.
Punch the holes with a paper hole-puncher.
Trace base on felt, cut 2 pieces.
Get the rest of the tools & materials ready.
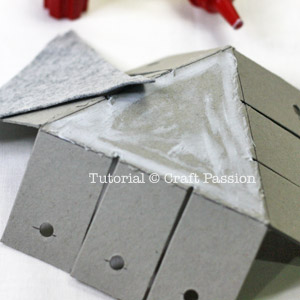 [300x300]Brush a layer of tacky glue on the bottom of the basket, press & stick the felt onto it.
 [300x300]Repeat the same to adhere the felt to the base.
Snip the edge of the felt follows the grooves between the fingers.
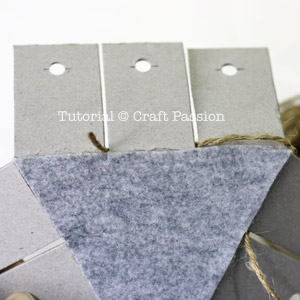 [300x300]Being to weave over and under around the fingers of the frame.
 [300x300]Push the twine into the grooves of the felt that you have just snipped.
Keep on weaving over and under the fingers until the end of first round.
 [300x300]When begin the second round, you will notice that you are weaving in the reverse side of the first round.
A full wrap on both sides after finish the second round.
 [300x300]Continue weaving and push the twine down to make them closer to each other. This will avoid gaps in between and will also hide the cardboard away.
As you go higher, the frame will stand up vertically and form the side of the basket.
 [300x300]Continue until you just over the hole’s level.
Allow a long length of twine for rim stitching later.
 [300x300]Put on clothes pin and allow some room for rim making.
 [300x300]To make the rim, insert another type of twine through the space between the clothes pin by using a tapestry needle.
Since the length is quite long, divide the twine by halve and work both ends from middle.
 [300x300]Keep going round by round. Take note on the corners and arrange them neatly.
 [300x300]Lay the twine until it fully covers the top portion of the basket.
 [300x300]Secure the rim by stitching the original twine through the holes.
 [300x300]Stitch again on the opposite direction to form criss-cross pattern.
 [300x300]When reaching the corner, pierce through the gap and make another stitch there.
 [300x300]Hide all ends into the braid to neaten up the basket.
The basket is ready to be used.
 [588x392]