https://vishivashka.ru/cveti-bisera/gortenzija.php
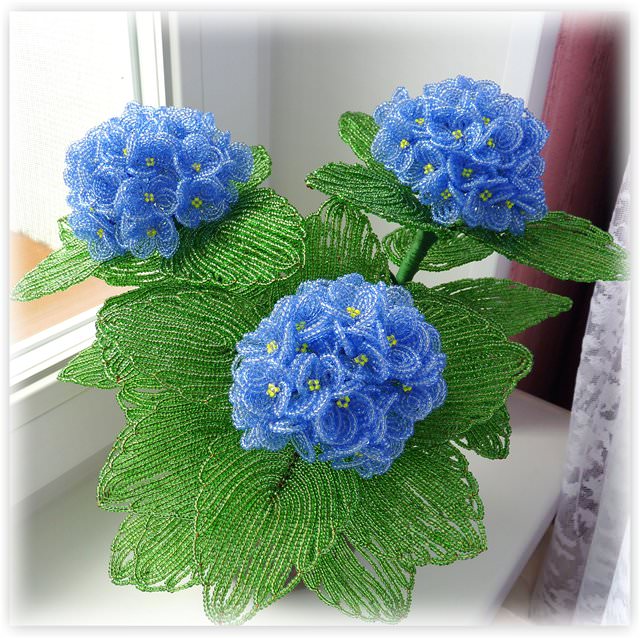
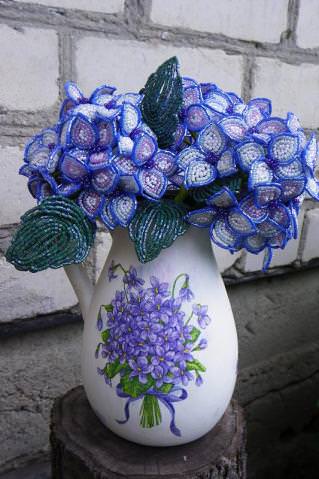
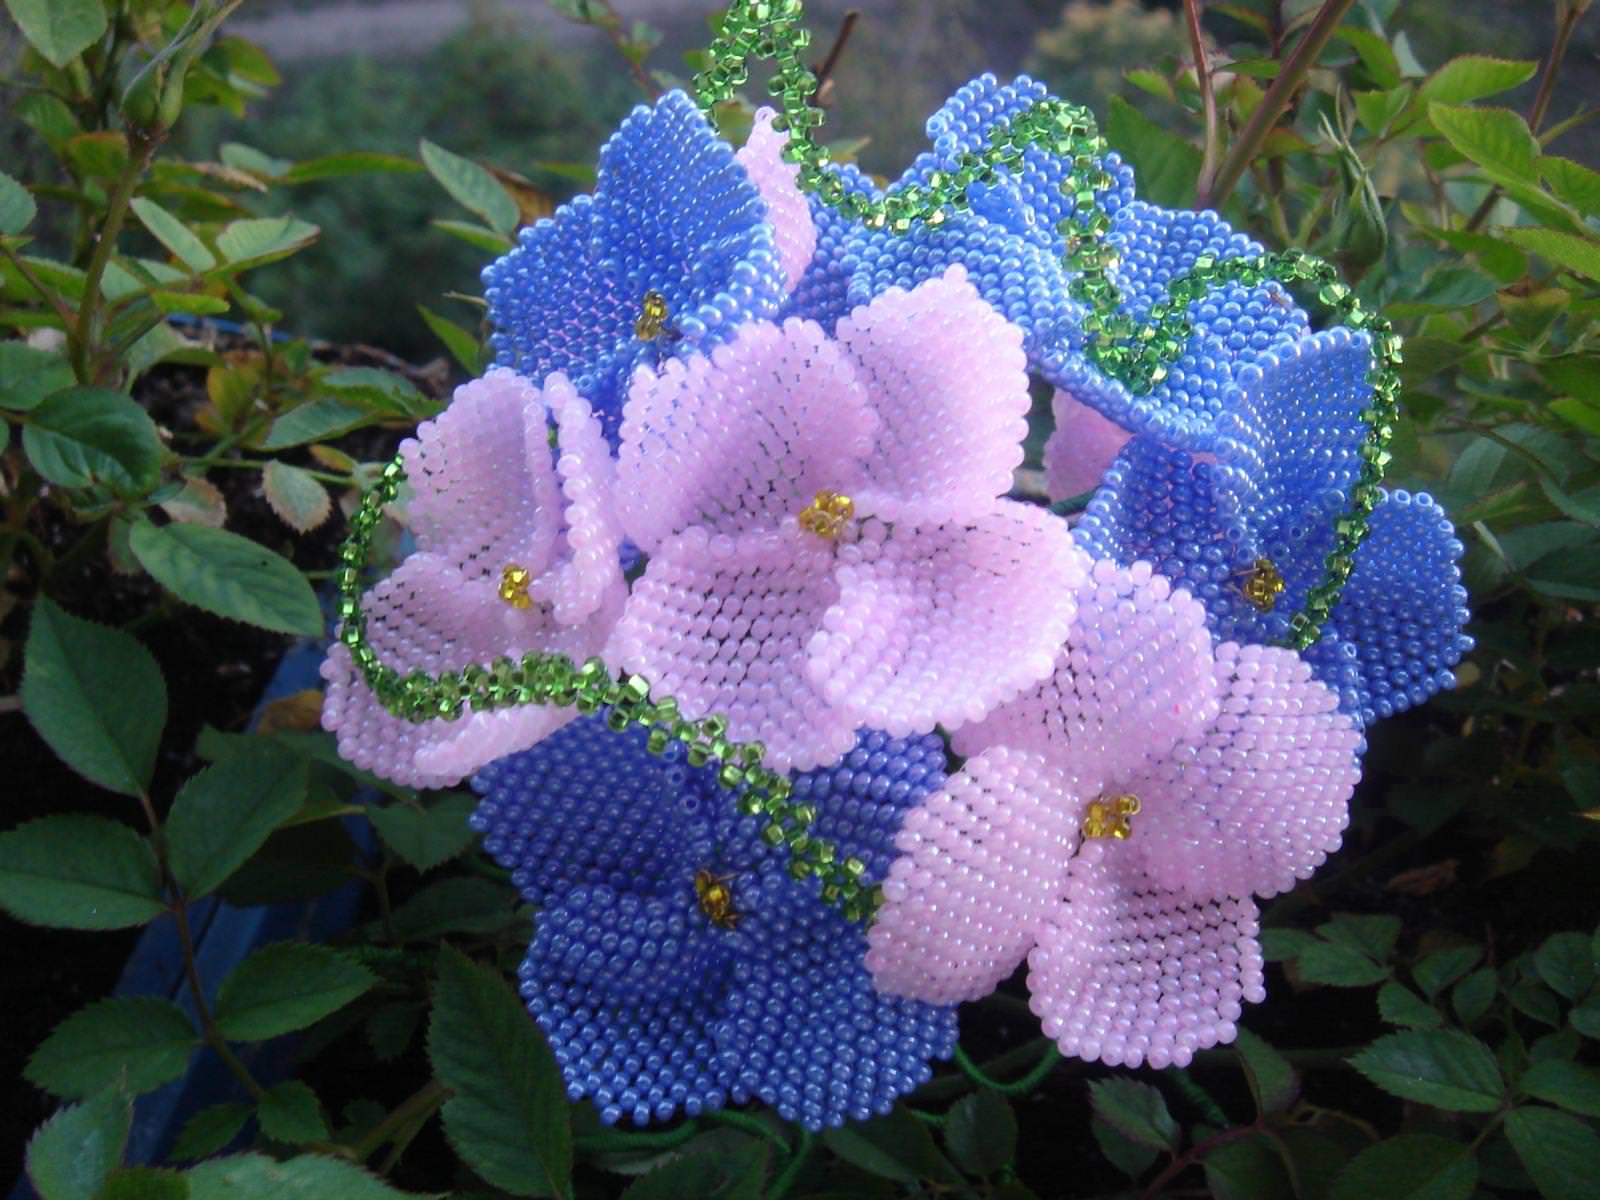
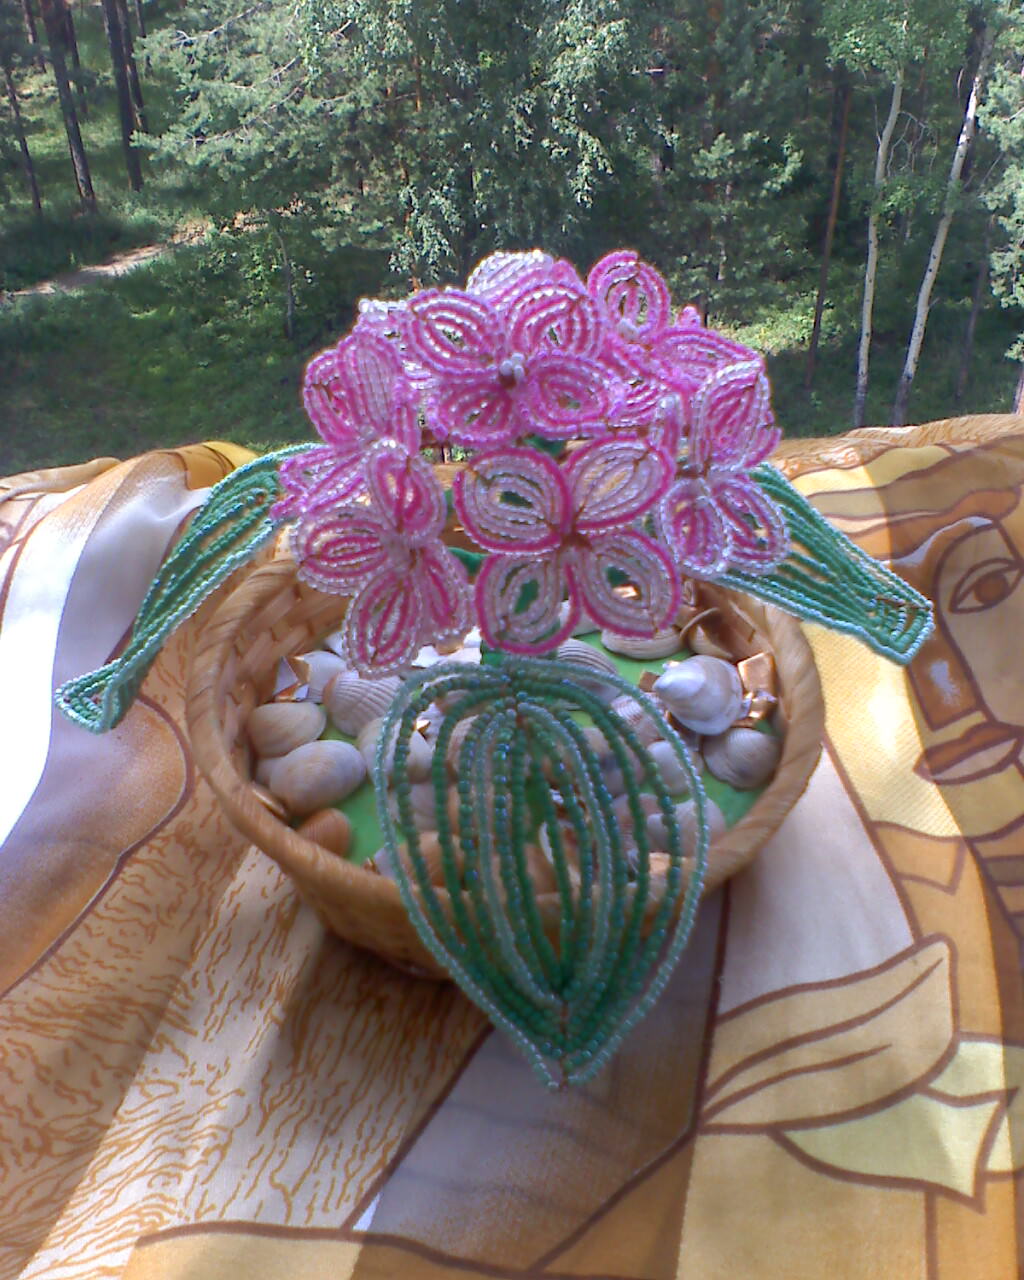
Гортензия из бисера — такой замечательный цветок можно самостоятельно смастерить и презентовать своим знакомым в качестве дополнительного подарка ко Дню Рождения.
 /vishivashka.ru/wp-content/uploads/gortenzija_iz_bisera_3-300x300.jpg" target="_blank">https://vishivashka.ru/wp-content/uploads/gortenzija_iz_bisera_3-300x300.jpg 300w, https://vishivashka.ru/wp-content/uploads/gortenzija_iz_bisera_3-150x150.jpg 150w, https://vishivashka.ru/wp-content/uploads/gortenzija_iz_bisera_3-105x105.jpg 105w, https://vishivashka.ru/wp-content/uploads/gortenzija_iz_bisera_3-44x44.jpg 44w, https://vishivashka.ru/wp-content/uploads/gortenzija_iz_bisera_3-30x30.jpg 30w, https://vishivashka.ru/wp-content/uploads/gortenzija_iz_bisera_3.jpg 640w" style="padding: 0px; margin: 0px auto; outline: none; list-style: none; border: 0px none; box-sizing: border-box; max-width: 100%; vertical-align: middle; height: auto; transition: all 0.4s;" width="70" />
 /vishivashka.ru/wp-content/uploads/gortenzija_iz_bisera_2-150x150.jpg" target="_blank">https://vishivashka.ru/wp-content/uploads/gortenzija_iz_bisera_2-150x150.jpg 150w, https://vishivashka.ru/wp-content/uploads/gortenzija_iz_bisera_2-319x318.jpg 319w, https://vishivashka.ru/wp-content/uploads/gortenzija_iz_bisera_2-105x105.jpg 105w, https://vishivashka.ru/wp-content/uploads/gortenzija_iz_bisera_2-44x44.jpg 44w" style="padding: 0px; margin: 0px auto; outline: none; list-style: none; border: 0px none; box-sizing: border-box; max-width: 100%; vertical-align: middle; height: auto; transition: all 0.4s;" width="70" />
 /vishivashka.ru/wp-content/uploads/gortenzija_iz_bisera_5-150x150.jpg" target="_blank">https://vishivashka.ru/wp-content/uploads/gortenzija_iz_bisera_5-150x150.jpg 150w, https://vishivashka.ru/wp-content/uploads/gortenzija_iz_bisera_5-105x105.jpg 105w, https://vishivashka.ru/wp-content/uploads/gortenzija_iz_bisera_5-44x44.jpg 44w" style="padding: 0px; margin: 0px auto; outline: none; list-style: none; border: 0px none; box-sizing: border-box; max-width: 100%; vertical-align: middle; height: auto; transition: all 0.4s;" width="70" />
 /vishivashka.ru/wp-content/uploads/gortenzija_iz_bisera_4-150x150.jpg" target="_blank">https://vishivashka.ru/wp-content/uploads/gortenzija_iz_bisera_4-150x150.jpg 150w, https://vishivashka.ru/wp-content/uploads/gortenzija_iz_bisera_4-105x105.jpg 105w, https://vishivashka.ru/wp-content/uploads/gortenzija_iz_bisera_4-44x44.jpg 44w" style="padding: 0px; margin: 0px auto; outline: none; list-style: none; border: 0px none; box-sizing: border-box; max-width: 100%; vertical-align: middle; height: auto; transition: all 0.4s;" width="70" />
 /vishivashka.ru/wp-content/uploads/gortenzija_iz_bisera_1-150x150.jpg" target="_blank">https://vishivashka.ru/wp-content/uploads/gortenzija_iz_bisera_1-150x150.jpg 150w, https://vishivashka.ru/wp-content/uploads/gortenzija_iz_bisera_1-105x105.jpg 105w, https://vishivashka.ru/wp-content/uploads/gortenzija_iz_bisera_1-44x44.jpg 44w" style="padding: 0px; margin: 0px auto; outline: none; list-style: none; border: 0px none; box-sizing: border-box; max-width: 100%; vertical-align: middle; height: auto; transition: all 0.4s;" width="70" />
Голубая гортензия из бисера
Для такого соцветия понадобятся следующие материалы:
- зеленая ленточка;
- кусачки и ножницы;
- проволока, диаметром 0, 3 мм;
- бисер голубого и зеленого цвета;
- провод, толщиной в 2 мм.
Итак, начнем наш мастер класс гортензия из бисера.
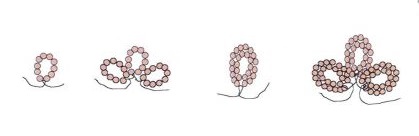
Схема для плетения цветов гортензии следующая:
 /vishivashka.ru/wp-content/uploads/gortenzija_iz_bisera_shema_pletenya_1.jpg" target="_blank">https://vishivashka.ru/wp-content/uploads/gortenzija_iz_bisera_shema_pletenya_1.jpg 419w" width="300" />
Чтобы получился полноценный цветок гортензии необходимо плести около 30 цветочков голубого цвета. В видео уроке, вы сможете подробно рассмотреть, как происходит процесс плетения цветов гортензии.
Начинаем мастер класс с нанизывания на проволоку семи бусинок голубого цвета. Дальше моделируем петельку придерживаясь схемы. Однако следует учитывать, что в этом МК – бусинок изображено больше чем необходимо для плетения цветка.
Затем вокруг 1-ой петельки делаем 2-ую и 3-тю петли. Лепесточек готов.
Отступаем немножко и плетем своими руками такой же круглый лепесточек из голубого бисера.
В этом МК цветочек сделан из 4-х лепесточков. Когда сплетете все тридцать цветочков – их необходимо складывать пучками по 5 шт. Таким образом вам будет легче складывать веточку (см. схемы).
 /vishivashka.ru/wp-content/uploads/gortenzija_iz_bisera_shema_pletenya_2.jpg" target="_blank">https://vishivashka.ru/wp-content/uploads/gortenzija_iz_bisera_shema_pletenya_2.jpg 426w" style="padding: 0px; margin: 0px; outline: none; list-style: none; border: 0px none; box-sizing: border-box; max-width: 100%; vertical-align: middle; height: auto;" width="243" />
Для изготовления 1-го цветочка необходимо плести два зелененьких листочка. Начать плетение следует с центрального рядка. На него собственно и будете набирать 4 зеленые бусины и делать дуги. Так как лист имеет острую форму необходимо прибавлять по 1-ой бусинке между рядочками дуг. Поэтому если хотите получить лист определенного размера – нужно будет сделать полных восемнадцать оборотов вокруг рядка центрального.
Берем 30-сантиметровый провод и прикрутим к его макушке пучки голубых цветов. После, на стебле, пониже, приматываем два листка. На финише остается лишь спрятать под зеленой лентой все ненужное. По такому принципу делаете три таких же цветка и ваша гортензия из бисера готова.
 /vishivashka.ru/wp-content/uploads/gortenzija_iz_bisera_6.jpg" target="_blank">https://vishivashka.ru/wp-content/uploads/gortenzija_iz_bisera_6.jpg 496w" width="288" />В следующем уроке вы научитесь мастерить прекрасный букет белой гортензии своими руками.
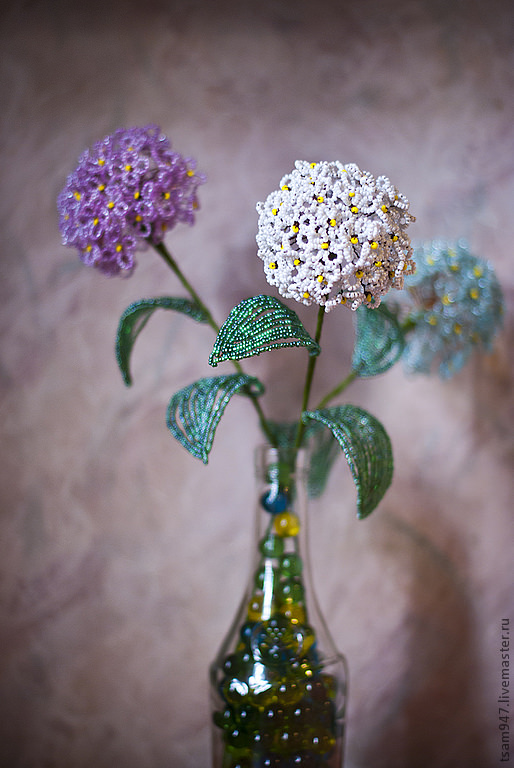
Белая гортензия из бисера
Этот урок будет под силу даже для начинающих мастериц. Чтобы получился такой цветочек необходимо подготовить такие материалы:
- проволока медная (толстая и тонкая) – для стеблей;
- бисер разного цвета (белый, розовый, голубой и кремовый, зеленый, желтый);
- зеленые нитки.
Итак, приступим, наш мастер класс гортензия из бисера с описанием по моделированию цветка.
Ход работы:
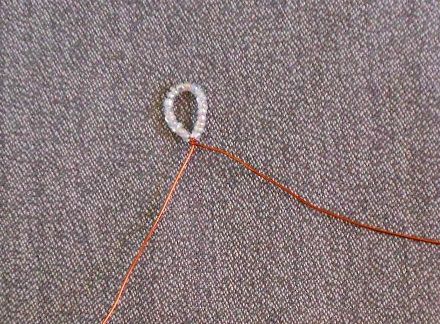
На 20 – сантиметровый отрезок одеваем 20 белых бусин (смотрим фото).
 /vishivashka.ru/wp-content/uploads/gortenzija_iz_bisera_master_klass_1.jpg" target="_blank">https://vishivashka.ru/wp-content/uploads/gortenzija_iz_bisera_master_klass_1.jpg 440w" width="300" />Скручиваете петельку, отступив на 6 см от края проволочки.
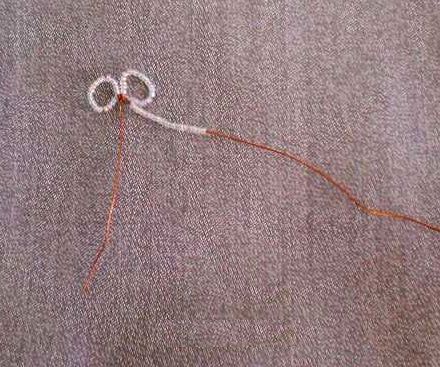
 /vishivashka.ru/wp-content/uploads/gortenzija_iz_bisera_master_klass_2.jpg" target="_blank">https://vishivashka.ru/wp-content/uploads/gortenzija_iz_bisera_master_klass_2.jpg 440w" width="300" />На длинный кончик одеваем еще столько же бусин (20 шт.).
Скручиваем 2-ую петельку рядом с первой (смотрим фото).
 /vishivashka.ru/wp-content/uploads/gortenzija_iz_bisera_master_klass_3.jpg" target="_blank">https://vishivashka.ru/wp-content/uploads/gortenzija_iz_bisera_master_klass_3.jpg 440w" width="300" />На тот же кончик одеваете еще 20 беленьких бусинок.
Скручиваете 3-ю петельку.
Продолжаем плетения: проделываем те же манипуляции проделываете с 4-ой петелькой.
 /vishivashka.ru/wp-content/uploads/gortenzija_iz_bisera_master_klass_4-150x150.jpg" target="_blank">https://vishivashka.ru/wp-content/uploads/gortenzi...era_master_klass_4-150x150.jpg 150w, https://vishivashka.ru/wp-content/uploads/gortenzi...era_master_klass_4-105x105.jpg 105w, https://vishivashka.ru/wp-content/uploads/gortenzi...isera_master_klass_4-44x44.jpg 44w" style="padding: 0px; margin: 0px auto; outline: none; list-style: none; border: 0px none; box-sizing: border-box; max-width: 100%; vertical-align: middle; height: auto; transition: all 0.4s;" width="70" />
 /vishivashka.ru/wp-content/uploads/gortenzija_iz_bisera_master_klass_5-150x150.jpg" target="_blank">https://vishivashka.ru/wp-content/uploads/gortenzi...era_master_klass_5-150x150.jpg 150w, https://vishivashka.ru/wp-content/uploads/gortenzi...era_master_klass_5-105x105.jpg 105w, https://vishivashka.ru/wp-content/uploads/gortenzi...isera_master_klass_5-44x44.jpg 44w" style="padding: 0px; margin: 0px auto; outline: none; list-style: none; border: 0px none; box-sizing: border-box; max-width: 100%; vertical-align: middle; height: auto; transition: all 0.4s;" width="70" />
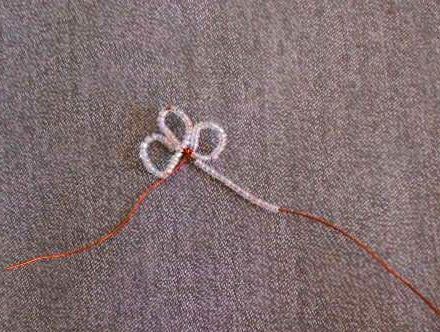 /vishivashka.ru/wp-content/uploads/gortenzija_iz_bisera_master_klass_6-150x150.jpg" target="_blank">https://vishivashka.ru/wp-content/uploads/gortenzi...era_master_klass_6-150x150.jpg 150w, https://vishivashka.ru/wp-content/uploads/gortenzi...era_master_klass_6-105x105.jpg 105w, https://vishivashka.ru/wp-content/uploads/gortenzi...isera_master_klass_6-44x44.jpg 44w" style="padding: 0px; margin: 0px auto; outline: none; list-style: none; border: 0px none; box-sizing: border-box; max-width: 100%; vertical-align: middle; height: auto; transition: all 0.4s;" width="70" />
На проволоке с длинным концом помещаете желтенькую бусинку.
Размещаете эту бусинку по центру цветочка, а концы проволоки закручиваете вместе.
Так у вас получается первый цветок гортензии. Для одного соцветия их необходимо сплести 24 шт.
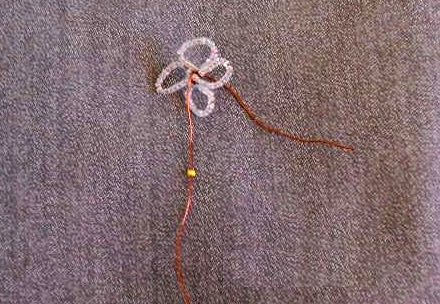 /vishivashka.ru/wp-content/uploads/gortenzija_iz_bisera_master_klass_7-150x150.jpg" target="_blank">https://vishivashka.ru/wp-content/uploads/gortenzi...era_master_klass_7-150x150.jpg 150w, https://vishivashka.ru/wp-content/uploads/gortenzi...era_master_klass_7-105x105.jpg 105w, https://vishivashka.ru/wp-content/uploads/gortenzi...isera_master_klass_7-44x44.jpg 44w" style="padding: 0px; margin: 0px auto; outline: none; list-style: none; border: 0px none; box-sizing: border-box; max-width: 100%; vertical-align: middle; height: auto; transition: all 0.4s;" width="70" />
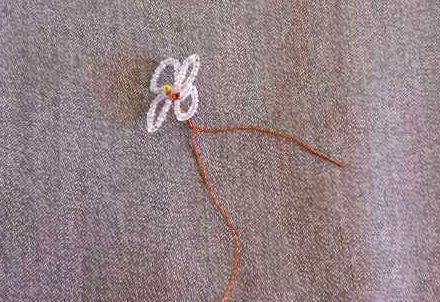 /vishivashka.ru/wp-content/uploads/gortenzija_iz_bisera_master_klass_8-150x150.jpg" target="_blank">https://vishivashka.ru/wp-content/uploads/gortenzi...era_master_klass_8-150x150.jpg 150w, https://vishivashka.ru/wp-content/uploads/gortenzi...era_master_klass_8-105x105.jpg 105w, https://vishivashka.ru/wp-content/uploads/gortenzi...isera_master_klass_8-44x44.jpg 44w" style="padding: 0px; margin: 0px auto; outline: none; list-style: none; border: 0px none; box-sizing: border-box; max-width: 100%; vertical-align: middle; height: auto; transition: all 0.4s;" width="70" />
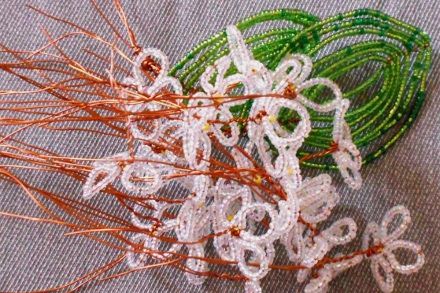 /vishivashka.ru/wp-content/uploads/gortenzija_iz_bisera_master_klass_9-150x150.jpg" target="_blank">https://vishivashka.ru/wp-content/uploads/gortenzi...era_master_klass_9-150x150.jpg 150w, https://vishivashka.ru/wp-content/uploads/gortenzi...era_master_klass_9-105x105.jpg 105w, https://vishivashka.ru/wp-content/uploads/gortenzi...isera_master_klass_9-44x44.jpg 44w" style="padding: 0px; margin: 0px auto; outline: none; list-style: none; border: 0px none; box-sizing: border-box; max-width: 100%; vertical-align: middle; height: auto; transition: all 0.4s;" width="70" />
Дальше будет идти бисероплетение листьев. Для этого берете проволоку длиной в 70 см. Скручиваем ее как на фото.
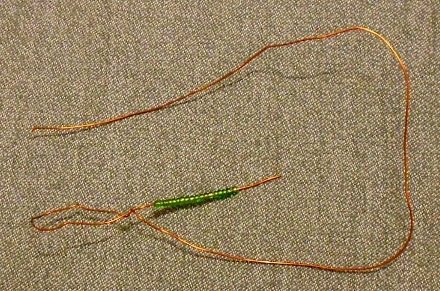 /vishivashka.ru/wp-content/uploads/gortenzija_iz_bisera_master_klass_10.jpg" target="_blank">https://vishivashka.ru/wp-content/uploads/gortenzija_iz_bisera_master_klass_10.jpg 440w" width="300" />У вас должна выйти петля – черешок листика, коротенький кончик проволоки и чуть длиннее, которым вы будете закручивать вокруг оси.
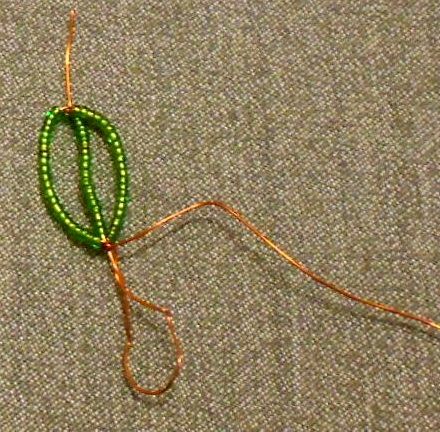
На ось нанизываем 17 зеленых бусин. На конец проволоки – одеваете 20 шт. и моделируете 1-ую дугу, оборачивая проволоку вокруг оси. Там же одеваете еще столько же бисера (20 шт.) и скручиваем 2-ю дугу.
 /vishivashka.ru/wp-content/uploads/gortenzija_iz_bisera_master_klass_11-150x150.jpg" target="_blank">https://vishivashka.ru/wp-content/uploads/gortenzi...ra_master_klass_11-150x150.jpg 150w, https://vishivashka.ru/wp-content/uploads/gortenzi...ra_master_klass_11-105x105.jpg 105w, https://vishivashka.ru/wp-content/uploads/gortenzi...sera_master_klass_11-44x44.jpg 44w" style="padding: 0px; margin: 0px auto; outline: none; list-style: none; border: 0px none; box-sizing: border-box; max-width: 100%; vertical-align: middle; height: auto; transition: all 0.4s;" width="70" />
 /vishivashka.ru/wp-content/uploads/gortenzija_iz_bisera_master_klass_12-150x150.jpg" target="_blank">https://vishivashka.ru/wp-content/uploads/gortenzi...ra_master_klass_12-150x150.jpg 150w, https://vishivashka.ru/wp-content/uploads/gortenzi...ra_master_klass_12-105x105.jpg 105w, https://vishivashka.ru/wp-content/uploads/gortenzi...sera_master_klass_12-44x44.jpg 44w" style="padding: 0px; margin: 0px auto; outline: none; list-style: none; border: 0px none; box-sizing: border-box; max-width: 100%; vertical-align: middle; height: auto; transition: all 0.4s;" width="70" />
 /vishivashka.ru/wp-content/uploads/gortenzija_iz_bisera_master_klass_13-300x295.jpg" target="_blank">https://vishivashka.ru/wp-content/uploads/gortenzi...ra_master_klass_13-300x295.jpg 300w, https://vishivashka.ru/wp-content/uploads/gortenzi...ra_master_klass_13-150x150.jpg 150w, https://vishivashka.ru/wp-content/uploads/gortenzi...ra_master_klass_13-105x105.jpg 105w, https://vishivashka.ru/wp-content/uploads/gortenzi...sera_master_klass_13-44x44.jpg 44w, https://vishivashka.ru/wp-content/uploads/gortenzija_iz_bisera_master_klass_13.jpg 440w" style="padding: 0px; margin: 0px auto; outline: none; list-style: none; border: 0px none; box-sizing: border-box; max-width: 100%; vertical-align: middle; height: auto; transition: all 0.4s;" width="70" />
Продолжаем бисероплетение: нанизываете 27 бусин. Новый завиточек у вас должен красиво лечь по кругу предыдущего.
Снова набираете 27 бусинок и делаете завиточек на левой стороне от оси.
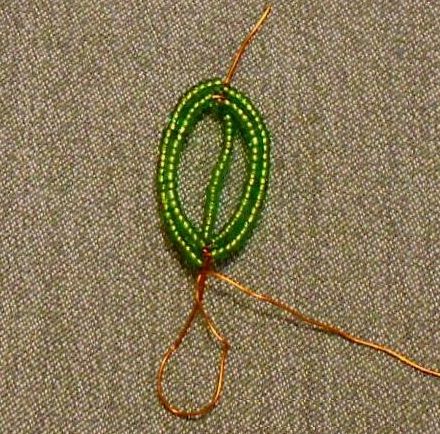
Продолжаем плетение: пока у вас не выйдет 6 дуг с каждой стороны от оси.
Верхний конец оси прячете на нижней стороне листочка, а оставшийся край – соединяете с черешком (петелька листа)
 /vishivashka.ru/wp-content/uploads/gortenzija_iz_bisera_master_klass_14-150x150.jpg" target="_blank">https://vishivashka.ru/wp-content/uploads/gortenzi...ra_master_klass_14-150x150.jpg 150w, https://vishivashka.ru/wp-content/uploads/gortenzi...ra_master_klass_14-105x105.jpg 105w, https://vishivashka.ru/wp-content/uploads/gortenzi...sera_master_klass_14-44x44.jpg 44w" style="padding: 0px; margin: 0px auto; outline: none; list-style: none; border: 0px none; box-sizing: border-box; max-width: 100%; vertical-align: middle; height: auto; transition: all 0.4s;" width="70" />
 /vishivashka.ru/wp-content/uploads/gortenzija_iz_bisera_master_klass_15-300x296.jpg" target="_blank">https://vishivashka.ru/wp-content/uploads/gortenzi...ra_master_klass_15-300x296.jpg 300w, https://vishivashka.ru/wp-content/uploads/gortenzi...ra_master_klass_15-150x150.jpg 150w, https://vishivashka.ru/wp-content/uploads/gortenzi...ra_master_klass_15-105x105.jpg 105w, https://vishivashka.ru/wp-content/uploads/gortenzi...sera_master_klass_15-44x44.jpg 44w, https://vishivashka.ru/wp-content/uploads/gortenzija_iz_bisera_master_klass_15.jpg 440w" style="padding: 0px; margin: 0px auto; outline: none; list-style: none; border: 0px none; box-sizing: border-box; max-width: 100%; vertical-align: middle; height: auto; transition: all 0.4s;" width="70" />
 /vishivashka.ru/wp-content/uploads/gortenzija_iz_bisera_master_klass_16-150x150.jpg" target="_blank">https://vishivashka.ru/wp-content/uploads/gortenzi...ra_master_klass_16-150x150.jpg 150w, https://vishivashka.ru/wp-content/uploads/gortenzi...ra_master_klass_16-105x105.jpg 105w, https://vishivashka.ru/wp-content/uploads/gortenzi...sera_master_klass_16-44x44.jpg 44w" style="padding: 0px; margin: 0px auto; outline: none; list-style: none; border: 0px none; box-sizing: border-box; max-width: 100%; vertical-align: middle; height: auto; transition: all 0.4s;" width="70" />
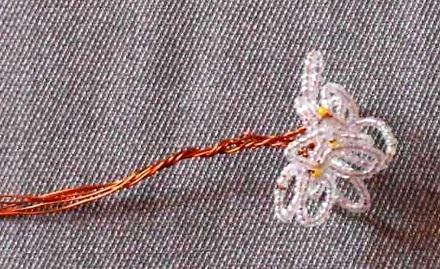
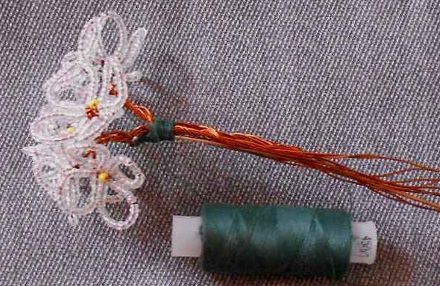
Далее, необходимо собирать своими руками соцветие и скрутить цветочки по 3 шт.
Берете потолще проволоку для стебля и нитками закрепляете цветы своими руками.
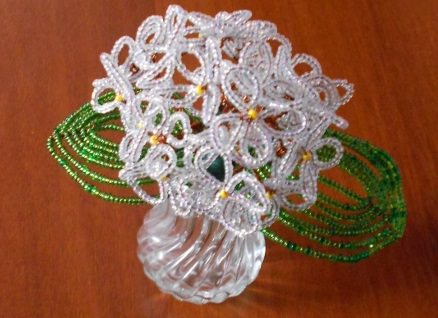
Под цветами закрепляете 2 листа. Так вы получите веточку гортензии.
 /vishivashka.ru/wp-content/uploads/gortenzija_iz_bisera_master_klass_17-150x150.jpg" target="_blank">https://vishivashka.ru/wp-content/uploads/gortenzi...ra_master_klass_17-150x150.jpg 150w, https://vishivashka.ru/wp-content/uploads/gortenzi...ra_master_klass_17-105x105.jpg 105w, https://vishivashka.ru/wp-content/uploads/gortenzi...sera_master_klass_17-44x44.jpg 44w" style="padding: 0px; margin: 0px auto; outline: none; list-style: none; border: 0px none; box-sizing: border-box; max-width: 100%; vertical-align: middle; height: auto; transition: all 0.4s;" width="70" />
 /vishivashka.ru/wp-content/uploads/gortenzija_iz_bisera_master_klass_18-150x150.jpg" target="_blank">https://vishivashka.ru/wp-content/uploads/gortenzi...ra_master_klass_18-150x150.jpg 150w, https://vishivashka.ru/wp-content/uploads/gortenzi...ra_master_klass_18-105x105.jpg 105w, https://vishivashka.ru/wp-content/uploads/gortenzi...sera_master_klass_18-44x44.jpg 44w" style="padding: 0px; margin: 0px auto; outline: none; list-style: none; border: 0px none; box-sizing: border-box; max-width: 100%; vertical-align: middle; height: auto; transition: all 0.4s;" width="70" />
 /vishivashka.ru/wp-content/uploads/gortenzija_iz_bisera_master_klass_19-150x150.jpg" target="_blank">https://vishivashka.ru/wp-content/uploads/gortenzi...ra_master_klass_19-150x150.jpg 150w, https://vishivashka.ru/wp-content/uploads/gortenzi...ra_master_klass_19-105x105.jpg 105w, https://vishivashka.ru/wp-content/uploads/gortenzi...sera_master_klass_19-44x44.jpg 44w" style="padding: 0px; margin: 0px auto; outline: none; list-style: none; border: 0px none; box-sizing: border-box; max-width: 100%; vertical-align: middle; height: auto; transition: all 0.4s;" width="70" />
Как видите этот МК под силу для начинающих рукодельниц, которые только учатся бисероплетению. Для визуального восприятия плетения гортензии из бисера советуем вам просмотреть видео с мастер-классом создания цветка.