МК взят с сайта Craft, Kids, Quilling - Innas Creations.
How to make a beveled picture frame out of paper
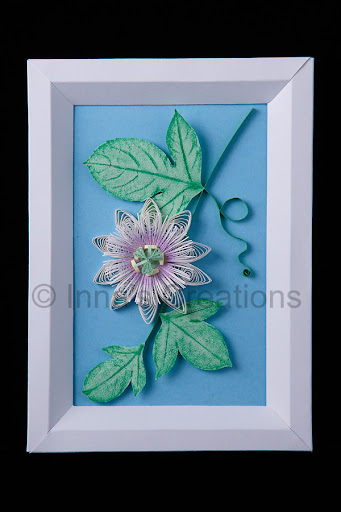
Long awaited instructions and templates for making a beveled paper frame I've used for my quilling projects "Poppies" and "Dandelions and raspberries". To additionally illustrate the use of a frame like this, I've created a quilled passionflower, which isn't a thoroughly designed work, so be indulgent, please.
We're going to make a frame that is 2.5 cm (1 inch) wide and 2 cm (6/16 inch) deep. I'm sorry, but you'll have to use a ruler with metric system units for this project.
Step 1: Preparing a paper rectangle
Measure the artwork to frame, add 10.5 cm at each side and cut out a rectangle of the dimensions you've calculated. Use heavyweight (240 gsm) cardstock paper.
Step 2: Drafting

Use one of the following methods to draw the lines: print out the template, cut it out and transfer onto the piece of cardstock you've prepared; alternatively, you may just draw the lines with a pencil according to the diagram above.
Templates for download
Download one of the PDF templates for the right paper size and print it out. Make sure you don't resize or scale the page when printing.
There's no need to download a template if you're not going to print it. Just draw the lines following the diagram above.
Notice that the corners are marked "top right", "bottom left" etc. Line up a cutout with a corresponding corner of the rectangle. Transfer the lines by pressing them into the paper, using a needle, or tracing the template around like shown in the photo. Using a pencil, mark with dots the points where the creases start.
After repeating the procedure for all the four corners, connect the dots with lines that go along the paper edges.
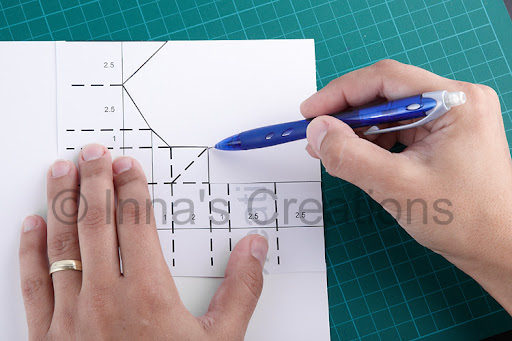
Step 3: The cutout
Carefully cut away the corners. Score the cardstock according to the crease lines and fold like shown below.
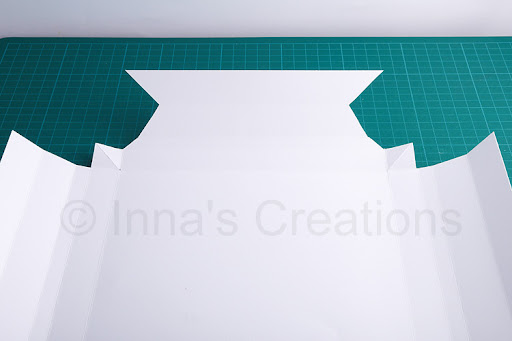
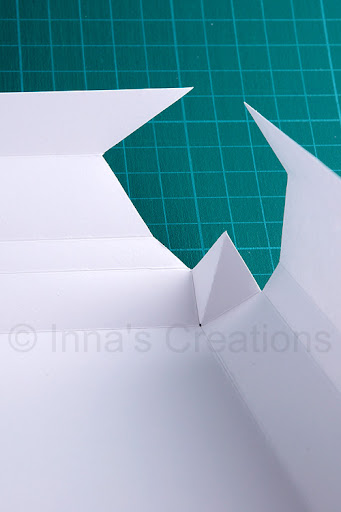
Step 3: Assembling
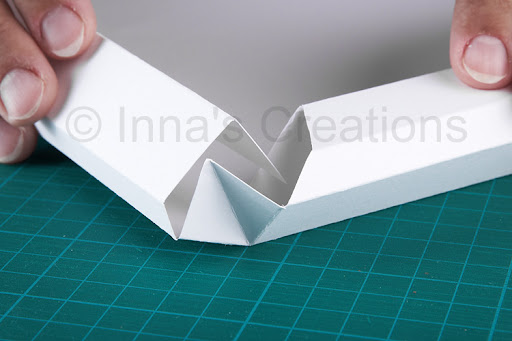
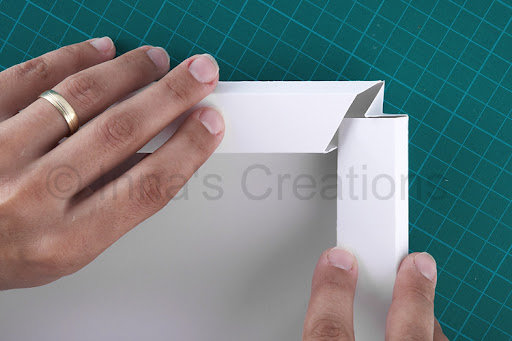
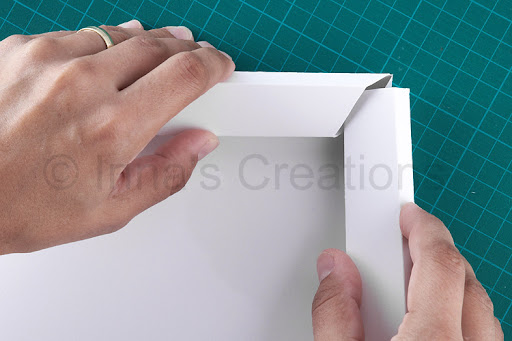
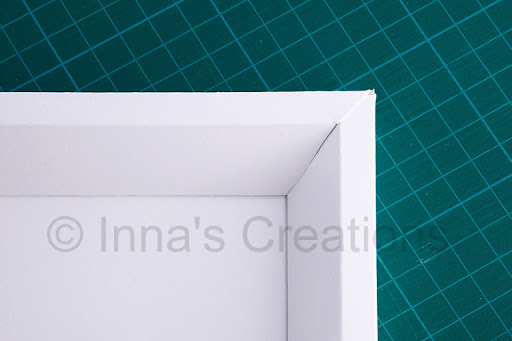
Start assembling the frame. If you don't use the back of the frame as a background, glue your picture down to the frame at this point. Then fold the border like shown in the pictures, simultaneously inserting the sides of a corner into each other.
 [показать]
  [показать]
  [показать]
  [показать]
Repeat for the rest of the corners. When done, carefully glue the bottom of the border to the back of the frame.
Have you noticed that little square I'd left in the corner? It folds into a triangle, goes inside the border and gives the frame extra rigidness. I must credit Svetlana for this idea.