Это цитата сообщения nata5219 Оригинальное сообщение
Marilyn the Fancy Fish
http://kimlapsley.blogspot.ru/2012/03/marilyn-fancy-fish.html

Size
13cm/5in long, 10cm/4in high
Skill Level
Advanced. This pattern uses single crochet and double crochet and is worked in a spiral. Some of the parts are quite small and assembly is a little complicated. Have a read through the pattern before you start. If you run into any trouble, please let me know.
Note on yarn and hook size
I used DK weight yarn and a 3.0mm hook for this pattern. For those using US hooks, I recommend a size C or D, for those using UK hooks, I recommend a size 11. You can use a different weight yarn than DK but it will change the size of your toy. Remember to use the same weight yarn for all parts so that your toy is in proportion. Choose a hook size that will give you a nice tight stitch.
Materials
Yarn
Orange (Approx. 70metres, 77yards)
White (small amount)
Purple (Small amount)
Red (Small amount)
Crochet Hook – 3.00mm or preferred size
Filling
Plastic pellets or dried beans and stocking (optional)
Tapestry needle
Black felt
White felt
Craft glue and/or thread and sharp needle for attaching felt
Pins
Scissors
Terminology
***This pattern is written using US crochet terminology***
ch – Chain
dc – Double crochet
Rnd – Round
sc – Single crochet
sl st – Slip stitch
st – Stitch. This term covers ch, sc, dc, sl st and other stitches used in crochet.
sc2tog – Single crochet two stitches together
Make a ring – The starting point for crocheting in a spiral. Use which ever method you prefer.
* * - Repeat the instructions between the asterisks as directed.
( ) – The number of stitches that should be in a completed round are placed in brackets at the end of that rounds instructions.
Instructions
Body (in Orange)
Make a ring.
Rnd 1: 7 sc in ring (7)
Rnd 2: 2 sc in each st around (14)
Rnd 3: *sc in next st, 2 sc in next st* around (21)
Rnd 4: *sc in next 2 st, 2 sc in next st* around (28)
Rnd 5: *sc in next 3 st, 2 sc in next st* around (35)
Rnd 6: *sc in next 4 st, 2 sc in next st* around (42)
Rnd 7: *sc in next 5 st, 2 sc in next st* around (49)
Rnd 8: *sc in next 6 st, 2 sc in next st* around (56)
Rnd 9-13: sc in each st around
Rnd 14: *sc in next 12 st, sc2tog* around (52)
Rnd 15: *sc in next 11 st, sc2tog* around (48)
Rnd 16: sc in each st around
Rnd 17: *sc in next 10 st, sc2tog* around (44)
Rnd 18: *sc in next 9 st, sc2tog* around (40)
Rnd 19: sc in each st around
Rnd 20: *sc in next 8 st, sc2tog* around (36)
Rnd 21: *sc in next 4 st, sc2tog* around (30)
Rnd 22: *sc in next 3 st, sc2tog* around (24)
Start stuffing. Plastic pellets or dried beans tied in a stocking can be placed in the body to give it a bit of weight so that Marilyn sits nicely when she's finished.
 |
|
|

Rnd 23: *sc in next 2 st, sc2tog* around (18)
Rnd 24-26: sc in each st around
Rnd 27: *sc in next st, sc2tog* around (12)
Finish stuffing firmly.
Rnd 28: sc in each st around
Rnd 29: sc2tog around (6)
Cut yarn and fasten off. Flatten the opening and sew shut. Weave in yarn ends.

Dorsal Fin (in Orange)
Make a ring.
Rnd 1: 5 sc in ring (5)
Rnd 2-3: sc in each st around
Rnd 4: 2 sc in first st, sc in next 4 st (6)
Rnd 5: *sc in next 2 st, 2 sc in next st* twice (8)
Rnd 6: *sc in next st, 2 sc in next st* four times (12)
Rnd 7: sc in each st around
Rnd 8: dc in next 6 st, sc in next 6 st (12)
Rnd 9: dc in next 6 st, sl st in next st (7)
Cut yarn and fasten off. Leave a tail of yarn to use when joining the fin to the body. Leave unstuffed.
Tail Fins (in Orange)
Make a ring.
Rnd 1: 5 sc in ring (5)
Rnd 2: sc in next 2 st, 2 sc in next st, sc in next st, 2 sc in next st (7)
Rnd 3: sc in next 3 st, 2 sc in next st, sc in next 2 st, 2 sc in next st (9)
Rnd 4: sc in next 4 st, 2 sc in next st, sc in next 3 st, 2 sc in next st (11)
Rnd 5-6: sc in each st around
Rnd 7: sc next 4 st, sc2tog, sc in next 3 st, sc2tog (9)
Rnd 8: sc in next 3 st, sc2tog, sc in next 2 st, sc2tog (7)
Cut yarn and fasten off, leaving tail of yarn to use when joining the fin to body. Leave unstuffed. Make two.
Side Fins (in Orange)
Make a ring.
Rnd 1: 5 sc in ring (5)
Rnd 2: sc in next 2 st, 2 sc in next st, sc in next st, 2 sc in next st (7)
Rnd 3: sc in next 3 st, 2 sc in next st, sc in next 2 st, 2 sc in next st (9)
Rnd 4-6: sc in each st around
Rnd 7: sc in next 3 st, sc2tog, sc in next 2 st, sc2tog (7)
Rnd 8: sc in each st around
Cut yarn and fasten off, leaving tail of yarn to use when joining the fin to body. Leave unstuffed. Make two.
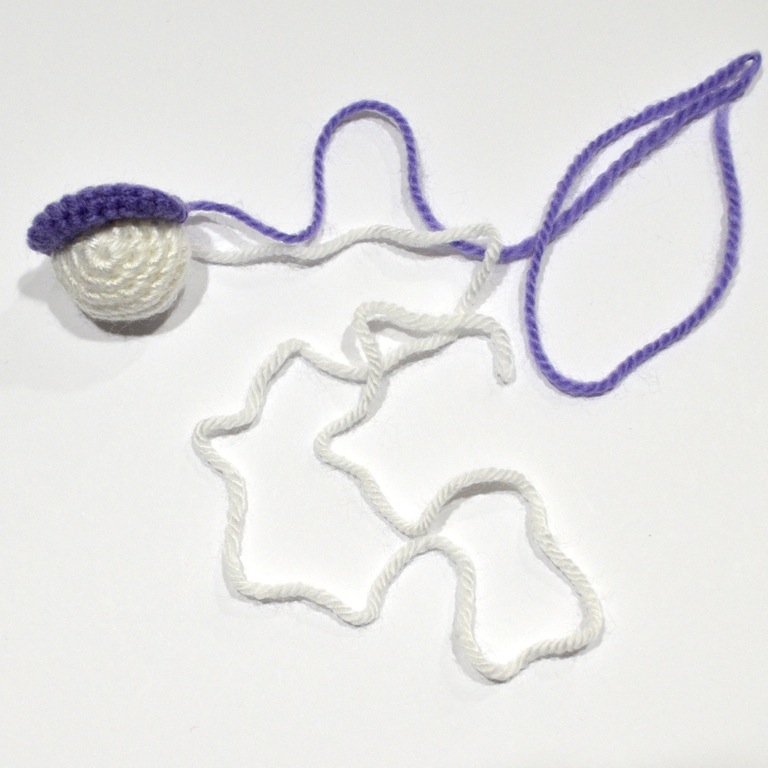
Eyes (in White)
Make a ring.
Rnd 1: 6 sc in ring (6)
Rnd 2: 2 sc in each st around (12)
Rnd 3: *sc in next st, 2 sc in next st* around (18)
Rnd 4: *sc in next 2 st, 2 sc in next st* around (24)
Rnd 5: sc in each st around
Rnd 6: *sc in next 2 st, sc2tog* around (18)
Rnd 7: *sc in next st, sc2tog* around (12)
Cut yarn and fasten off, leaving a tail of yarn to use when joining the eyes to the body. Stuff firmly. Make two.
Eyelids (in Purple)
Make a ring.
Rnd 1: 6 sc in ring (6)
Rnd 2: 2 sc in each st around (12)
Rnd 3: *sc in next st, 2 sc in next st* around (18)
Rnd 4: *sc in next 2 st, 2 sc in next st* around (24)
Rnd 5: sc in each st around
Cut yarn and fasten off, leaving a tail of yarn to use when joining the eyelids to the eyes and body. Make two.
Lips (in Red)
Make a ring.
Rnd 1: 5 sc in ring (5)
Rnd 2: 2 sc in each st around (10)
Rnd 3-25: sc in each st around
Fasten off. You now have a long tube. Fold the tube in half and sew the ends of the tube together. Leave a long tail for joining to the body.


Assembly
***These are guidelines only. Be guided by your own eyes at all times.***
Join the tail fins to the body. Use the yarn tails on the fins to stitch them on.


Join the dorsal fin to the body. The dorsal fin should be aligned with the tail fins, its tip pointing towards the tail. Use the yarn tail on the fin to stitch it on.


Join the side fins to the body. Angle them slightly towards the tail. Pin them on and use the yarn tails on the fins to stitch them on.


Join the eyelids to the eyes. The eyelids sit with the edge sitting along the open edge of the back of the eye. Pin the eyelid onto the eye. Be careful not to jab yourself. Use the tail on the eyelid to join it to the eye. Work your way from the back, sewing down the side of the eyelid.


When you reach the front, don't sew over the edge of the eyelid. You want this section to curve upwards. Instead at the front of the eyelid, join the underside of the eyelid to the eye until you reach the other side and then you can stitch over the edge again until you reach the back.


Don't weave in the eyelid tail. This will be used when joining the eyes to the body.
Join the eyes to the body. Pin them so that they sit close together. Use the purple tail of yarn to join the eyelid section to the body and then use the white tail of yarn to join the eye section to the body.


