Это цитата сообщения В_расцвете Оригинальное сообщение
3-Step Card Tutorial (4 1/4" x 6" card)
http://frommycraftroom.blogspot.co.il/2013/04/template-for-3-step-card-4-14-x-6.html

[ [[[[[[khjkjh
The card was only 4 1/4" x 6" in size. I made it smaller than my usual size--which is 6-inch square--because I was going to use only one Mini Magnolia image on the card front. I thought the 6-inch square card was to large for it unless I heap all kinds of embellishments on it--more than I already did...LOL.
Anyway, I was asked to do a tutorial on it (Donna, this is for you), so here goes...
Materials required
2 pieces of cardstock 8 1/2" x 6" each
4 1/8" x 5 7/8" designer/patterned paper to decorate the front
8 1/2" x 6" designer/patterned paper to decorate the inside
Other materials to finish decorating as you desired, eg. coloured images, flowers, ribbons, bows, pearls, etc.
Templates for the 3-step card

And woo-hoo...this old gal has used the little grey cells in her head and has figured out how to put PDF's in her blog post...LOL.
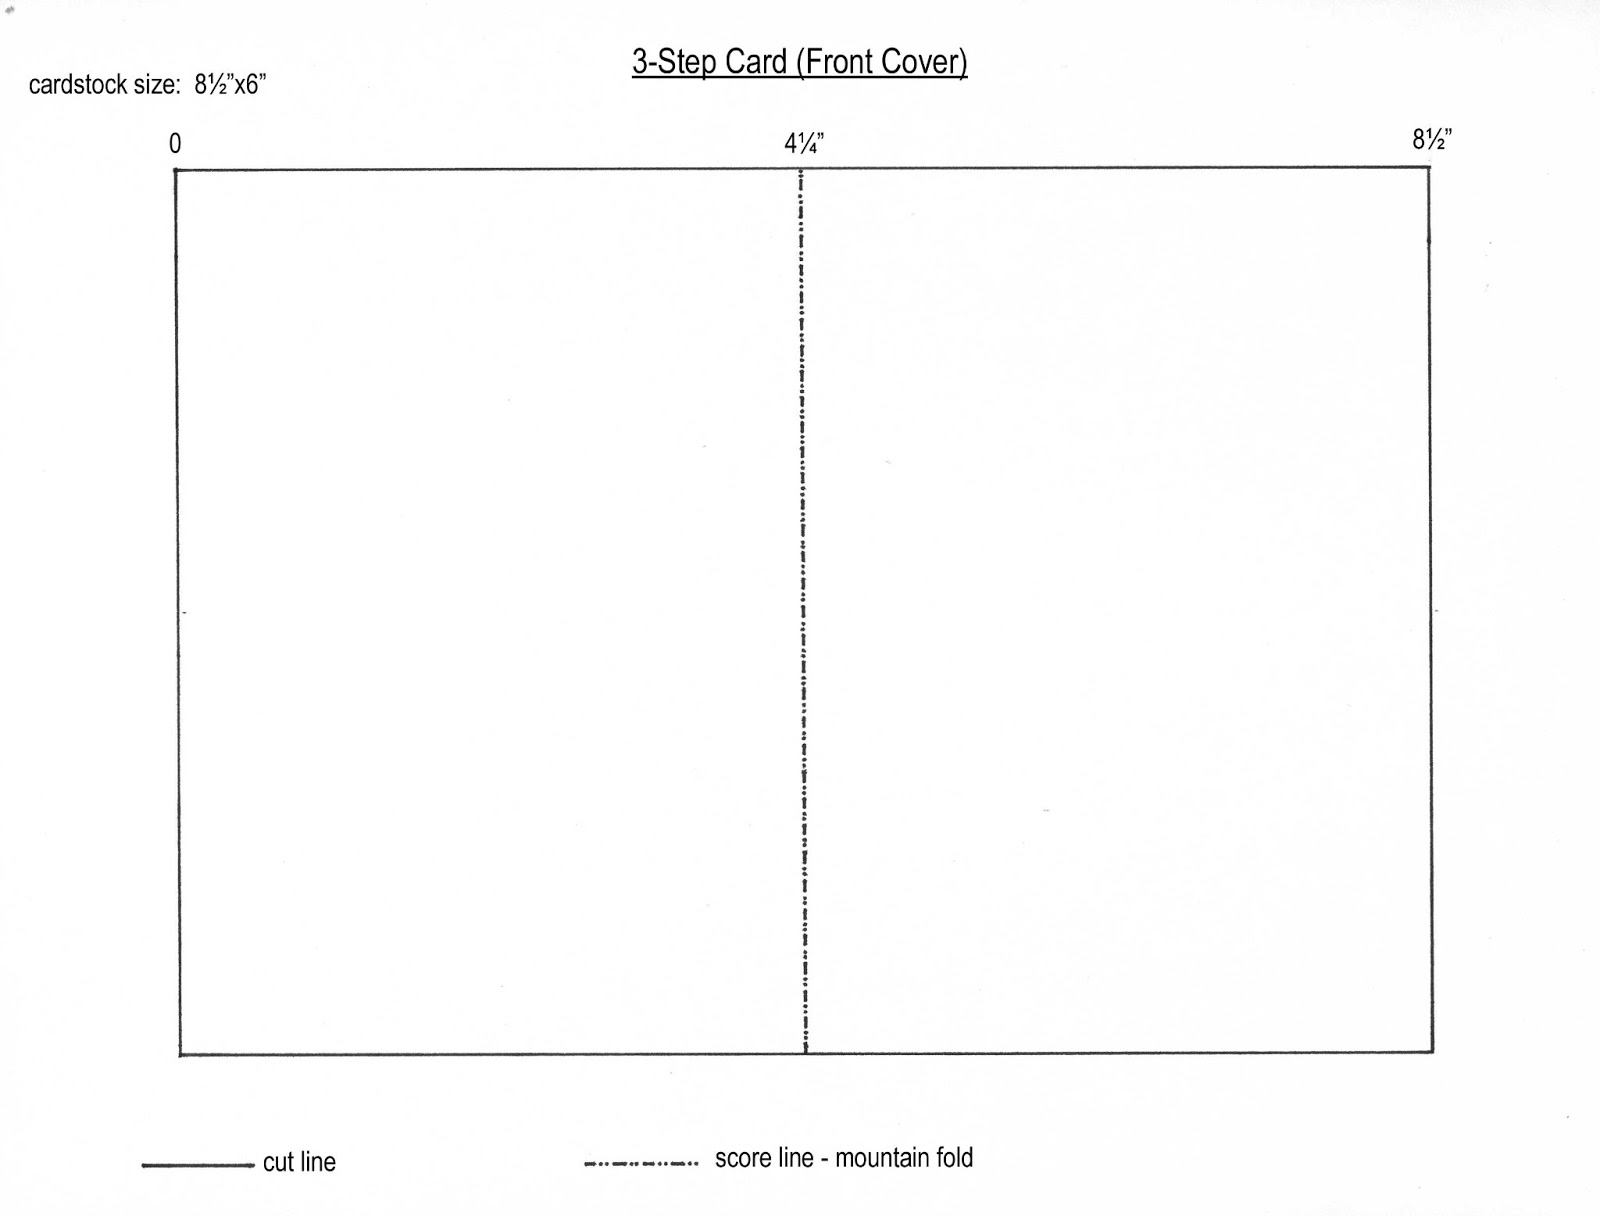
3-Step Card (front cover) template ( I know you don't really need this one...tee he he)
3-Step Card (inside card) template
For those of you who need step-by-step instructions, here they are...
INSTRUCTIONS
Step 1
Score an 8 1/2" x 6" cardstock midway at 4 1/4" and fold. This is for the front cover. Put aside.


Step 2
On the other 8 1/2" x 6" cardstock, pencil-draw horizontal lines at 2" and 4" from the top.
On the first horizontal line, mark at 3 1/4" and 5 3/4".
On the second horizontal line, mark at 3 3/4" and 6 1/4".

Step 3
Using a ruler and a craft knife, cut between the 2 marks at each horizontal line (shown as white dashes below).

Step 4
Score at 2 1/4" from top to bottom.
Score at 5 1/4" from top to 1st horizontal line.
Score at 5 3/4" from 1st horizontal line to 2nd horizontal line.
Score at 6 1/4" from 2nd horizontal line to bottom.

Step 5
Turn the paper upside down and
Score at 5 1/4" from top to 1st horizontal line.
Score at 4 3/4" from 1st horizontal line to 2nd horizontal line.
Score at 4 1/4" from 2nd horizontal line to bottom.

Step 6
Create valley and mountain folds where indicated on template. This is the card inside.

Step 7
Apply glue as show below.

Step 8
Adhere the card inside to the front cover.

Step 9
This is the easiest way I can think of of explaining how to cut out and trim your designer/patterned paper to decorate the inside of your card.
Draw the cut and score lines shown on the template on your designer/patterned paper.

Step 10
Using your ruler and craft knife, trim away about 1/16" for the outside paper edges and both sides of every drawn line, a shown below.

Step 11
Apply glue to the back of each piece and adhere to card inside as shown.


Step 12
Apply glue to the back of the 4 1/8" x 5 7/8" designer/patterned paper and adhere to card front. And voila!...you're done.

Now you can finish decorating your card with coloured stamped image(s) and embellishments as you desired.