


|
KOOLINAR.RU
| ||||||||||||


Это цитата сообщения Татьяна_Чувьюрова Оригинальное сообщение
Любителям совушек, милый вязаный совенок!
На Постиле нашла Совенка
http://www.passionforum.ru/posts/25958-lyubiteljam...ek-milyi-vjazanyi-sovenok.html
Любителям совушек, милый вязаный совенок!
 [показать] [показать] |
Анна (Анна)
27.07.2015 00:22
|
Источник - https://vk.com/vyazanyimir
Далее слова автора. Необходимые материалы для Божьей коровки:
1. Пряжа акрил (300м/100г): бордовый, красный, черный, белый
2. «Ирис» - белый
3. Крючок №1; №1,25
4. Проволока тонкая – 15-20 см.
5. Плотный картон
6. Игла с широким ушком для сшивания деталей
7. Холлофайбер
8. Прозрачный клей «Момент»
9. Декоративный бантик
10. Фетр черный.
11. Черные полубусины – 2 шт.
12. Накладные ресницы – 2 шт.
Условные обозначения:
Вп – воздушная петля
СС – соединительный столбик
Сбн - столбик без накида
С1н – столбик с 1 накидом
Пр – прибавка (провязать 2 сбн в 1 петлю)
Уб – убавка (провязать 2 сбн вместе)
Пропуск – пропустить сбн
* - повторить указанное число раз
Число в скобках в конце каждого ряда описания показывает, сколько должно быть петель в этом ряду.
Размер игрушки зависит от плотности вязания и от толщины используемой пряжи!
Голова-туловище
(бордовой нитью, крючок №1,25)
1 ряд: набрать 2 вп и провязать во вторую петлю от крючка 6 сбн
Продолжать вязать по кругу.
2 ряд: пр*6 (12)
3 ряд: (сбн, пр)*6 (18)
4 ряд: (2 сбн, пр)*6 (24)
5 ряд: (3 сбн, пр)*6 (30)
6 ряд: (4 сбн, пр)*6 (36)
7 ряд: (5 сбн, пр)*6 (42)
8 ряд: (6 сбн, пр)*6 (48)
9 ряд: 48 сбн
10 ряд: (7 сбн, пр)*6 (54)
11-18 ряд: 54 сбн
19 ряд: (7 сбн, уб)*6 (48)
20 ряд: 48 сбн
21 ряд: (6 сбн, уб)*6 (42)
22 ряд: (5 сбн, уб)*6 (36)
23 ряд: (4 сбн, уб)*6 (30)
24 ряд: (3 сбн, уб)*6 (24)
25 ряд: (2 сбн, уб)*6 (18)
26 ряд: (сбн, уб)*6 (12)
Набить. Продолжаем вязать туловище.
27 ряд: за переднюю половинку петли (сбн, пр)*6 (18)
28 ряд: (5 сбн, пр)*3 (21)
29 ряд: (6 сбн, пр)*3 (24)
30-34 ряд: 24 сбн
35 ряд: (2 сбн, уб)*6 (18)
36 ряд: (сбн, уб)*6 (12)
Набить.
37 ряд: убавка до конца
Закончить сс. Нить обрезать и спрятать.
Глаза ( 2 шт)
(белым «ирисом», крючок №1)
1 ряд: набрать 8 вп и провязать, начиная со второй петли от крючка, 6 сбн, 3 сбн в 1 петлю, продолжать вязать на другой стороне цепочки 5 сбн, пр (16)
Продолжать вязать по кругу.
2 ряд: пр, 5 сбн, пр*3, 5 сбн, пр*2 (22)
3 ряд: сбн, пр, 5 сбн, (сбн, пр)*3, 5 сбн, (сбн, пр)*2 (28)
4 ряд: 2 сбн, пр, 5 сбн, (2 сбн, пр)*3, 5 сбн, (2 сбн, пр)*2 (34)
5 ряд: 3 сбн, пр, 5 сбн, (3 сбн, пр)*3, 5 сбн, (3 сбн, пр)*2 (40)
6 ряд: 4 сбн, пр, 5 сбн, (4 сбн, пр)*3, 5 сбн, (4 сбн, пр)*2 (46)
7 ряд: 5 сбн, пр, 5 сбн, (5 сбн, пр)*3, 5 сбн, (5 сбн, пр)*2 (52)
8 ряд: 52 сбн
Закончить сс. Оставить нить для пришивания.
Приколоть иголочками глаза и пришить близко друг к другу, немного набив.
Носик
(красной нитью)
1 ряд: набрать 2 вп и провязать во вторую петлю от крючка 6 сбн
Продолжать вязать по кругу.
2 ряд: пр*6 (12)
3-5 ряд: 12 сбн
6 ряд: уб*6 (6)
Набить.
7 ряд: убавка до конца.
Закончить сс. Оставить нить для пришивания.
Пришить носик.
Черной нитью вышить улыбку под носиком. Приклеить полубусины на месте зрачков. Приклеить реснички. Вышить бровки (по желанию).
Ножки (2 шт)
(начать бордовой нитью, крючок №1,25)
1 ряд: набрать 2 вп и провязать во вторую петлю от крючка 6 сбн
Продолжать вязать по кругу.
2 ряд: (сбн, пр)*3 (9)
3 ряд: (2 сбн, пр)*3 (12)
4-5 ряд: 12 сбн
Сменить нить на красную.
6 ряд: 12 сбн
7 ряд: уб*6 (6)
Набить. Сменить нить на черную.
8-11 ряд: 6 сбн
Закончить сс. Оставить нить для пришивания.
Ручки (2 шт)
(черной нитью, крючок №1,25)
1 ряд: набрать 2 вп и провязать во вторую петлю от крючка 6 сбн
Продолжать вязать по кругу.
2 ряд: (сбн, пр)*3 (9)
3 ряд: 9 сбн
4 ряд: 4 сбн, 2с1н в 1 петлю, 4 сбн (10)
5 ряд: 4 сбн, 2с1н вместе, 4 сбн (9)
6 ряд: (сбн, уб)*3 (6)
Ладошку немного набить.
7-11 ряд: 6 сбн
Закончить сс. Оставить нить для пришивания.
Усики (2шт)
(красной нитью, крючок №1,25)
1 ряд: набрать 2 вп и провязать во вторую петлю от крючка 6 сбн
Продолжать вязать по кругу.
2 ряд: пр*6 (12)
3-4 ряд: 12 сбн
5 ряд: уб*6 (6)
Закончить сс. Оставить нить для пришивания. Набить.
Приготовить проволоку 6-8 см. Обмотать её черной


Автор: Askina
Перевод описания: yolito

Вяжем шар и вышиваем рожицы.
1 ряд: в кольцо амигуруми провязываем 6 сбн.
2 ряд: обязательно пометить контрастной ниткой начало ряда! Прибавка х 6 раз = 12 п
3 ряд: прибавка, 1 сбн х 6 раз = 18 п
4 ряд: прибавка, 2 сбн х 6 раз = 24 п
5 ряд: прибавка, 3 сбн х 6 раз = 30 п
6 ряд: прибавка, 4 сбн х 6 раз = 36 п
7-12 ряды: 6 рядов вяжем ровно, без прибавок = 36 п
13 ряд: убавка, 4 сбн х 6 раз = 30 п
14 ряд: убавка, 3 сбн х 6 раз = 24 п
15 ряд: убавка, 2 сбн х 6 раз = 18 п
16 ряд: убавка, 1 сбн х 6 раз = 12 п
17 ряд: 6 убавок = 6 п
Стянуть иголкой получившееся отверстие. Вот и вышел ровный шарик!
А еще открою маленький секрет: по этой схеме можно вязать шарики любого размера, просто нужно в каждом ряду равномерно делать 6 прибавок, потом вязать ровно, потом в каждом ряду равномерно 6 убавок.
А посчитать количество рядов, которые нужно провязать ровно, чтобы шарик получился круглым очень просто! Надо количество столбиков в последнем ряду с прибавками разделить на 6! Получится количество ровных рядов. Например: у нас в примере в последнем ряду с прибавками получилось 36 столбиков. Делим на 6, получается 6 рядов ровно. А если вязать шарик побольше, предположим, в последнем ряду с прибавками будет 60 столбиков. Делим на 6, получаем 10 рядов, которые надо провязать ровно!


Необходимые материалы:
Пряжа красного, белого,немного жёлтого и чёрного цветов; крючок
холлофайбер, игла для сшивания, глазки полубусинки
Голова:
Вяжем бежевым цветом
1р-6 в кольцо
2р- пр.6 раз (12)
3р-(1ст,пр) 6 раз (18)
4р –(2ст,пр) 6раз (24)
5р -24ст
6р –(4ст,пр) 6 раз (30)
7р –(5ст,пр) 6 раз (36)
8р –(6ст,пр) 6 раз (42)
9р –(7ст,пр) 6 раз (48)
10р -48ст
11р-(8ст,пр) 6 раз (54)
12р – (9ст,пр) 6 раз (60)
13-17р – 60ст
18р-(8ст,уб) 6 раз (54)
По мере вязания набиваем деталь
19р –(7ст,уб) 6 раз (48)
20р -48ст
21р (6ст,уб) 6 раз (42ст)
22р-(5ст,уб) 6 раз (36)
23р –(4ст,уб) 6 раз (30)
24р -(3ст,уб) 6р (24)
25р –(2ст,уб) 6 раз (18)
Туловище:
Вяжем красным цветом
1р- 9в кольцо
2р –пр 9раз (18)
3р –(1ст,пр) 9раз(27)
4р –(2ст,пр) 9раз (36)
5р –(3ст,пр)9раз (45)(в оригинале ошибка, там 42ст)
6р –(4ст,пр) 9раз (54)
7р –за заднюю стенку вяжем 54ст
8-10р -54ст
коричневым или чёрным
11-12р –54ст
красным
13р -54ст
По мере вязания не забываем набивать
14р –(3ст,уб) 9 раз (45)
15-16р - 45ст
17р -(2ст,уб) 9раз (36)
18р -36ст
19р - (4ст,уб) 6раз (30)
20р -30ст
21р –(3ст,уб) 6 раз (24)
22р – 24ст
23р -91ст,уб) 6 раз (18) оставляем длинный конец для сшивания
Сшиваем голову и туловище
Ручки:
Белым цветом
1р -6 в кольцо
2р –(2ст,пр) 3 раза (9)
3-4р – 9ст
5р –пышный столбик, я вязала так: (1ст, накид)повт 3раза в одну петлю), 7ст,убавка(8)
6р -3ст,меняем нить на красную
7-16р 8ст
Набиваем только ладошки
Колпак:
Вяжем красным цветом
1р -6 в кольцо
2р -6ст
3р –прибавка 6 раз(12)
4-7р -12ст
8р –(3ст,пр) 3раза (15)
9-13р -15ст
14р –(4ст,пр) 3 раза (18)
15-17р - 18ст
18р –(2ст,пр) 6 раз 924)
19-20р 24ст
21р –(3ст,пр) 6 раз (30)
22-23р – 30ст
24р –(9ст,пр) 3 раза (33)
25-26р -33ст
27р –(10ст,пр) 3 раза (36ст)
28-29р -36ст
30р- (5ст.пр) 6 раз (42ст)
31р- 42ст
32р –(6ст,пр) 6 раз (48)
33р – 48ст
34р –(7ст.пр) 6 раз (54)
35р -54 ст
36р –(8ст.пр) 6 раз (60)
37-41р – 60ст
Белой нитью
42р –(7ст,уб) 6 раз (54)
43-44р-54
45р – вяжем рачьим шагом 54ст, заканчиваем вязание. Колпак можно пришить к голове, а можно оставить так.
Делаем помпон из белой пряжи,пришиваем к колпаку.
Борода:
Из белой пряжи нарезаем ниточки длиной около 9см . У меня это 4 ряда бороды по 23 столбика в каждом ряду, ориентируйтесь на фото
Жёлтой пряжей вяжем ремень соединительными столбиками ориентируясь на картинку. Для пуговки вяжем 8ст в кольцо, пришиваем.
Приклеиваем или пришиваем глазки, вышиваем носик (мне так показалось красивее).
Надеюсь вам понравился мой перевод и дополнения. Всем лёгких петелек))))


Это цитата сообщения Марриэтта Оригинальное сообщение
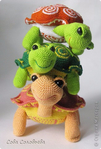
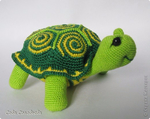
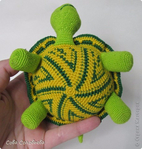
Как связать крючком ЧЕРЕПАШКУ
 [показать]
 [показать]
 [показать]

Навязала вот таких зверешарков на елку. Увидела описание медвежонка, остальных зверушек придумала сама.
Делюсь описанием мишки (правда на английском языке). И творческих вам идей!
Teddy
Head – Body
With the colour beige
R1: 6 Sc in a magic circle. Add a marker to show the start of the row. Move the marker after completing each row.
R2: 2 Sc in each Sc around (12)
R3: *2 Sc in the nexted Sc, Sc in the nexted Sc; repeat from * until the end of the row (18)
R4: *2 Sc in the nexted Sc, Sc in the nexted 2 Sc; repeat from * until the end of the row (24)
R5: *2 Sc in the nexted Sc, Sc in the nexted 3 Sc; repeat from * until the end of the row (30)
R6: *2 Sc in the nexted Sc, Sc in the nexted 4 Sc; repeat from * until the end of the row (36)
R7 – 13: 1 Sc in each Sc until the end of the row (36)
R14: *2Sc tog, Sc in the nexted 4 Sc; repeat from *until the end of the row (30)
R15: *2Sc tog, Sc in the nexted 3 Sc; repeat from *until the end of the row (24)
At this moment we add the safety eyes. Place them in between row 11 and 12 with about 4 stitches apart.
To make the nose and mouth, cut a small circle of White felt. Placing it on the face, evenly, just below the eyes... with black yarn, make a vertical line, as shown in the photo:
Now, where the mouth starts, mark the place where the nose will go, with the help of a need or a hook make the space bigger to make it easier to place the nose.
R16: * 2Sc tog, Sc in the nexted 2 Sc; repeat from * until the end of the row (18)
R17: * 2Sc tog, Sc in the nexted Sc; repeat from * until the end of the row (12)
Firmly fill the head.
Change to red.
R18 – 19: 1 Sc in each Sc until the end of the row (12)
R20: *2 Sc in the nexted Sc, Sc in the nexted Sc; repeat from * until the end of the row (18)
R21: 1 Sc in each Sc until the end of the row (18) Change to black.
R22 – 23: Sc in each Sc until the end of the row (18)
Change to beige.
R24: 2Sc tog, Sc in the nexted Sc; repeat from * un
til the end of the row (12)
Firmly fill the body.
With gold thread, (or yellow if you don’t have gold) carefully sew the border of the belt.
R25: *2Sc tog in each Sc* until the end of the row (6)
Close. With the help of a needle pass the end of the yarn through all of the stitches on row 25 and pull to tighten them. Then hide the yarn in the inside of the body, pull the yarn through and cut off the remaining yarn.
Hat
Starting with white.
R1: 4 Sc in a magic circle. Add a marker to show the start of the row. Move your marker after completing each row.
R2: 2 Sc in each Sc around (8)
R3: Sc in each Sc until the end of the row (8)
R4: *2Sc tog in each Sc* repeat from * until the end of the row (4)
Change to red.
The yarn that is left behind, which we used to start the hat, which is left in the circle, we will useto fill later.
R5: Sc in each Sc around until the end of the row (4)
R6: *2 Sc in the nexted Sc, Sc in the nexted Sc; repeat from * until the end of the row (6)
R7: *2 Sc in the nexted Sc, Sc in the nexted 2 Sc; repeat from * until the end of the row (8)
R8: Sc in each Sc around until the end of the row (8)
R9: *2 Sc in the nexted Sc, Sc in the nexted 3 Sc; repeat from * until the end of the row (10)
R10: Sc in each Sc around until the end of the row (10)
R11: *2 Sc in the nexted Sc, Sc in the nexted 4 Sc;repeat from * until the end of the row (12)
R12: *2 Sc in the nexted Sc, Sc in the nexted 5 Sc;repeat from * until the end of the row (14)
R13: *2 Sc in the nexted Sc, Sc in the nexted 6 Sc;repeat from * until the end of the row (16)
R14: *2 Sc in the nexted Sc, Sc in the nexted 7 Sc;repeat from * until the end of the row (18)
R15: *2 Sc in the nexted Sc, Sc in the nexted 8 Sc;repeat from * until the end of the row (20)
R16: *2 Sc in the nexted Sc, Sc in the nexted 9 Sc;repeat from * until the end of the row (22)
R17: *2 Sc in the nexted Sc, Sc in the nexted 10 Sc; repeat

