Это цитата сообщения helen1 Оригинальное сообщение
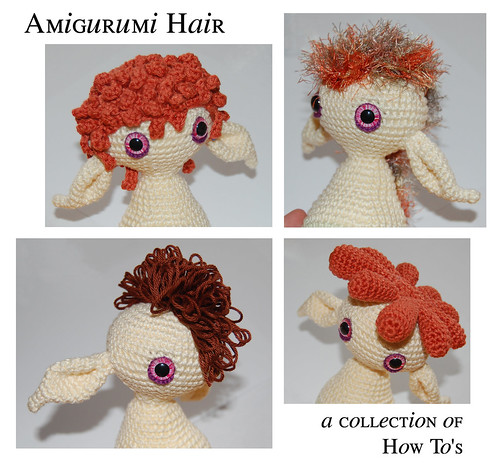
Прически амигуруми.
 [показать]
needlenoodles.com/home/?q=node/83
mygurumi.blogspot.com/2008/10/how-to-amigurumi-...
amigurumipatterns.blogspot.com/2008/10/how-to-a...
freeamigurumi.blogspot.com/2008/11/amigurumi-ha...
esshaych.blogspot.com/2009/09/amigurumi-hair-tu...
www.flickr.com/photos/12928926@N06/sets/7215760...
s485.photobucket.com/albums/rr218/berriiiz/?sta...
berriiiz-berriiiz.blogspot.com
Олесье @}->--
Продолжу тему.
 [показать]

 [показать]
 [показать]
SIZE A
1 -- make a dr with 5 sts
2 -- m2 x5
3 til 5 -- sc 10 sts
6 -- sc8, sc2tog
7 -- sc7, sc2tog
8 -- sc6, sc2tog
9 -- sc5, sc2tog
SIZE B
1 -- make a dr with 6 sts
2 -- m2 x6
3 til 4 -- sc 12 sts
5 -- sc10, sc2tog
6 -- sc9, sc2tog
7 -- sc8, sc2tog
8 -- sc7, sc2tog
9 -- sc6, sc2tog
10 -- sc5, sc2tog
SIZE C
1 -- make a dr with 8 sts
2 -- m2 x8
3 til 4 -- sc 16 sts
5 -- sc14, sc2tog
6 -- sc13, sc2tog
7 -- sc12, sc2tog
8 -- sc11, sc2tog
9 -- sc10, sc2tog
10 -- sc9, sc2tog
11 -- sc8, sc2tog
12 -- sc7, sc2tog
13 -- sc6, sc2tog
To make something like this:
1 -- start just like for a regular doll head
2 -- creating a hair: chain 6 sts, and starting in 2nd stitch from hook sc into the next 5 sts.
3 -- go on with the pattern of yourdolls head
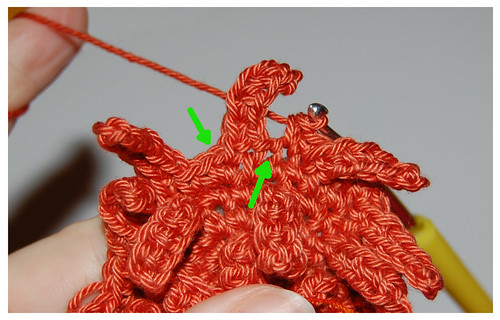
for this short haired version I made "hair" every 3 sts and every 2nd row. The row inbetween two "hair-rows" was very helpful to keep track of my sts. See the picture below for understanding the first stitch after a hair and the last stitch before a hair (green arrows). When you crochet around a hair take care that you hold the "hair" away from you, behind your yarn and hook.
 [показать]
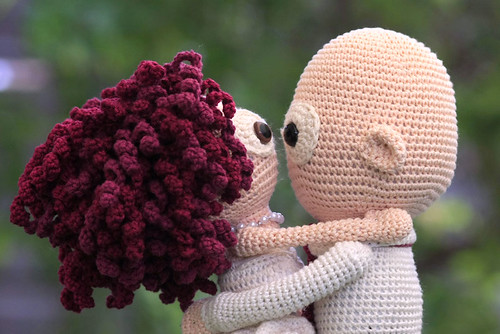
When you elongate the chains they start curling automatically and might look like the hair of this beautiful bride, created by the lovely Adi (see her profile at flickr: slipstich)
 [показать]http://mygurumi.blogspot.com/2008/10/how-to-amigurumi-hair.html
 [показать]