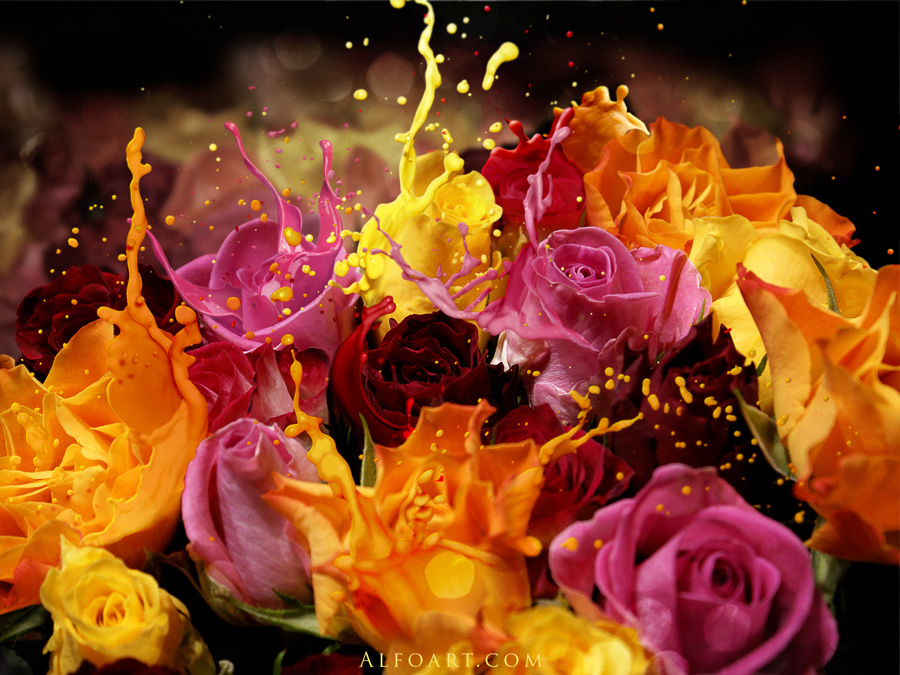
"Roses bouquet splash effect"
25-12-2010 02:03
к комментариям - к полной версии
- понравилось!
вверх^
к полной версии
понравилось!
в evernote
This is step by step Photoshop tutorial that teaches you how to create blurred, bokeh effect background and beautiful splash effect for Roses bouquet. You will use milk splashes, filters and layer style effects.
Picture before changes:

- Used Images:
- Create a new Photoshop document little bit higher than original roses picture.
- Fill the first layer with black color.
- Insert roses photo into the second layer. File > Place.
- Duplicate "roses" layer and apply Gaussian blur filter(around 30%) for the bottom layer.
- Duplicate the blurred layer and merge both of blurred layers. Move created layer a little above.
- Make active original roses layer.
- Add Layer Mask to the original layer and process top edge of the layer with soft black brush in the Layer Mask.
- In order to separate background and foreground,Load selection for background flowers with Magnetic Lasso
 Tool.
Tool.
- Apply Gaussian Blur filter to selected area - 5%.
- Go to Image > Adjustments > Levels. Change levels settings:
- Play with Hue/Saturation settings. Image > Adjustments > Hue/Saturation
- After this, in order to load selection for foreground flowers, go to Select > Inverse.
- Keep selection active, duplicate flowers layer, make active duplicated layer.
- Go to Filter > Other > High Pass. Apply Overlay Blending Mode and add Layer Mask to erase unselected background layer The foreground flowers should become sharper.
- Open milk Splash image.
- Make the milk picture Black & White.
- The next step is Image > Adjustments > Selective Color.
- Image > Adjustments > Levels.
- To separate milk from background, go to Select > Color Range.
- Adjust Fuzziness around 100, and click black background with Eyedropper
 Tool .
- Select > Expand Selection > expand by 1 px.
- Select > Smooth Selection > Sample Radius 1 px.
- Inverse selection, copy milk area and paste it into a new layer of roses document.
- We will use this splash to create imitation for the left yellow rose.
- Apply Horizontal Flip transformation to it.
- Apply warm(orange/yellow) Photo Filter to this splash. Use pink Photo Filter for pink rose and red for red one and etc. Image > Adjustments > Photo Filter.
- Erase superfluous areas with Eraser Tool.
- Apply following layer style effects:
- Use different color balance gradients for other roses.
- In order to create shadow effect, load selection for the small drops, fill selected area in the bottom layer with dark color, apply Overlay Blending Mode and Opacity 55%.
- Use the same way to create splash imitation for other flowers.
- In final, place bokeh image into the new layer, make it black and white, erase central part using Layer Mask and reflected black and white gradient.
- Apply Soft light Blending Mode to bokeh layer.
And here is result!
Комментарии (1):
Татьяна_Теодорская
05-06-2011-14:35
удалить
ОТПАД!!!!!!!!!!!!!!
Комментарии (1):
вверх^
Вы сейчас не можете прокомментировать это сообщение.
Дневник "Roses bouquet splash effect" | PHOTOSHOP_Tut - Дневник PHOTOSHOP_Tut |
Лента друзей PHOTOSHOP_Tut
/ Полная версия
Добавить в друзья
Страницы:
раньше»